
The visible trackwork on Weybourne was completed months ago, but I’ve yet to start work on the single-road storage yard that will be hidden behind the industrial buildings on the left-hand side of the layout. If space in the house were not at a premium, I’d have a dedicated storage yard on a separate board, but since I do not have that option, I’ve decided to go with removable cassettes that slot into the layout from the left. In order for these cassettes to accommodate three-coach trains, they will stick out from the main baseboard. Whilst this isn’t ideal, I think it’s a fair trade-off to allow me to run longer trains.
Designing the cassettes
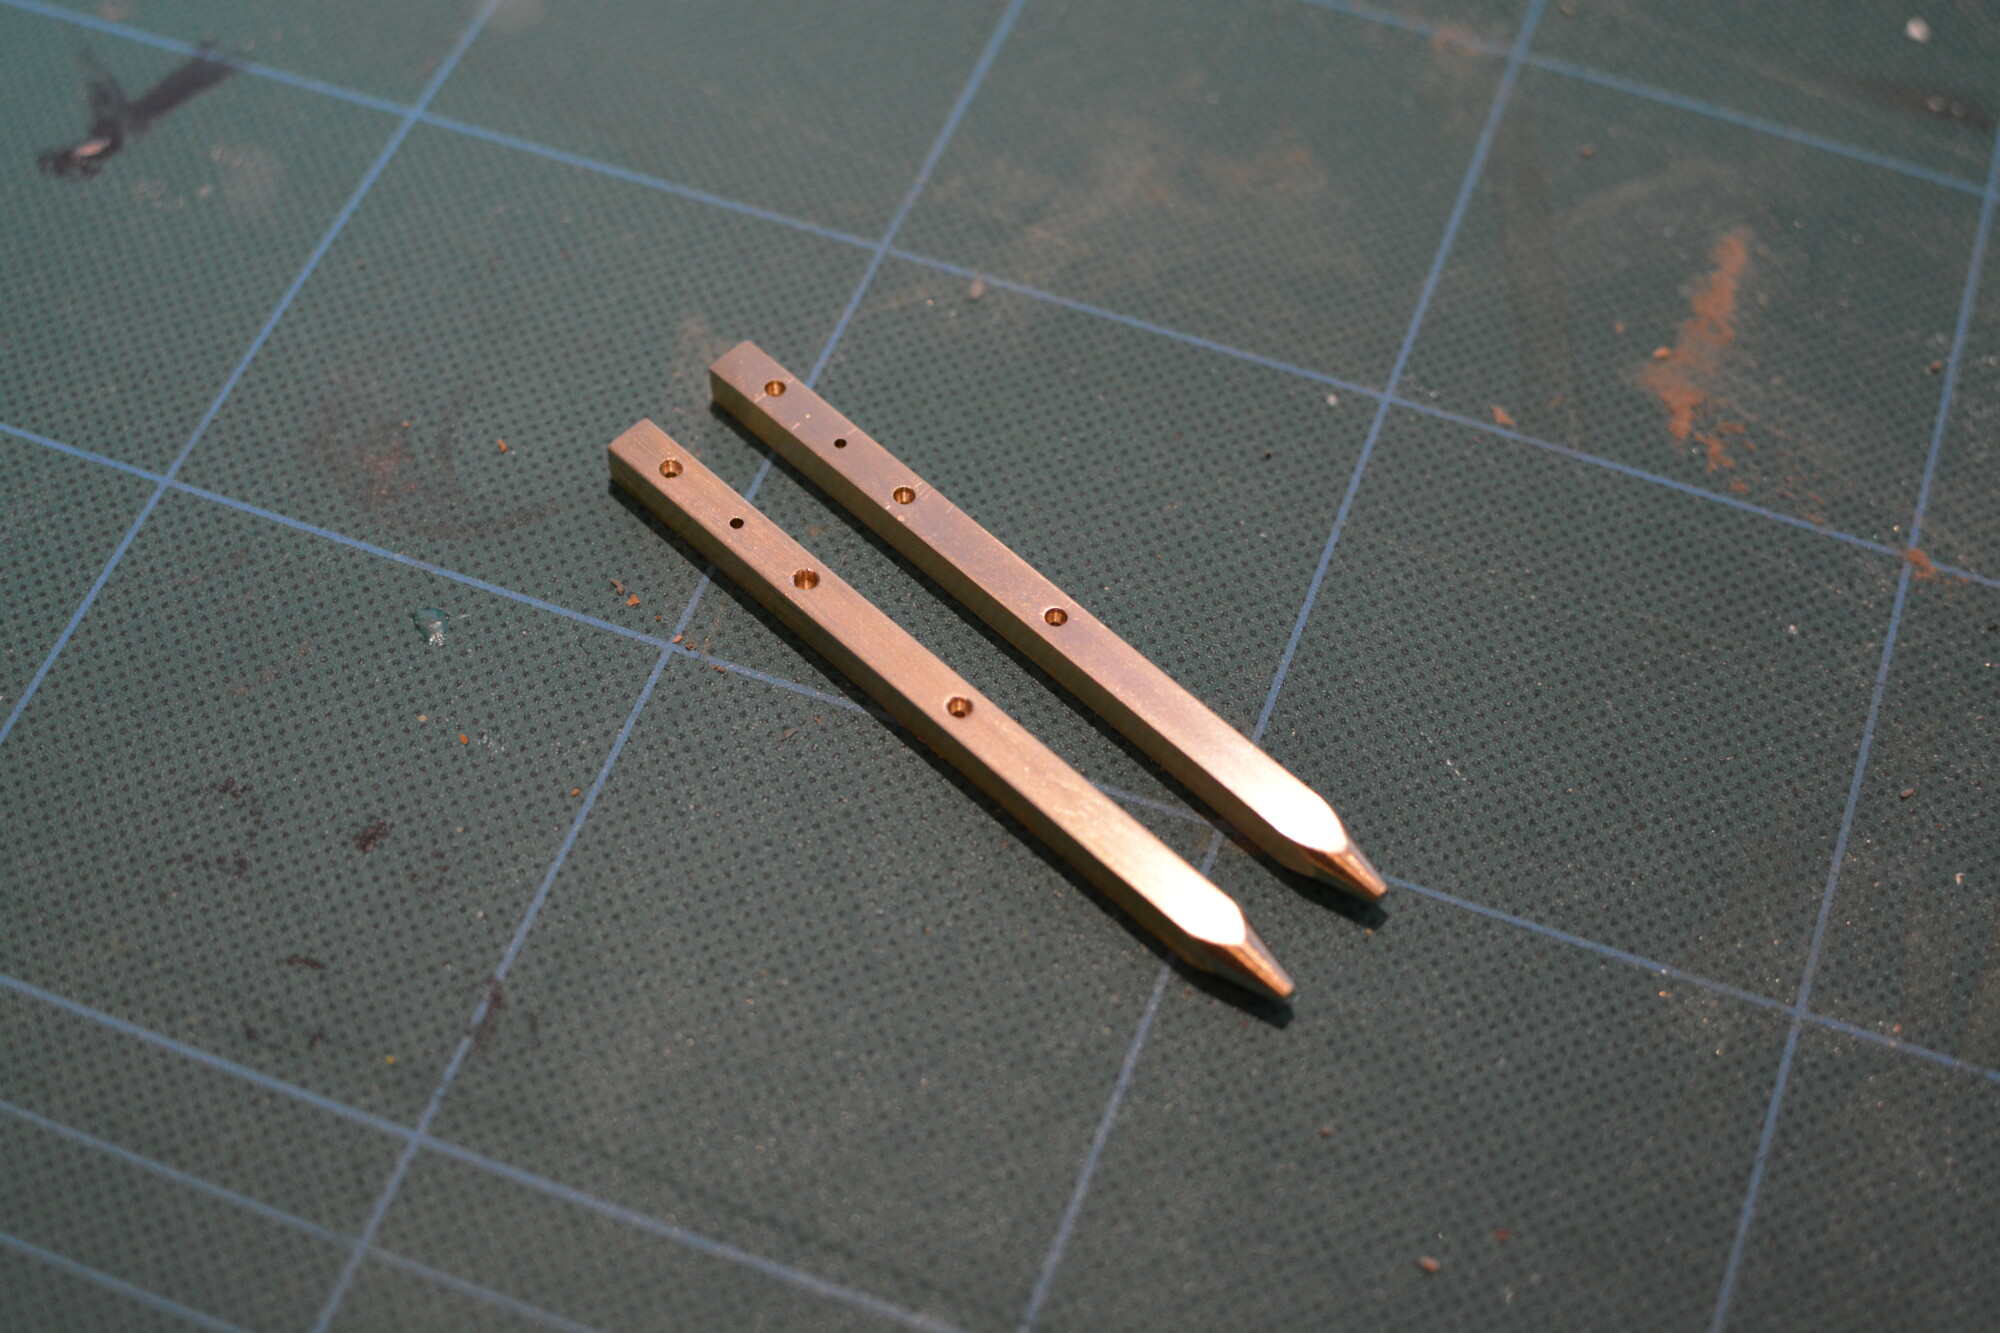
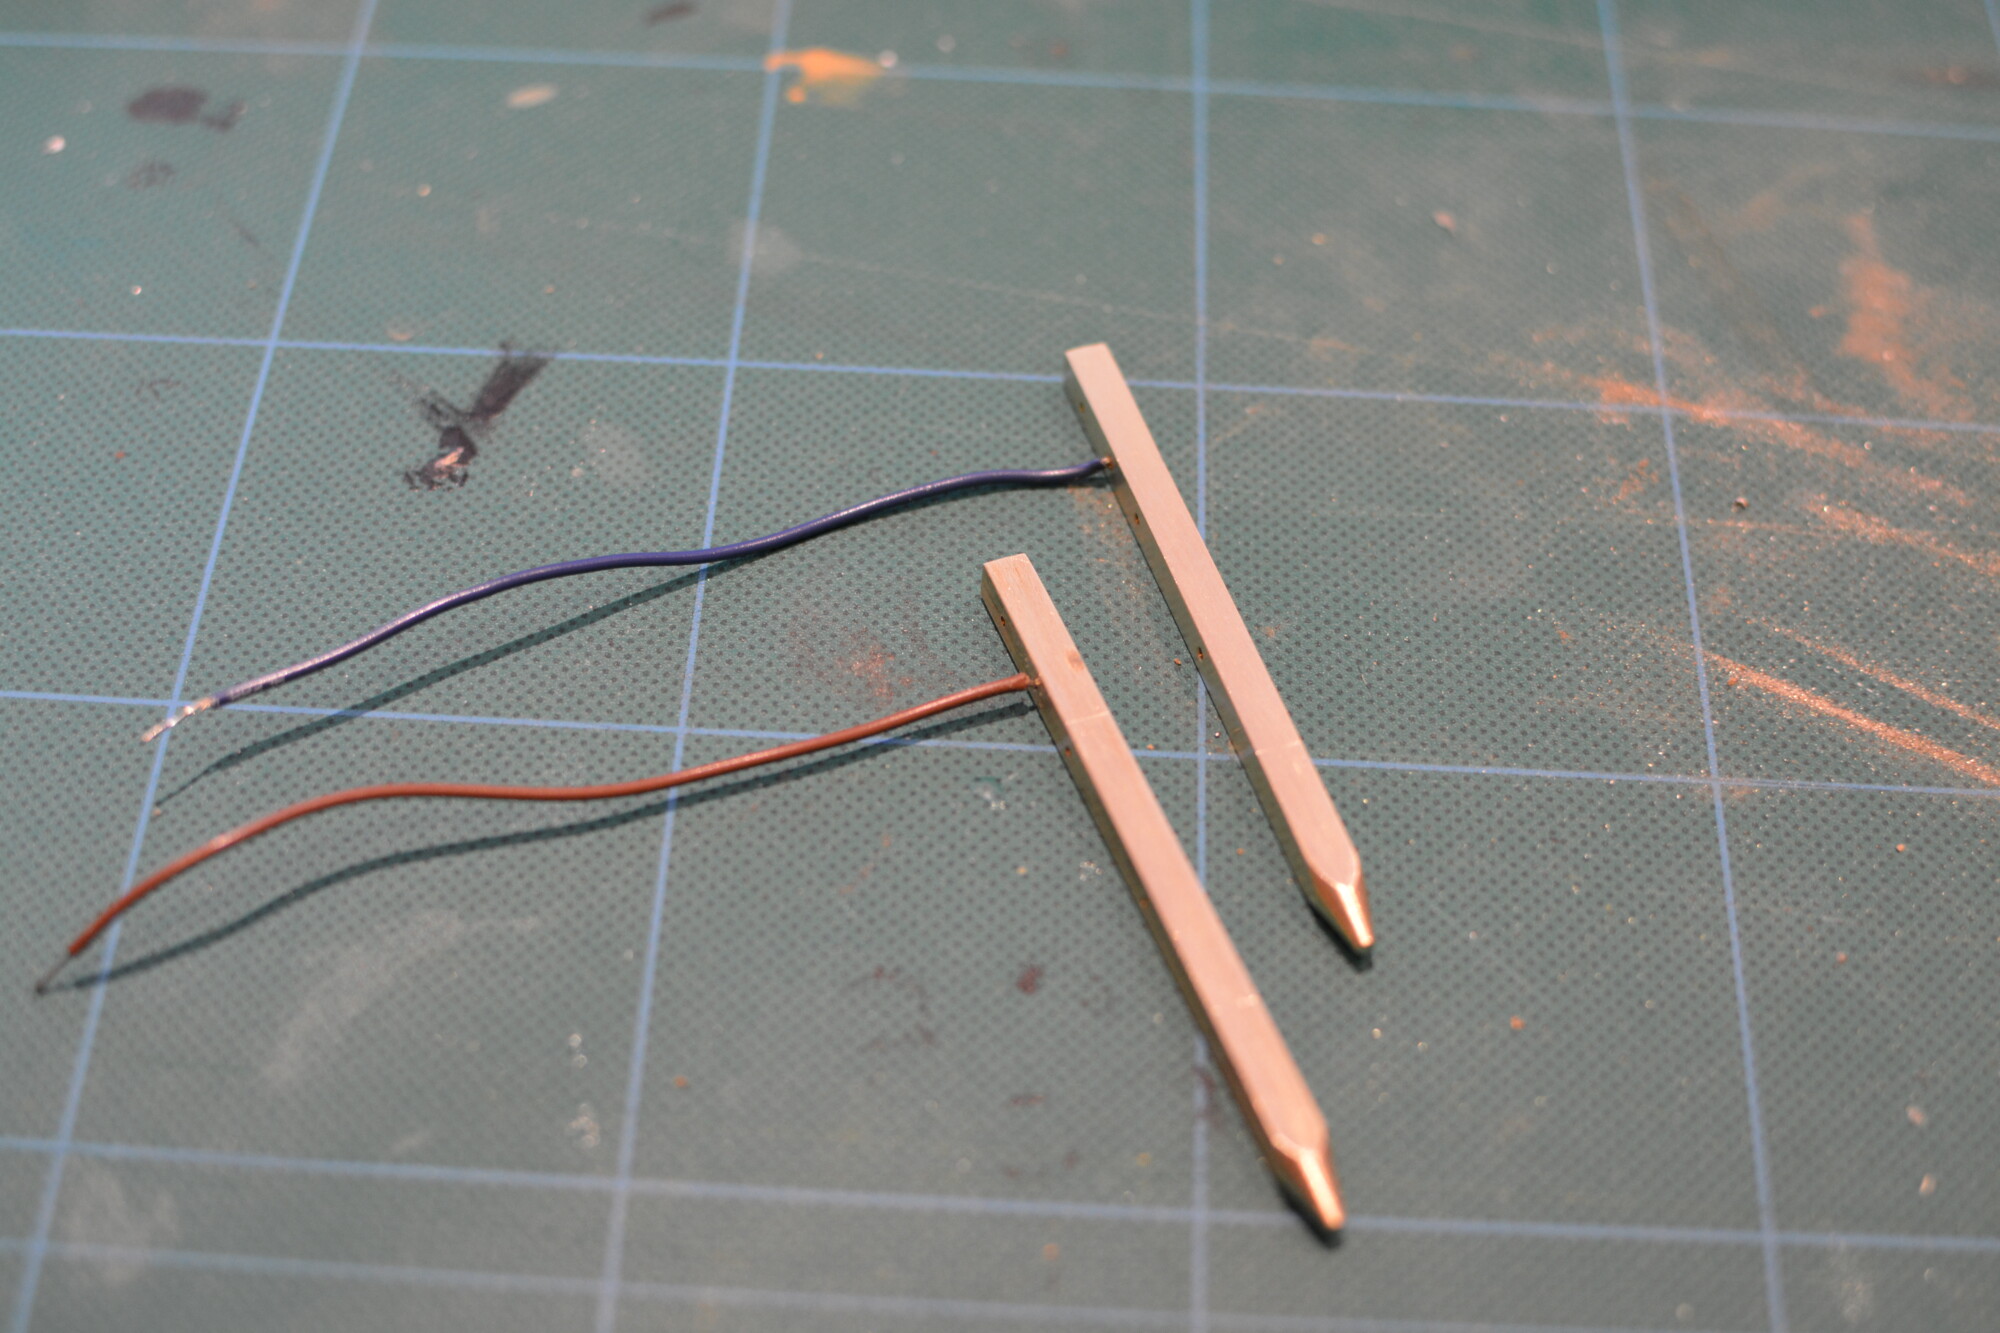
I’ll be using a typical cassette design: Two pieces of aluminium angle attached to a plywood base. I’ve seen this approach used on countless layouts at model shows, and hvaing chatted to a fair few operators at these shows, it seems as if this will give nice reliable operation. For accurate alignment, and electrical contacts, I’ll be using square brass tube on the cassettes, which will locate onto a pair of square brass rods fixed to the baseboard.
Following the advice of one operator at a show I visited last year, I ordered the aluminium from Aluminium Warehouse, who sell it in 5m lengths, or optionally cut to length for a small fee. Since I want the cuts to be accurate and neat, I got them to cut all the pieces for me. The pieces themselves are ~25mmx50mmx1.5mm (most of their stock is measured in imperial but I always work in metric). I chose natural finish rather than anodised, as anodised aluminum does not conduct electricity, and we need electricity to drive trains on and off the cassettes!
The plywood bases came from Woodshop Direct. Whilst this ended up being quite expensive compared to buying from a local timber merchant, I don’t have the tools at home to cut wood sheet accurately, so again, I chose the easy route over the cheap one! The bases themselves are 8mm thick and 67mm wide, in a variety of lengths to suit different train lengths, with the shortest one (300mm) being just long enough for a locomotive or railcar, and the longest one (1080mm) able to fit a tender steam loco and three Hawksworth coaches. I used a simple spreadsheet (attached below) to calculate how long a cassette would need to be for a given train.
Cassette construction
I started by giving the plywood bases a couple of coats of white undercoat, just to help protect it from accidental spills, oils and moisture. I then used a 16.5mm gauge to get the correct separation between the aluminium pieces. The aluminium was then drilled and screwed to the plywood underneath.
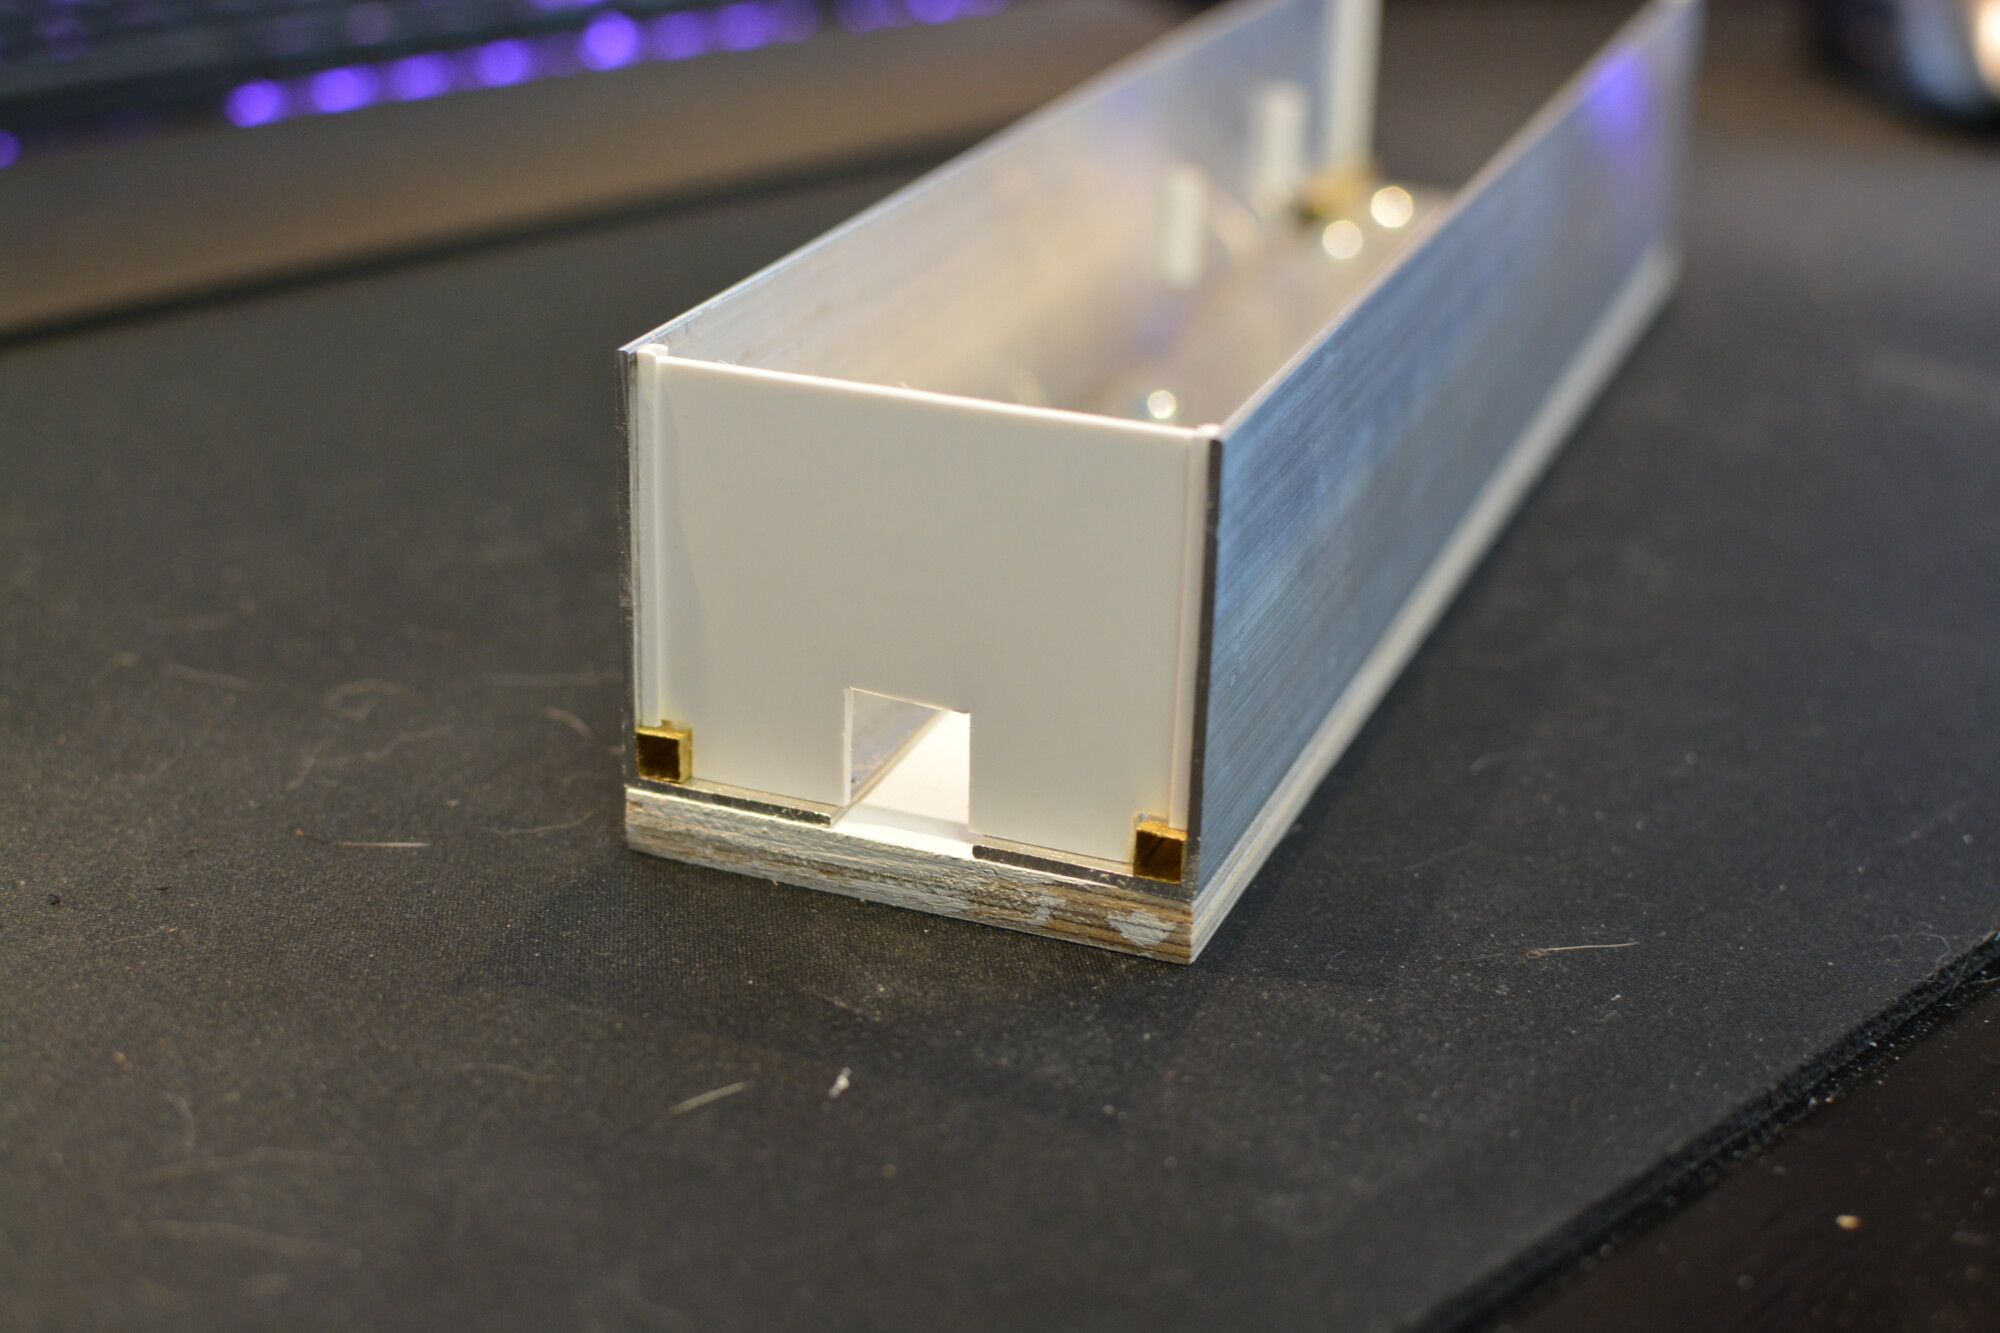
30mm lengths of square brass tube were then cut and glued into the corners using cyanoacrylate adhesive. I chose to use glue because it’s very difficult (almost impossible actually) to solder to aluminium, and I didn’t want to deform or damage the tube by drilling or screwing it. Initially I wasn’t sure if the glue method would conduct electricity, but after trying this on a test piece, I was happy to find that it conducts electricity perfectly when tested using a multimeter.
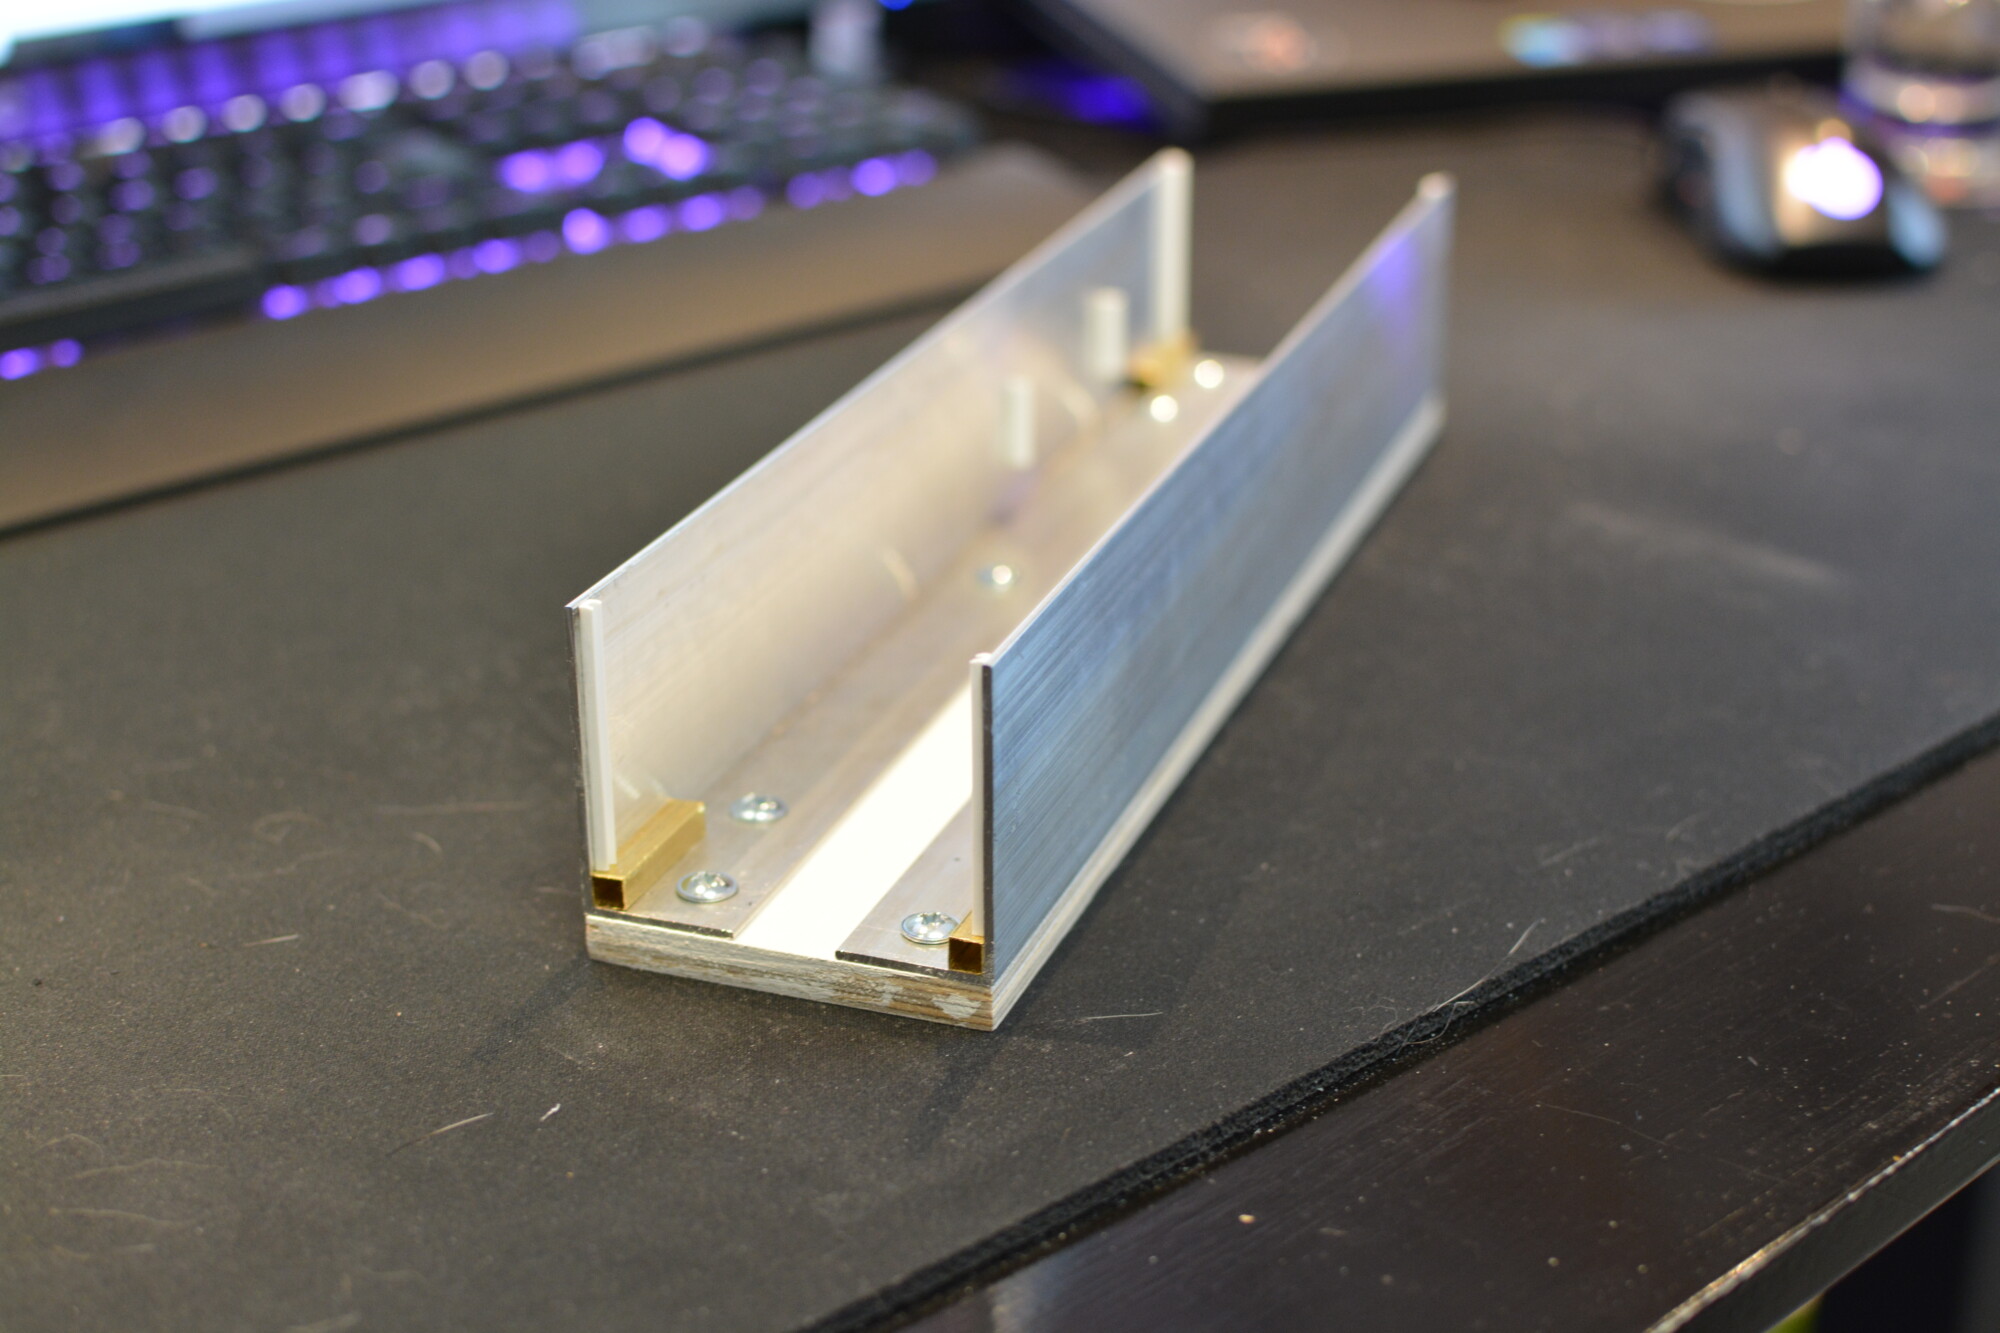
To stop rolling stock falling out of the cassette when it’s being moved around, I have added plastic “U” profile strips to the ends, into which thick plasticard panels can be dropped. 1.5mm plasticard seems to be strong enough for this task.

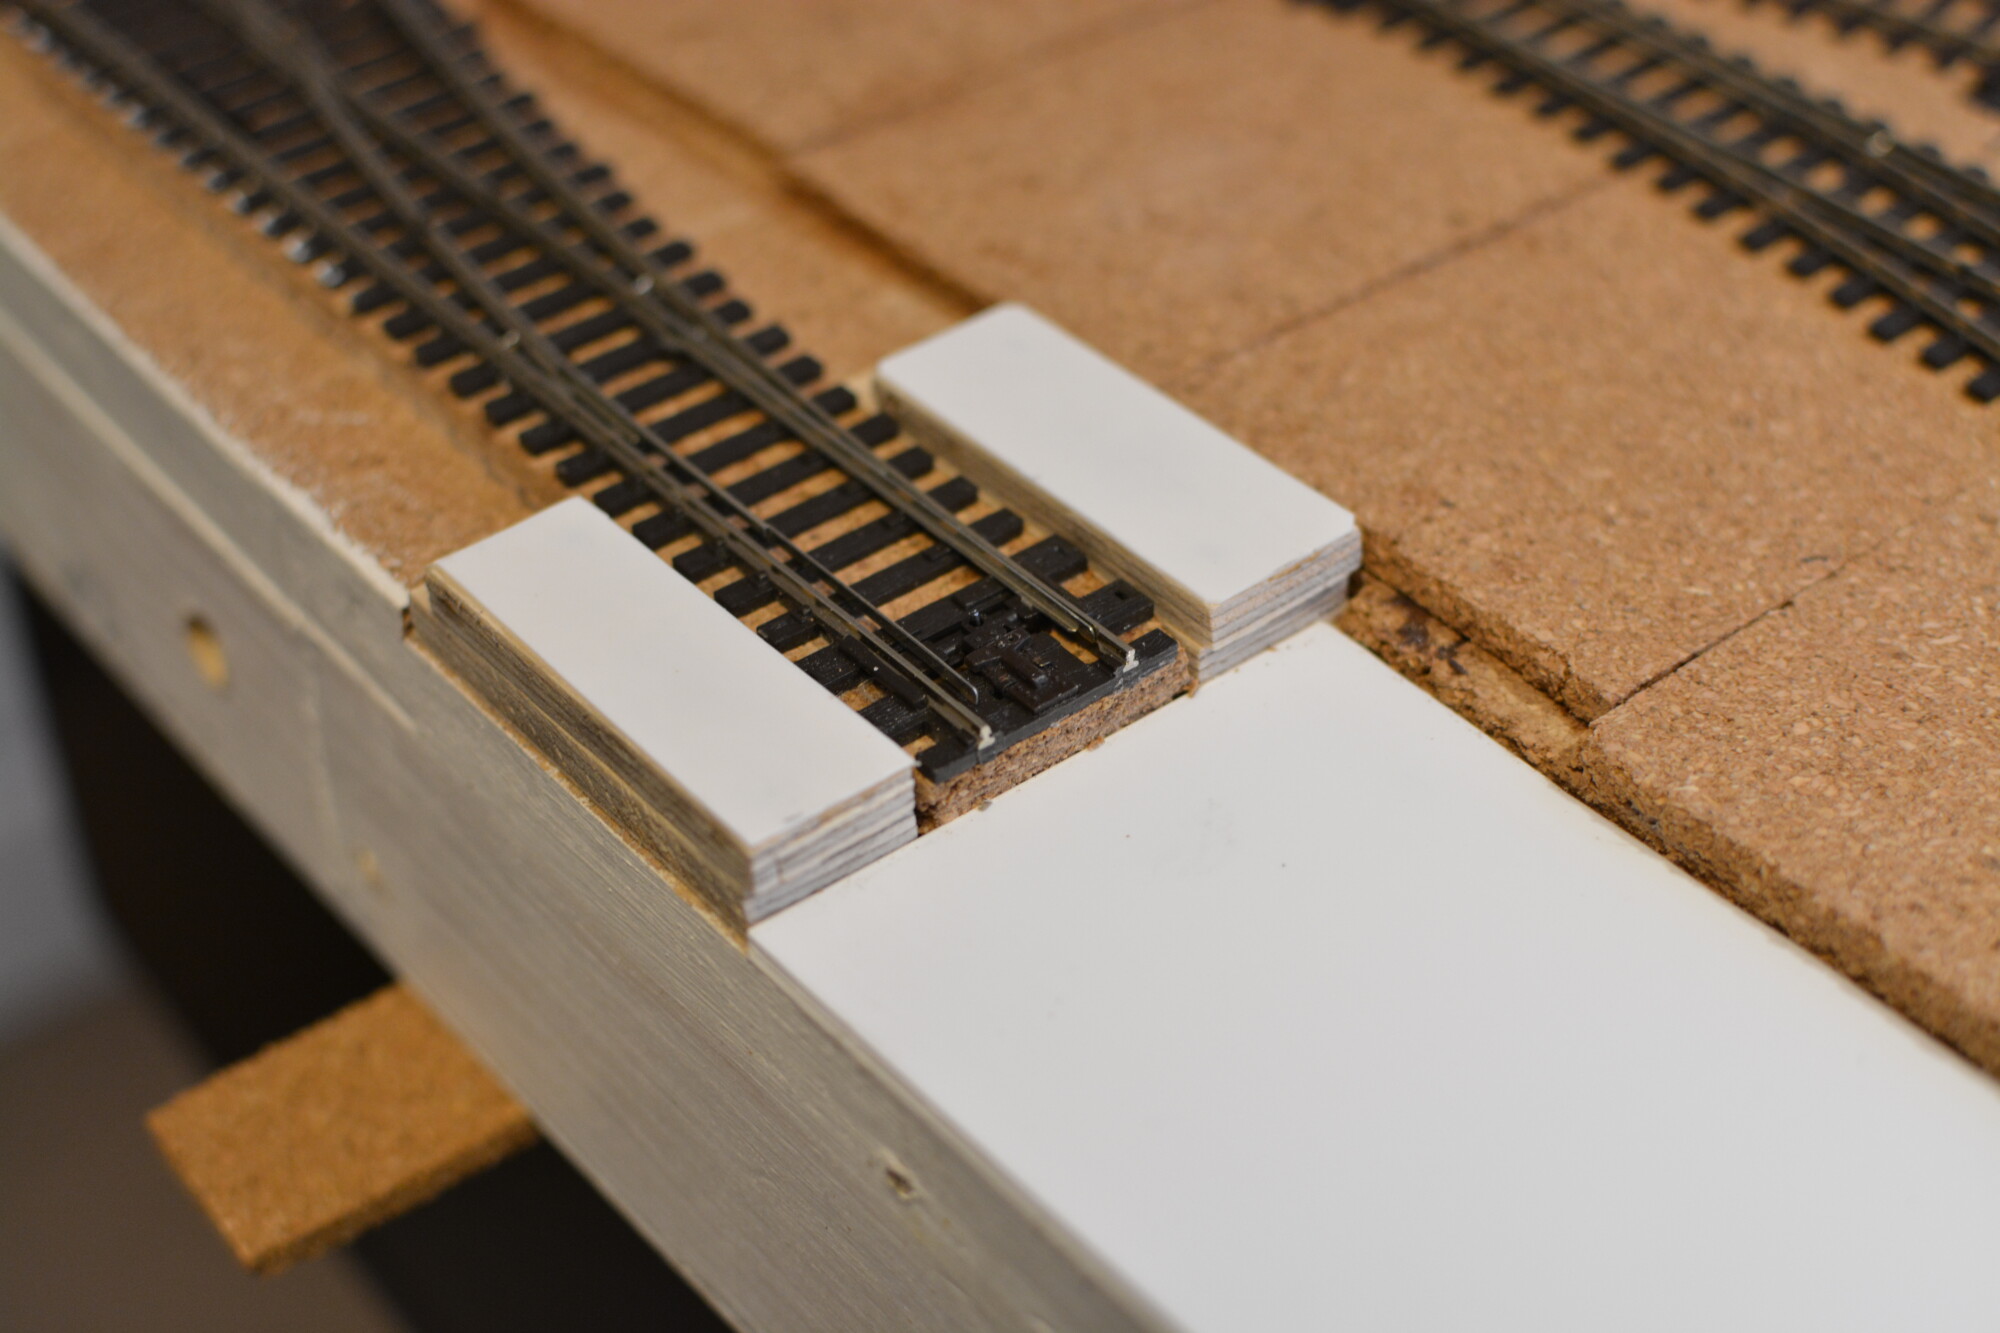
Preparing the baseboard
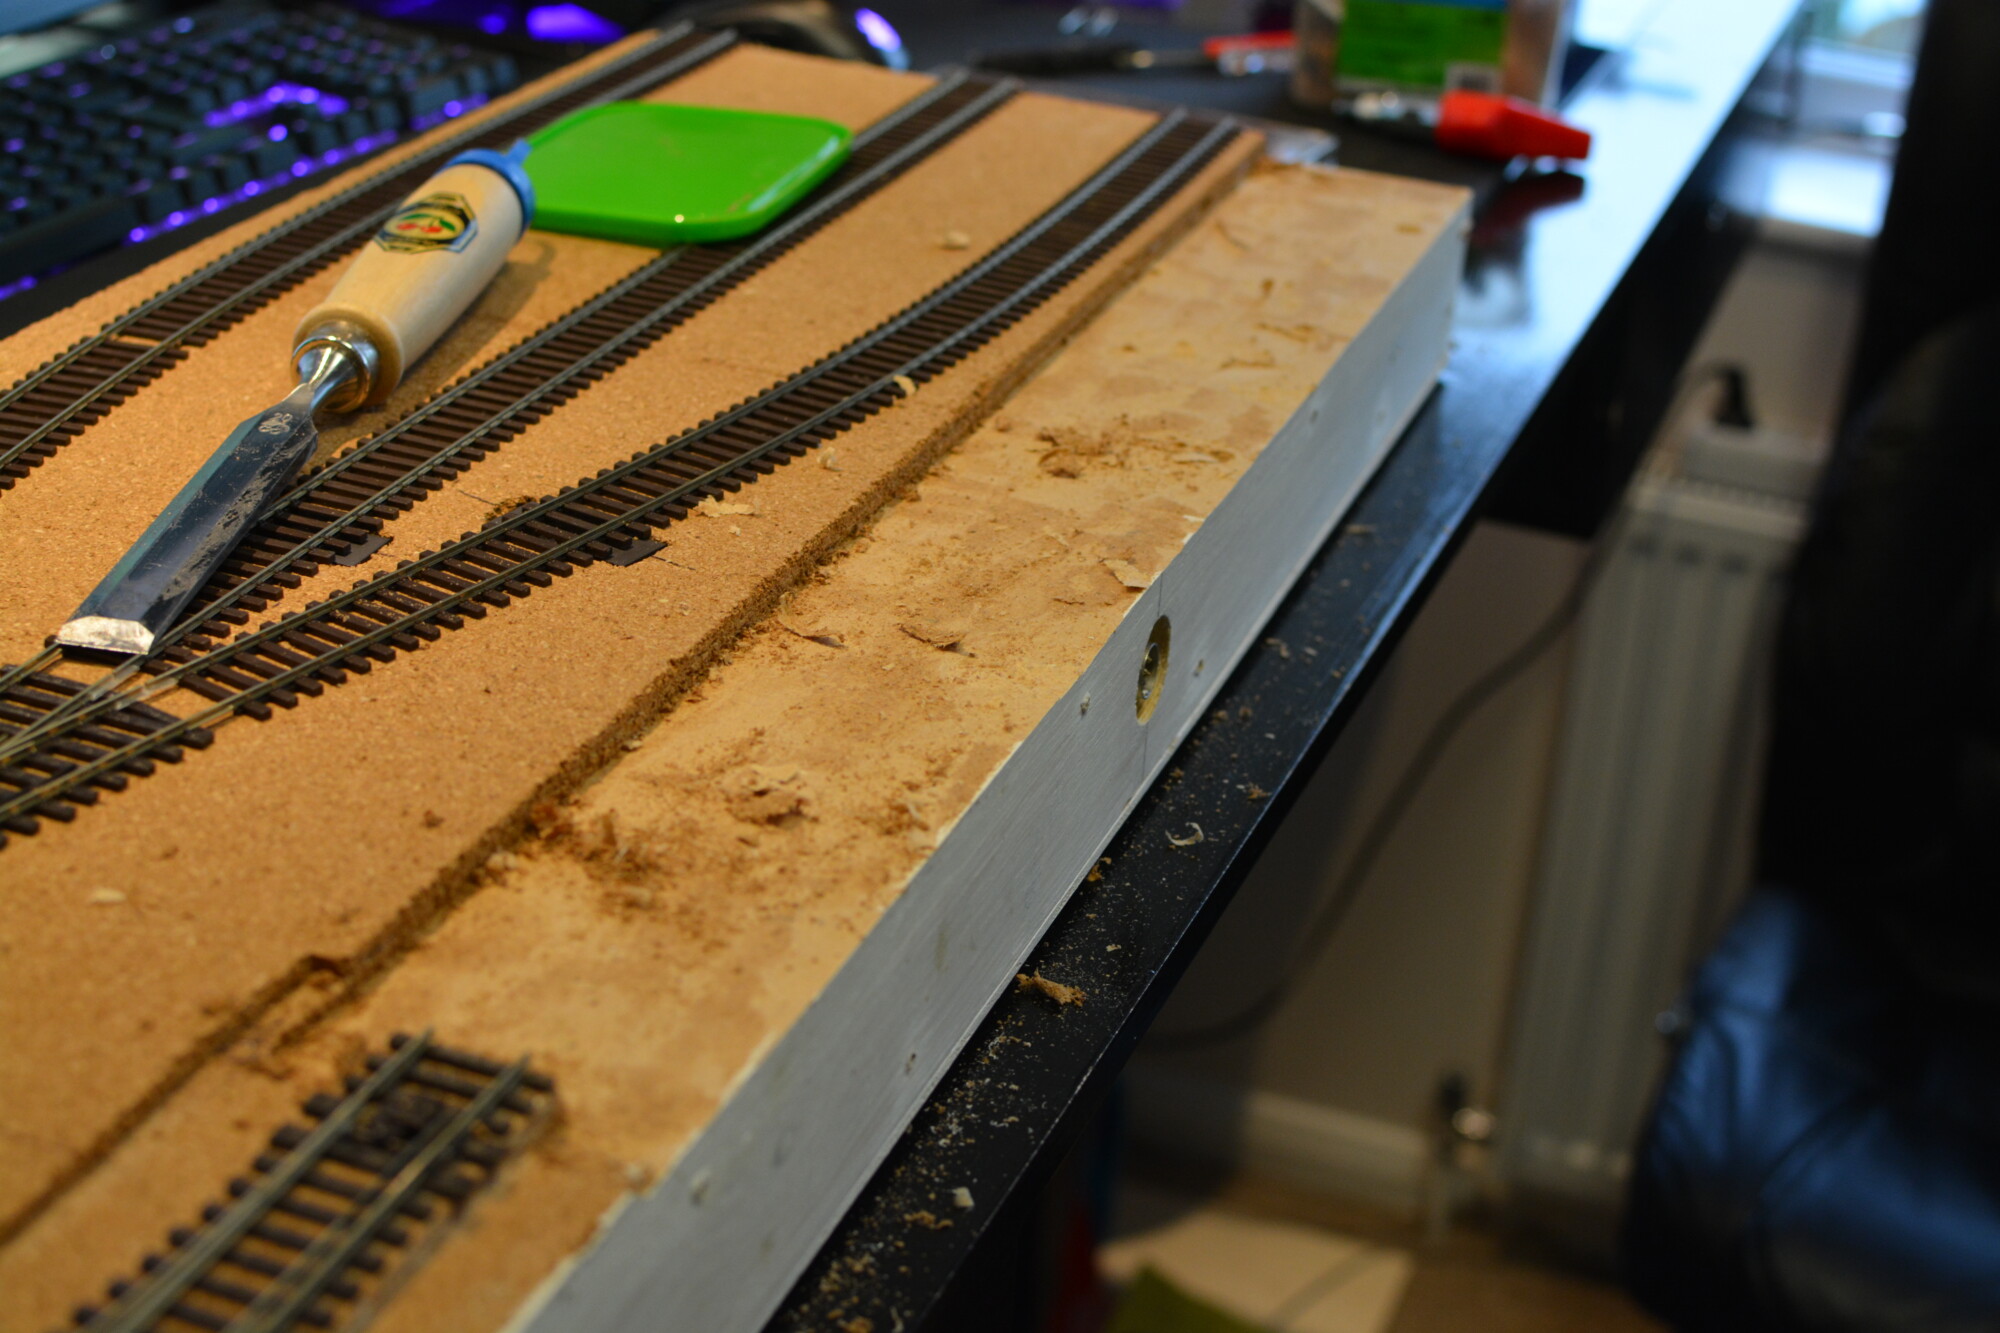
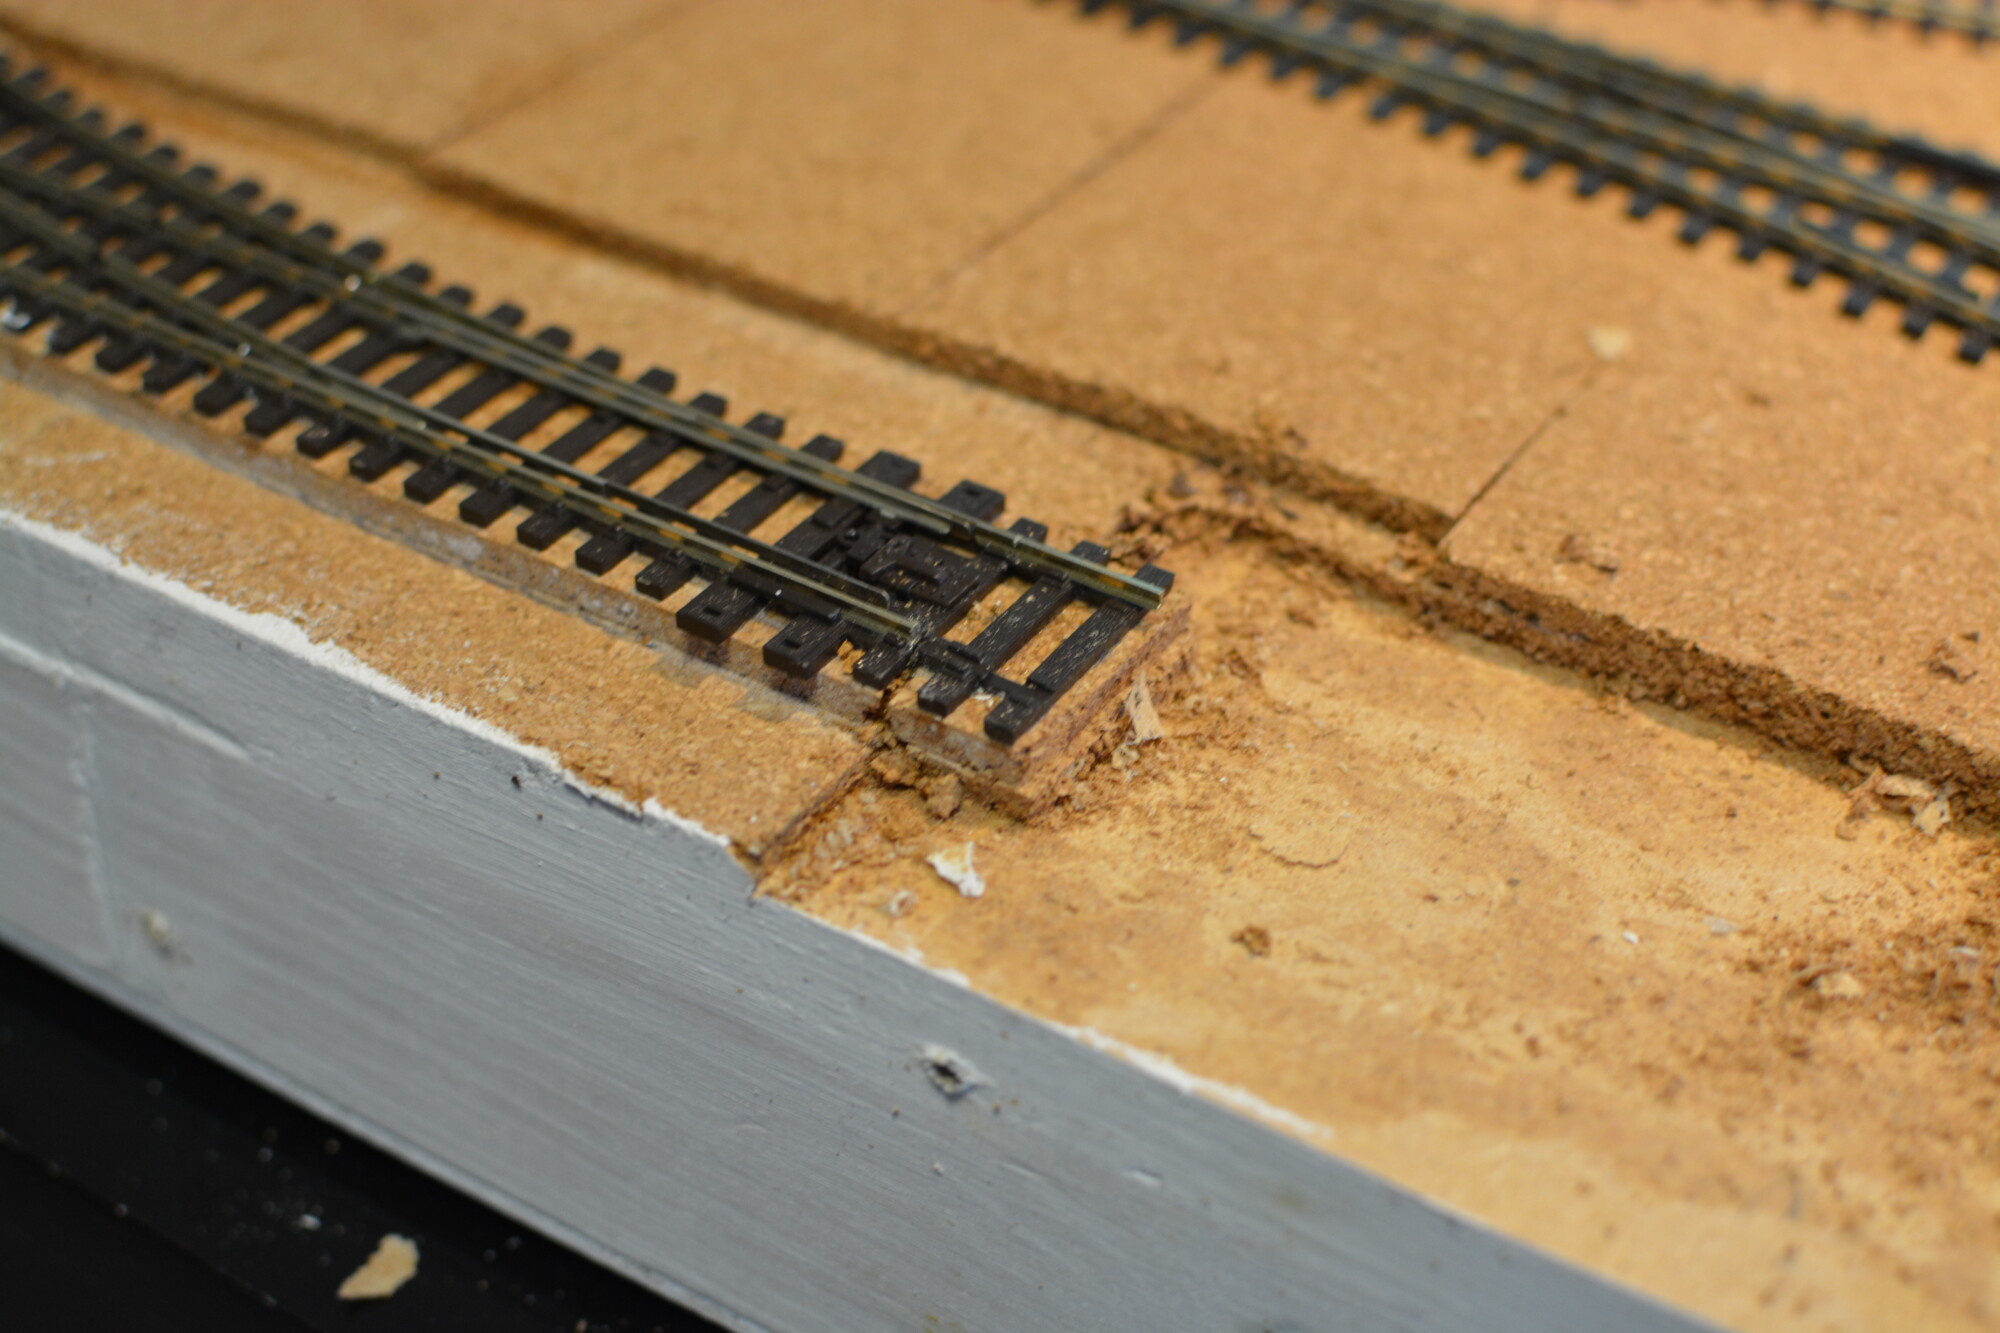
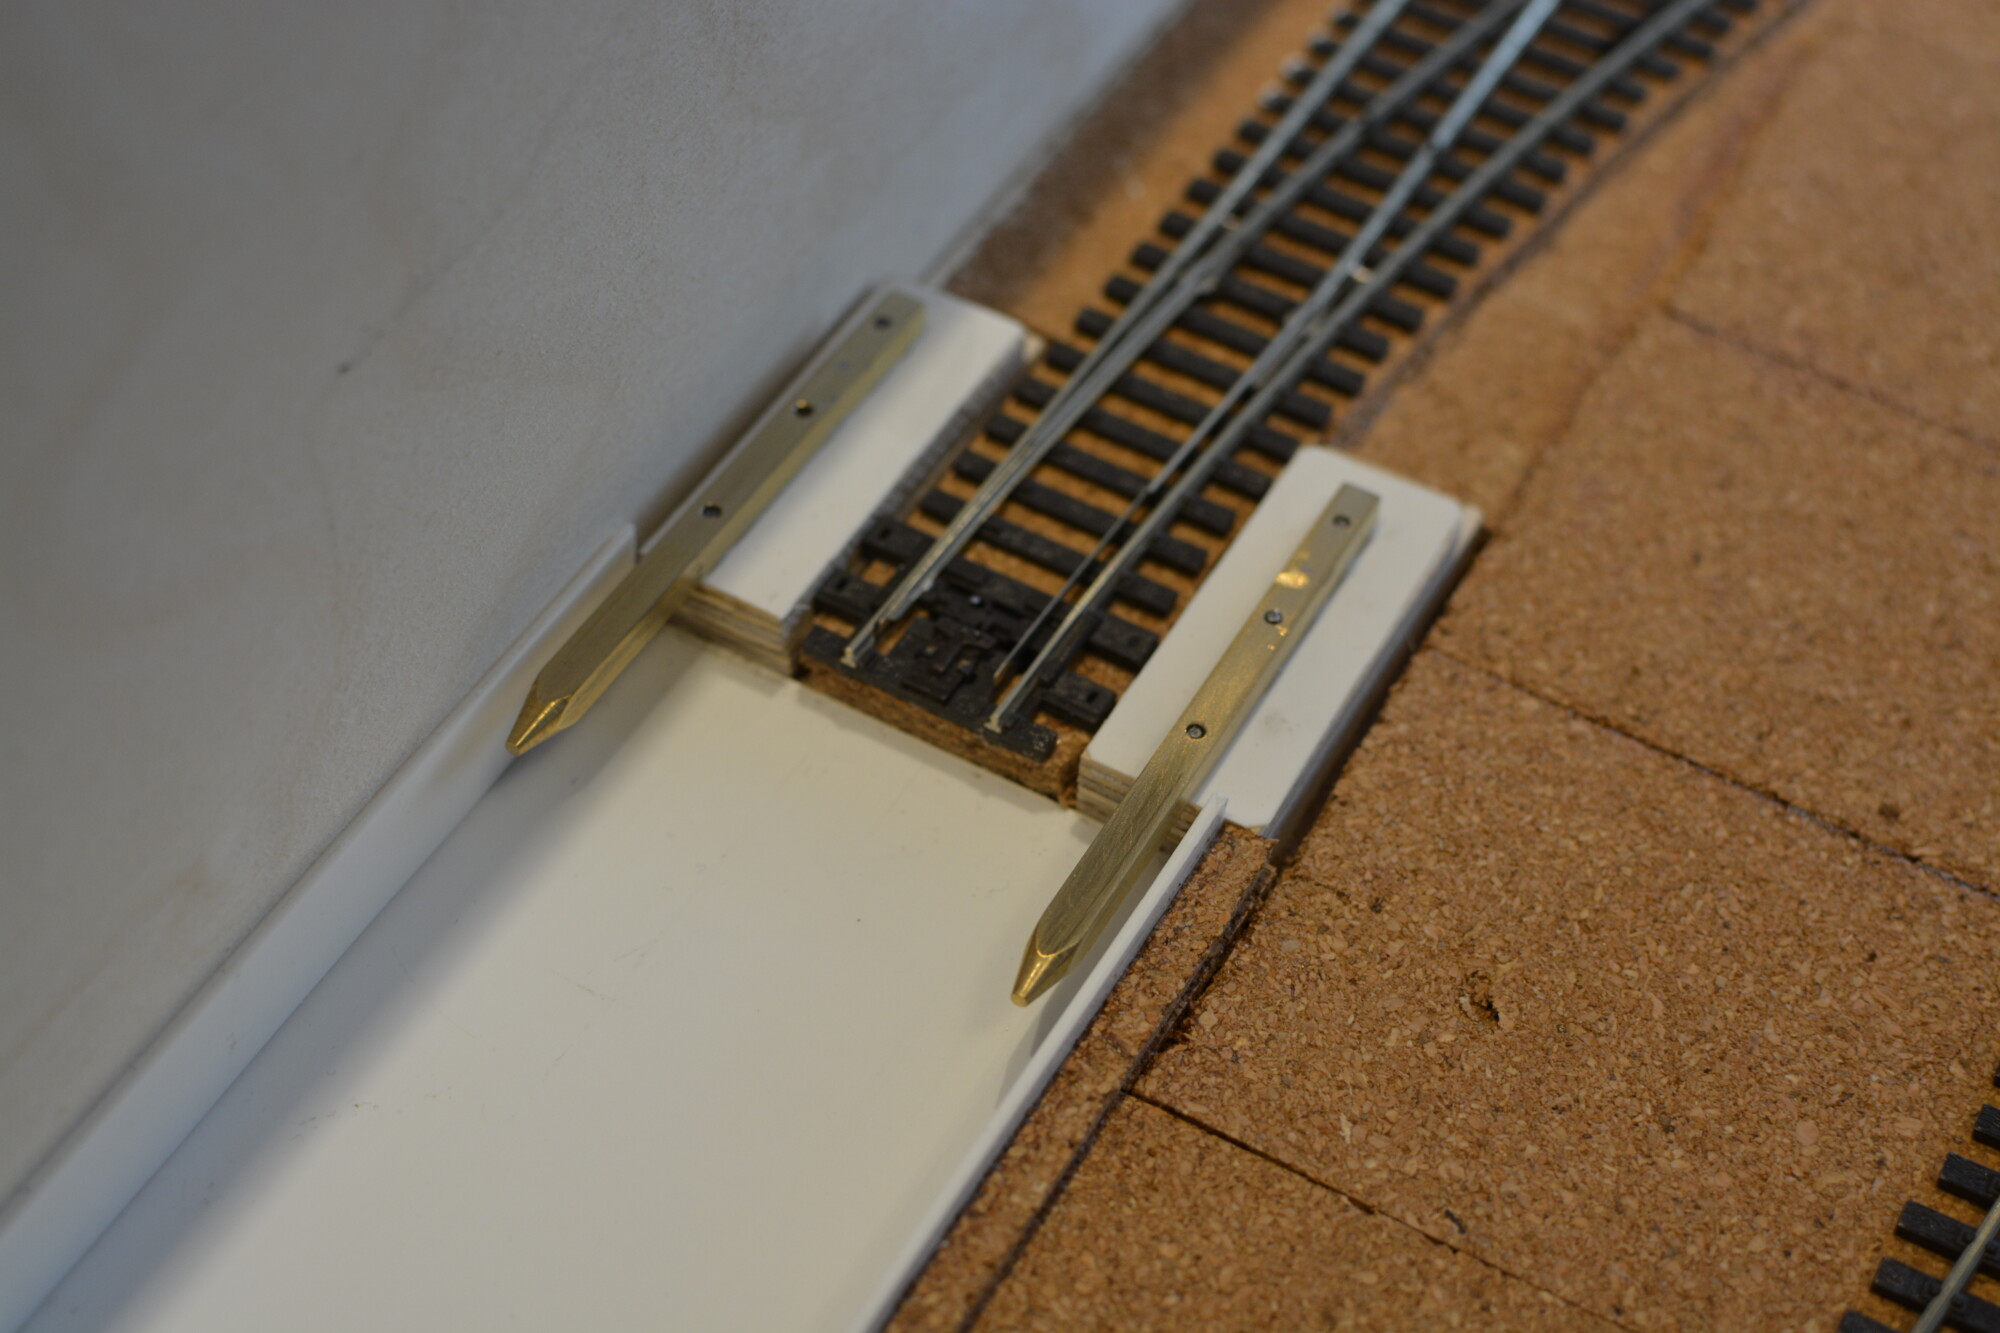
Now the cassettes are built, it’s time starting working on the layout side of things. The first step is to remove the cork layer from the baseboard where the cassettes will go. This is necessary because the base of the cassettes will be a few mm thick, so to match the rail height, I need to go down a bit.

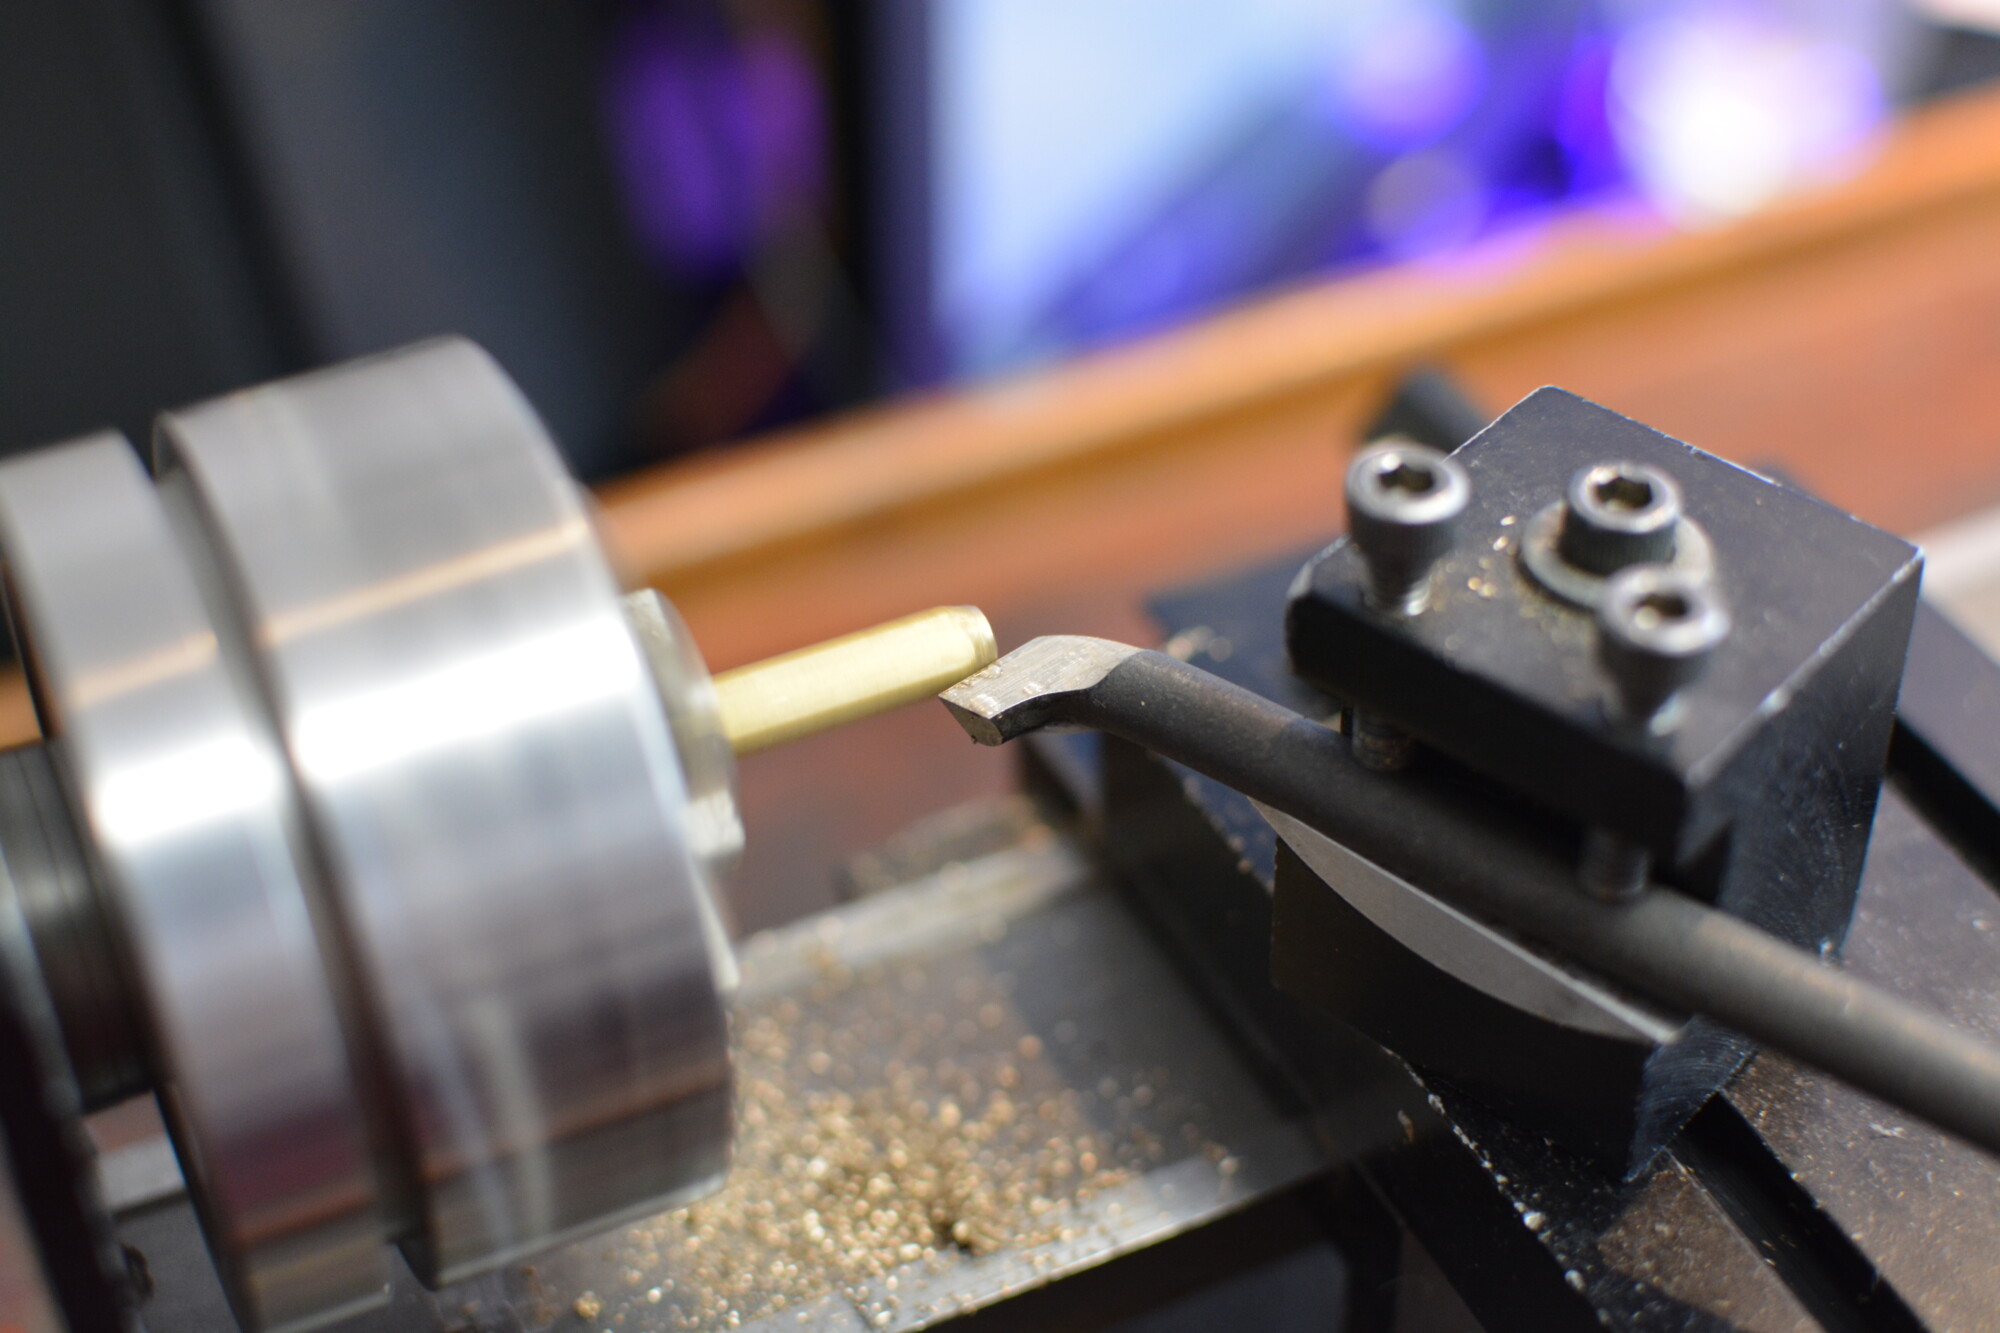
Locating the cassettes
I’ve chosen to use brass rods inside brass tube to align the cassettes and provide power to them. In order to make inserting the cassettes easier, the ends of these rods were turned down on the lathe to give them a nice smooth taper.
The finished system
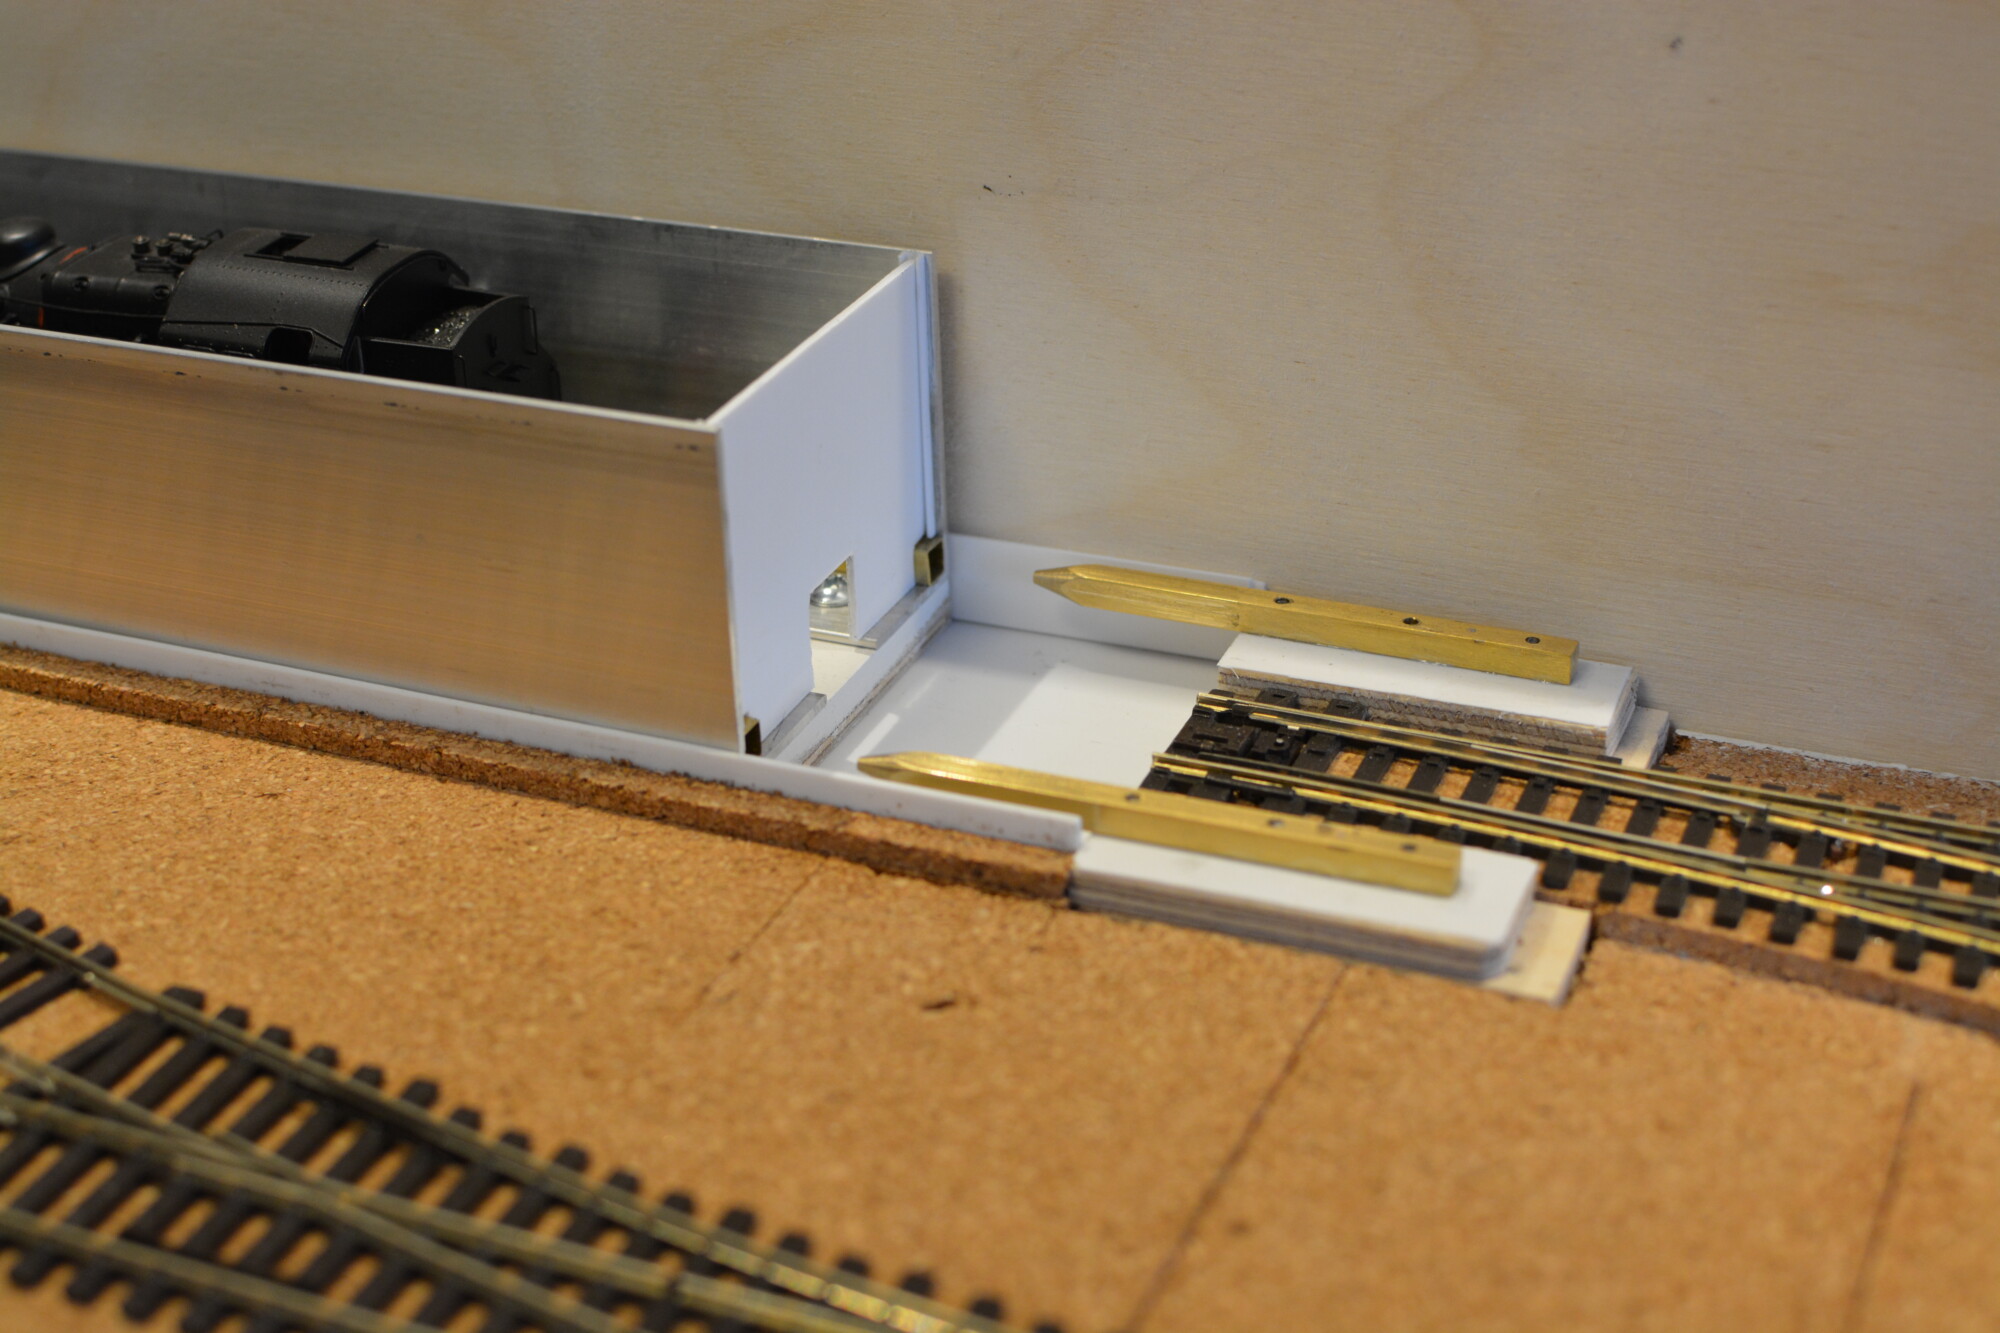
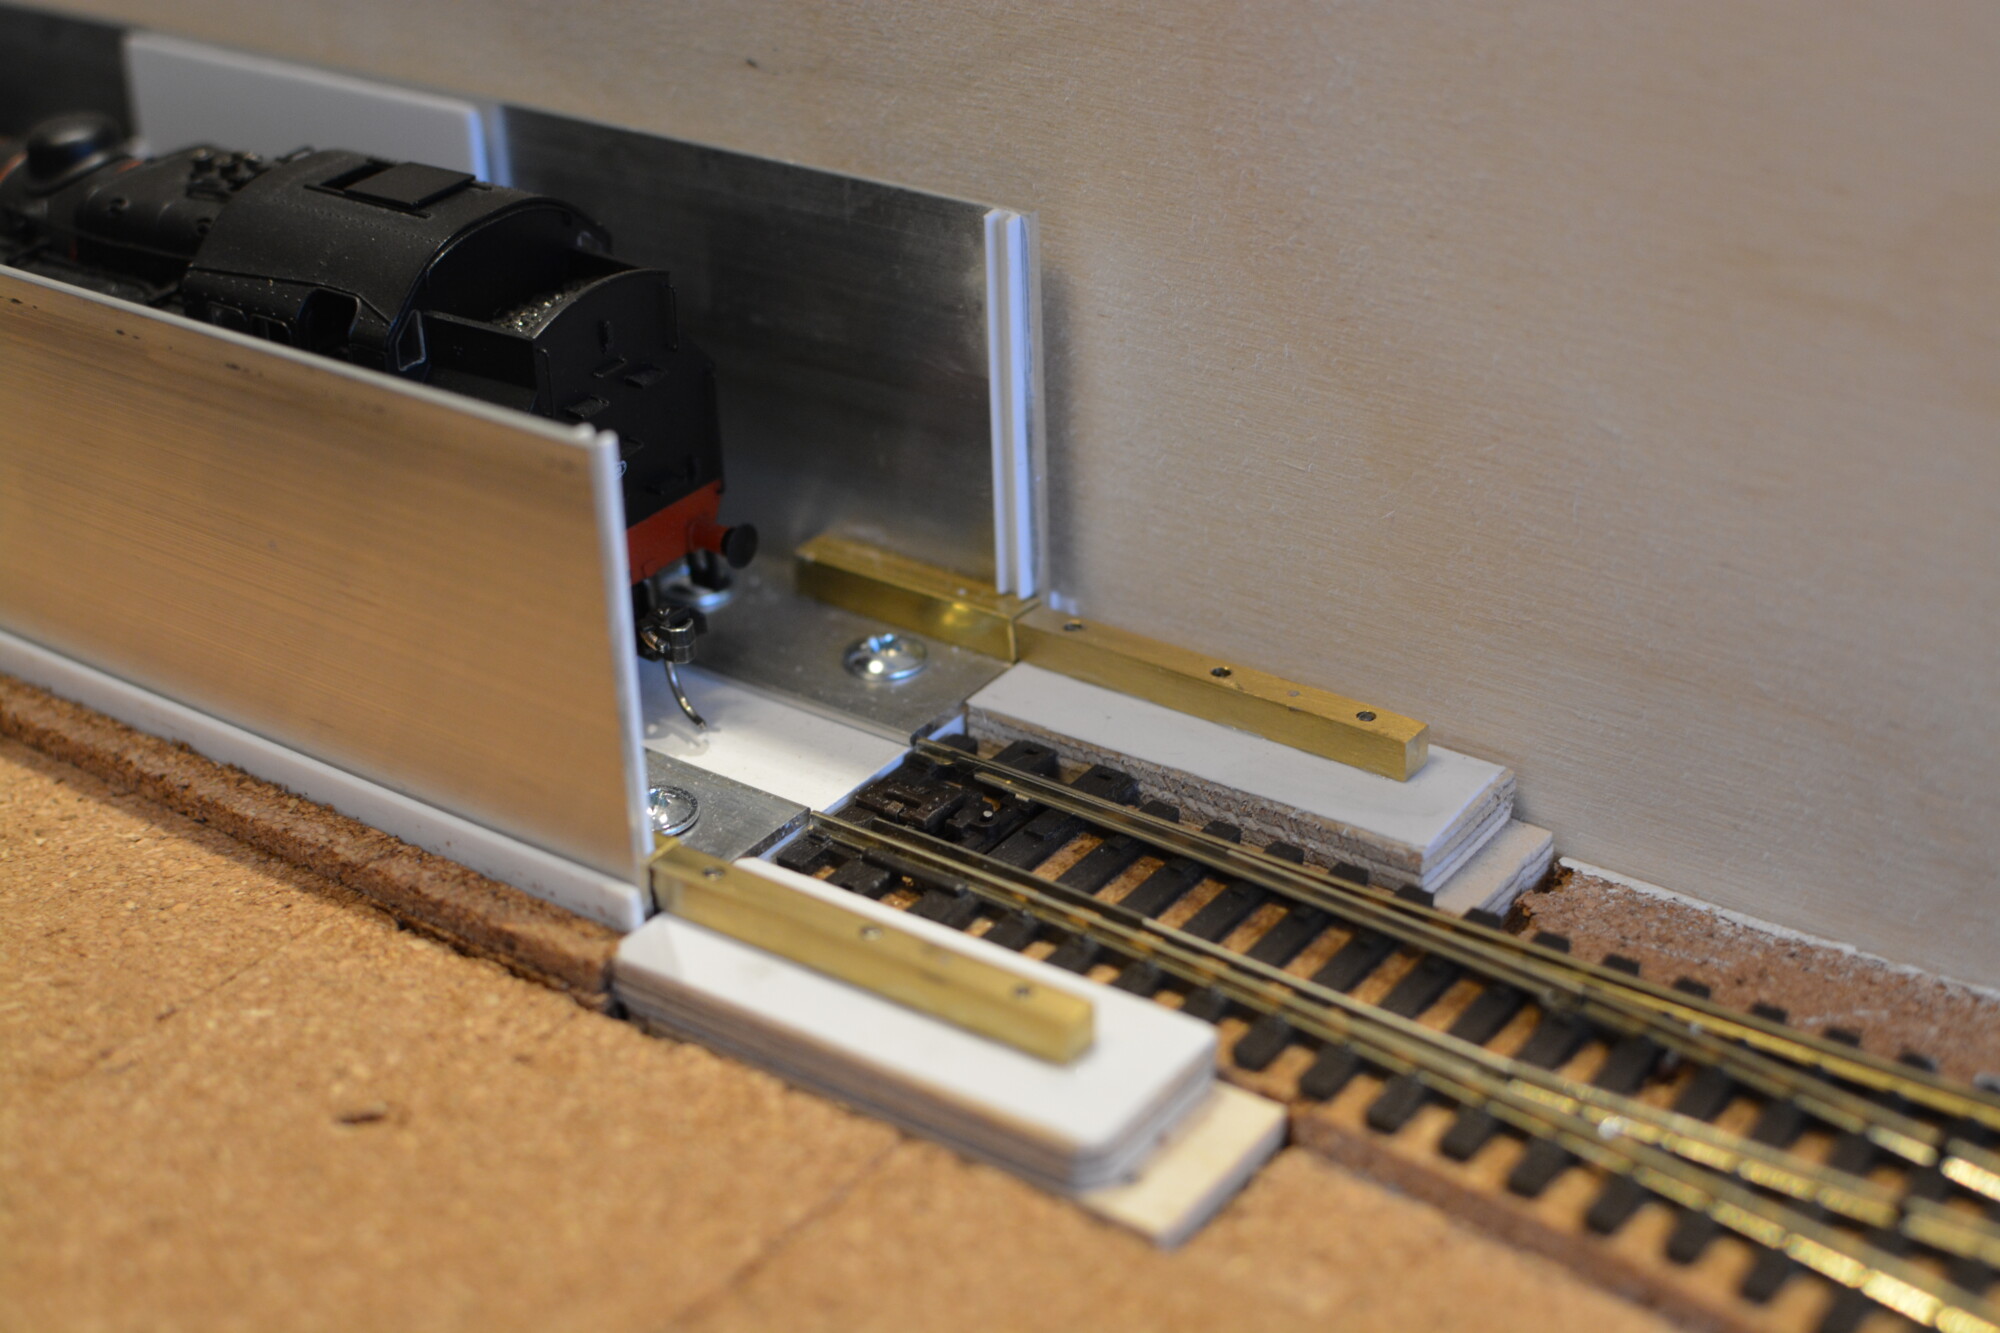
I think this system has worked out pretty well. The cassettes, whilst not that cheap (due to the components being cut to length for me) feel sturdy and secure. This is important when a typical train in a cassette is probably worth about £200-300!
I’m especially pleased with the locating rods. They give perfect alignment every time, and, short of attacking them with a hammer, I can’t see how they could possibly move out of alignment.
One thing I will be doing is painting the cassettes. I have noticed that when the layout is powered, if I grip a cassette tightly when insert or removing it, I get a noticeable electric shock. This surprised me the first time it happened, as I’ve never had a shock from the rails, but I think the greater surface area between my fingers and the aluminium meant that more current could flow from the aluminium to me. A coat or two of multi-surface paint should solve this though. I’ll also take the chance to paint the ends a bright colour, so that people don’t walk into a cassette if it is overhanging the end of the baseboard.