I had some spare time while visiting Reading back in 2018, so I took a short trip one station down to the line to Twyford, to visit Berkshire Dolls House and Models. Whilst I was browsing, I saw an interesting looking wagon on the shelf: A Bachmann JGA bogie hopper in RMC orange livery.
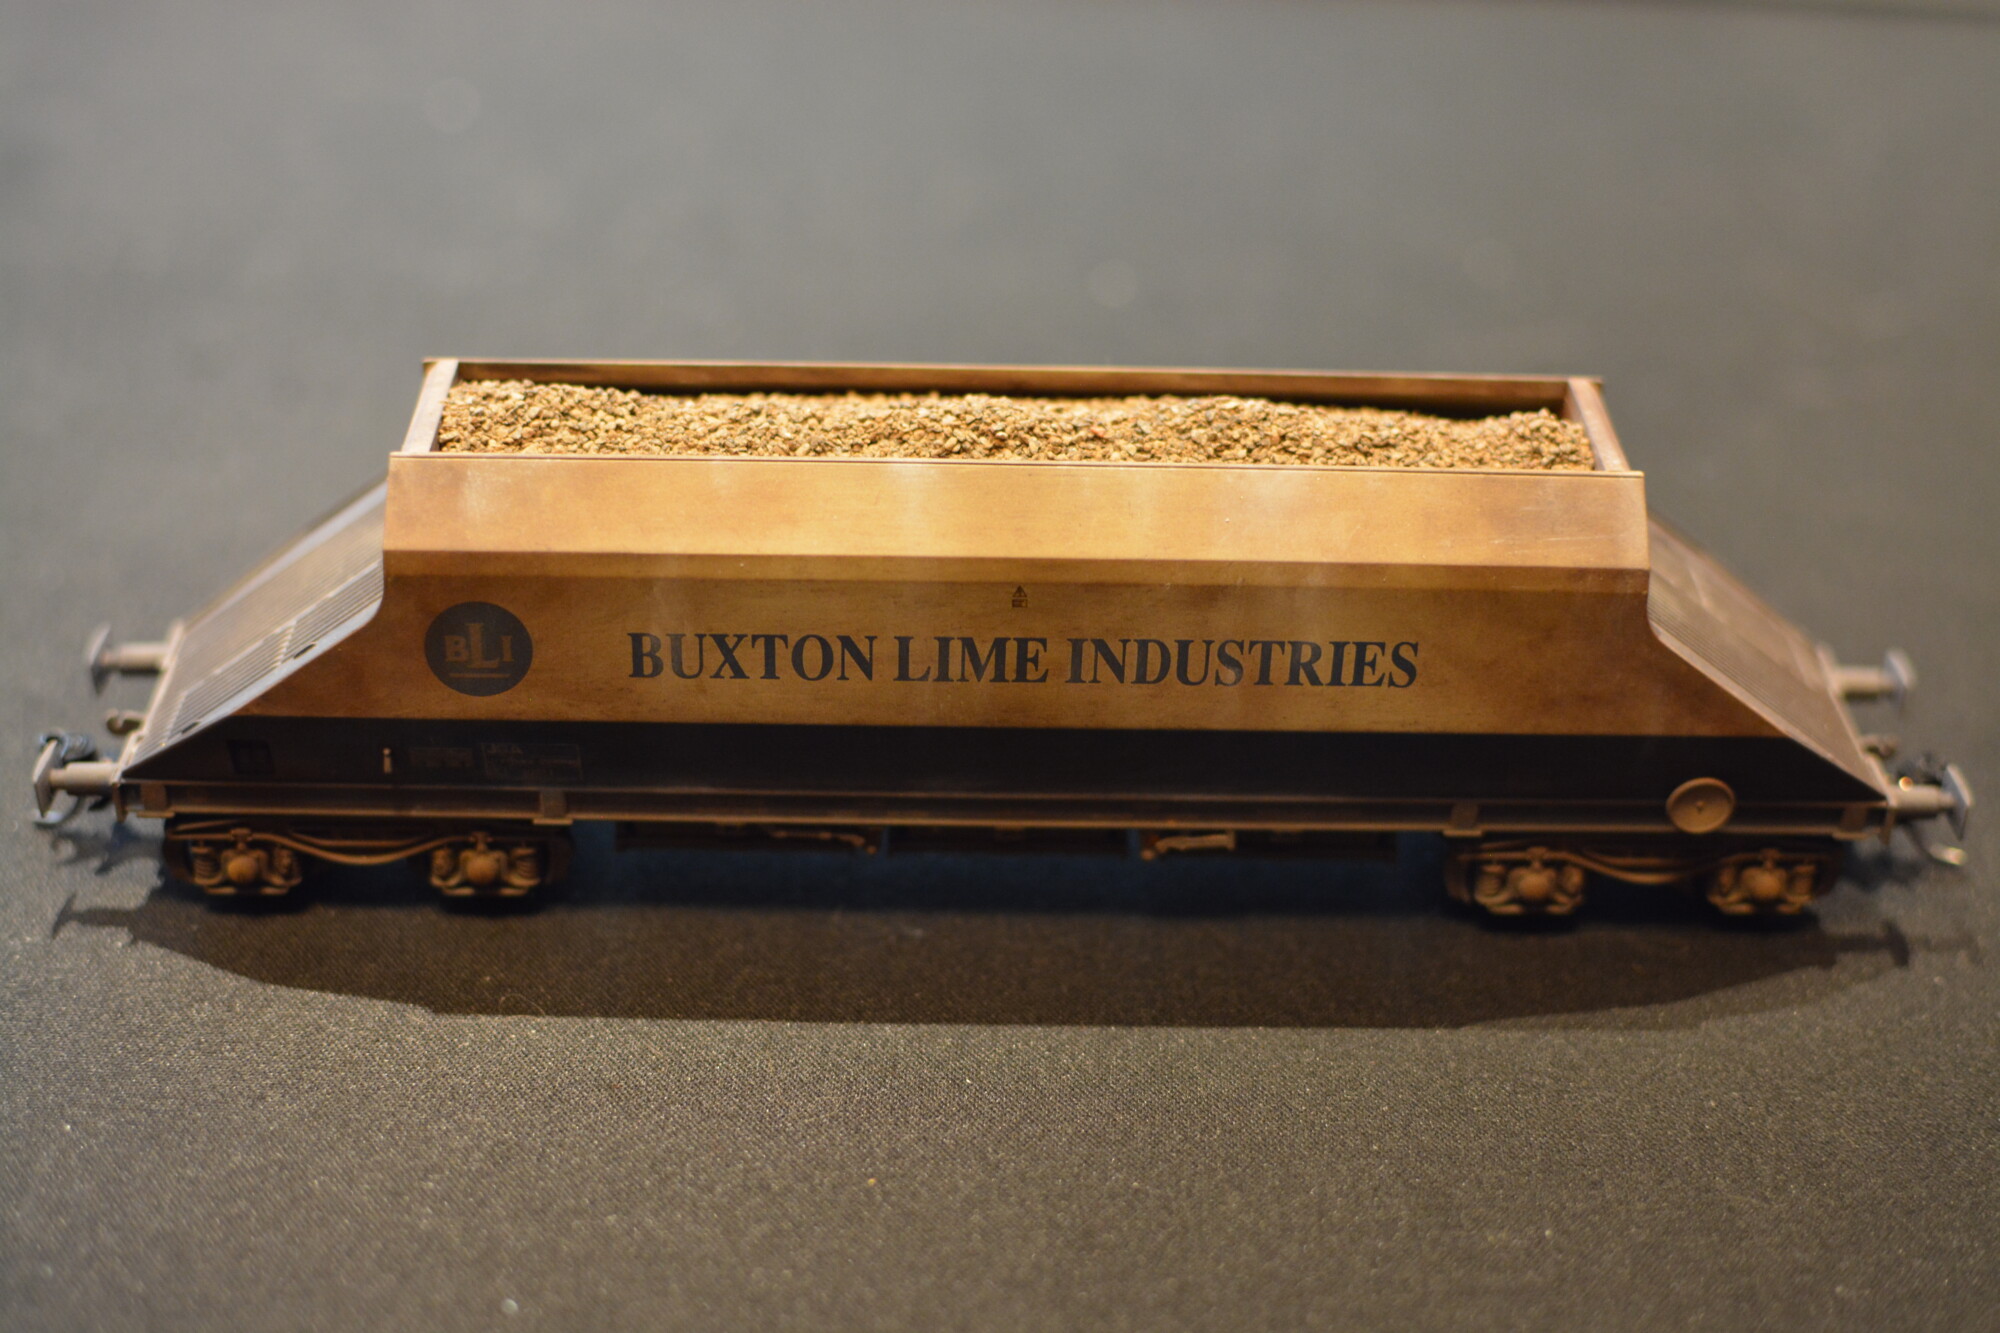
I didn’t have anything like it at the time, so I bought it on a whim. Fast forward two years, and I now have a short rake of eight of them: six in the orange RMC livery, and two in Buxton Lime white and blue. This isn’t as long as trains of these would normally be (they’d normally be in trains of fifteen plus wagons), but it’s plenty for a model railway. Also they don’t run very freely, so any more than ten is going to be tough for a single loco to haul!
The prototype
Whilst looking around online for photos of the real thing, I noticed two things:
Condition
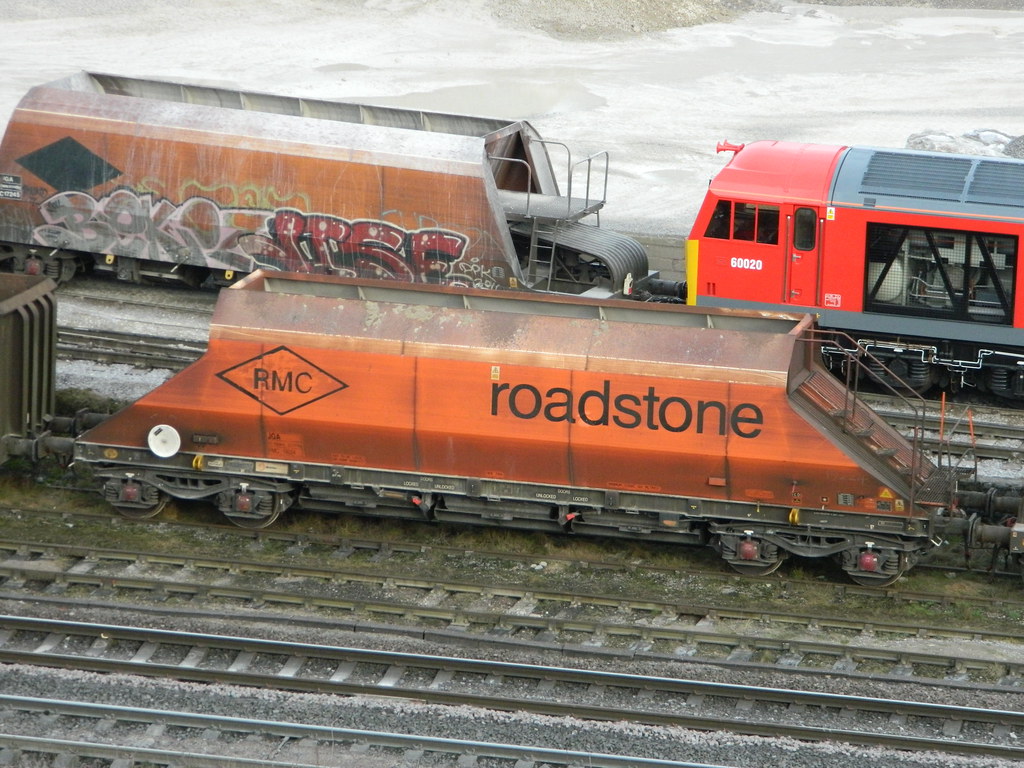
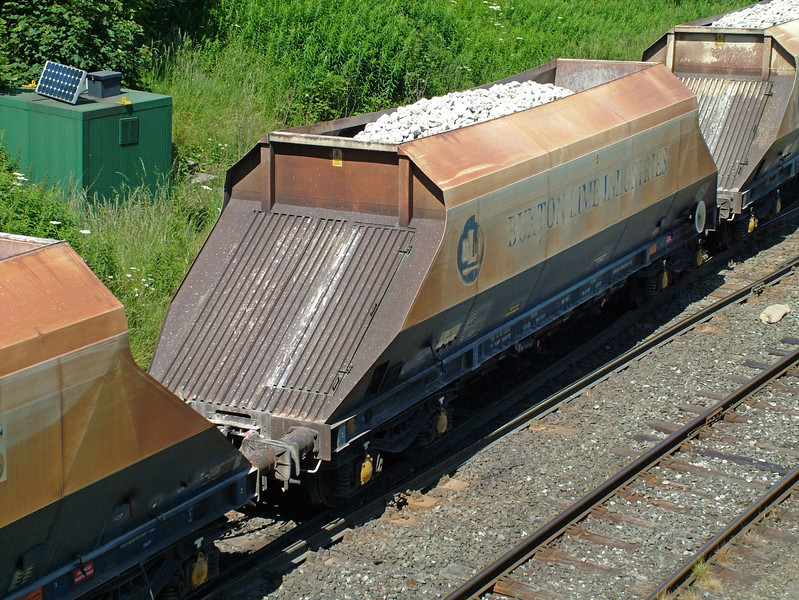
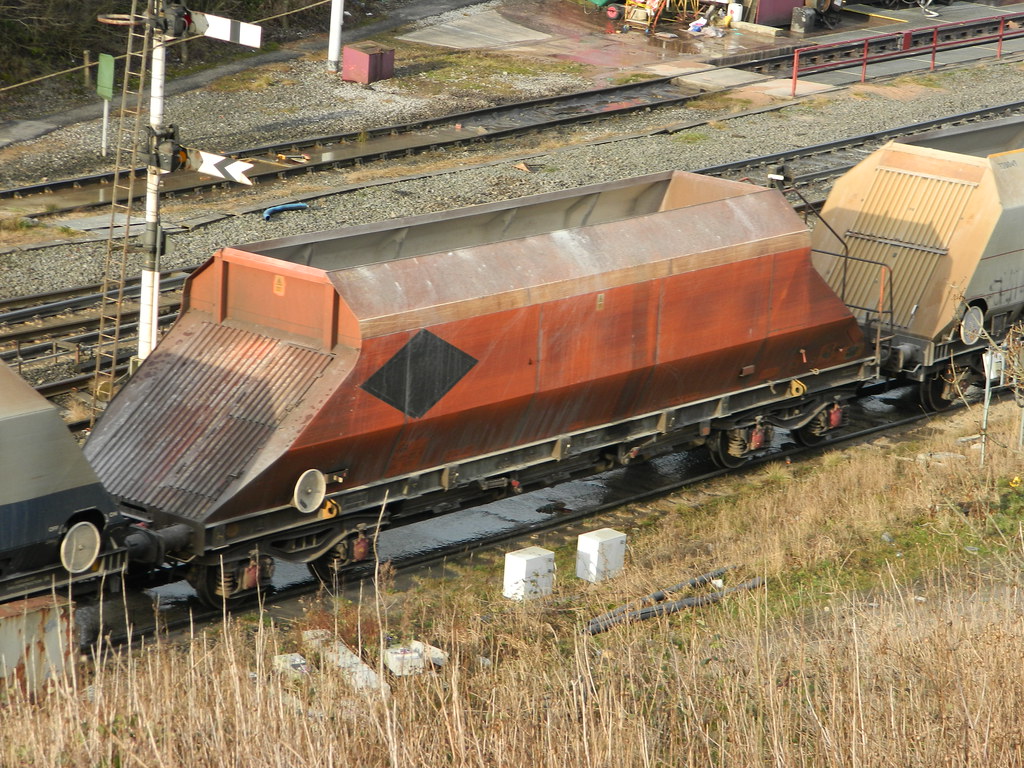
They get really dirty! Here are a selection of photos of how mucky they are, a mix of the usual dirt from running on the railways and the dust from the stone loads they carry.
Livery
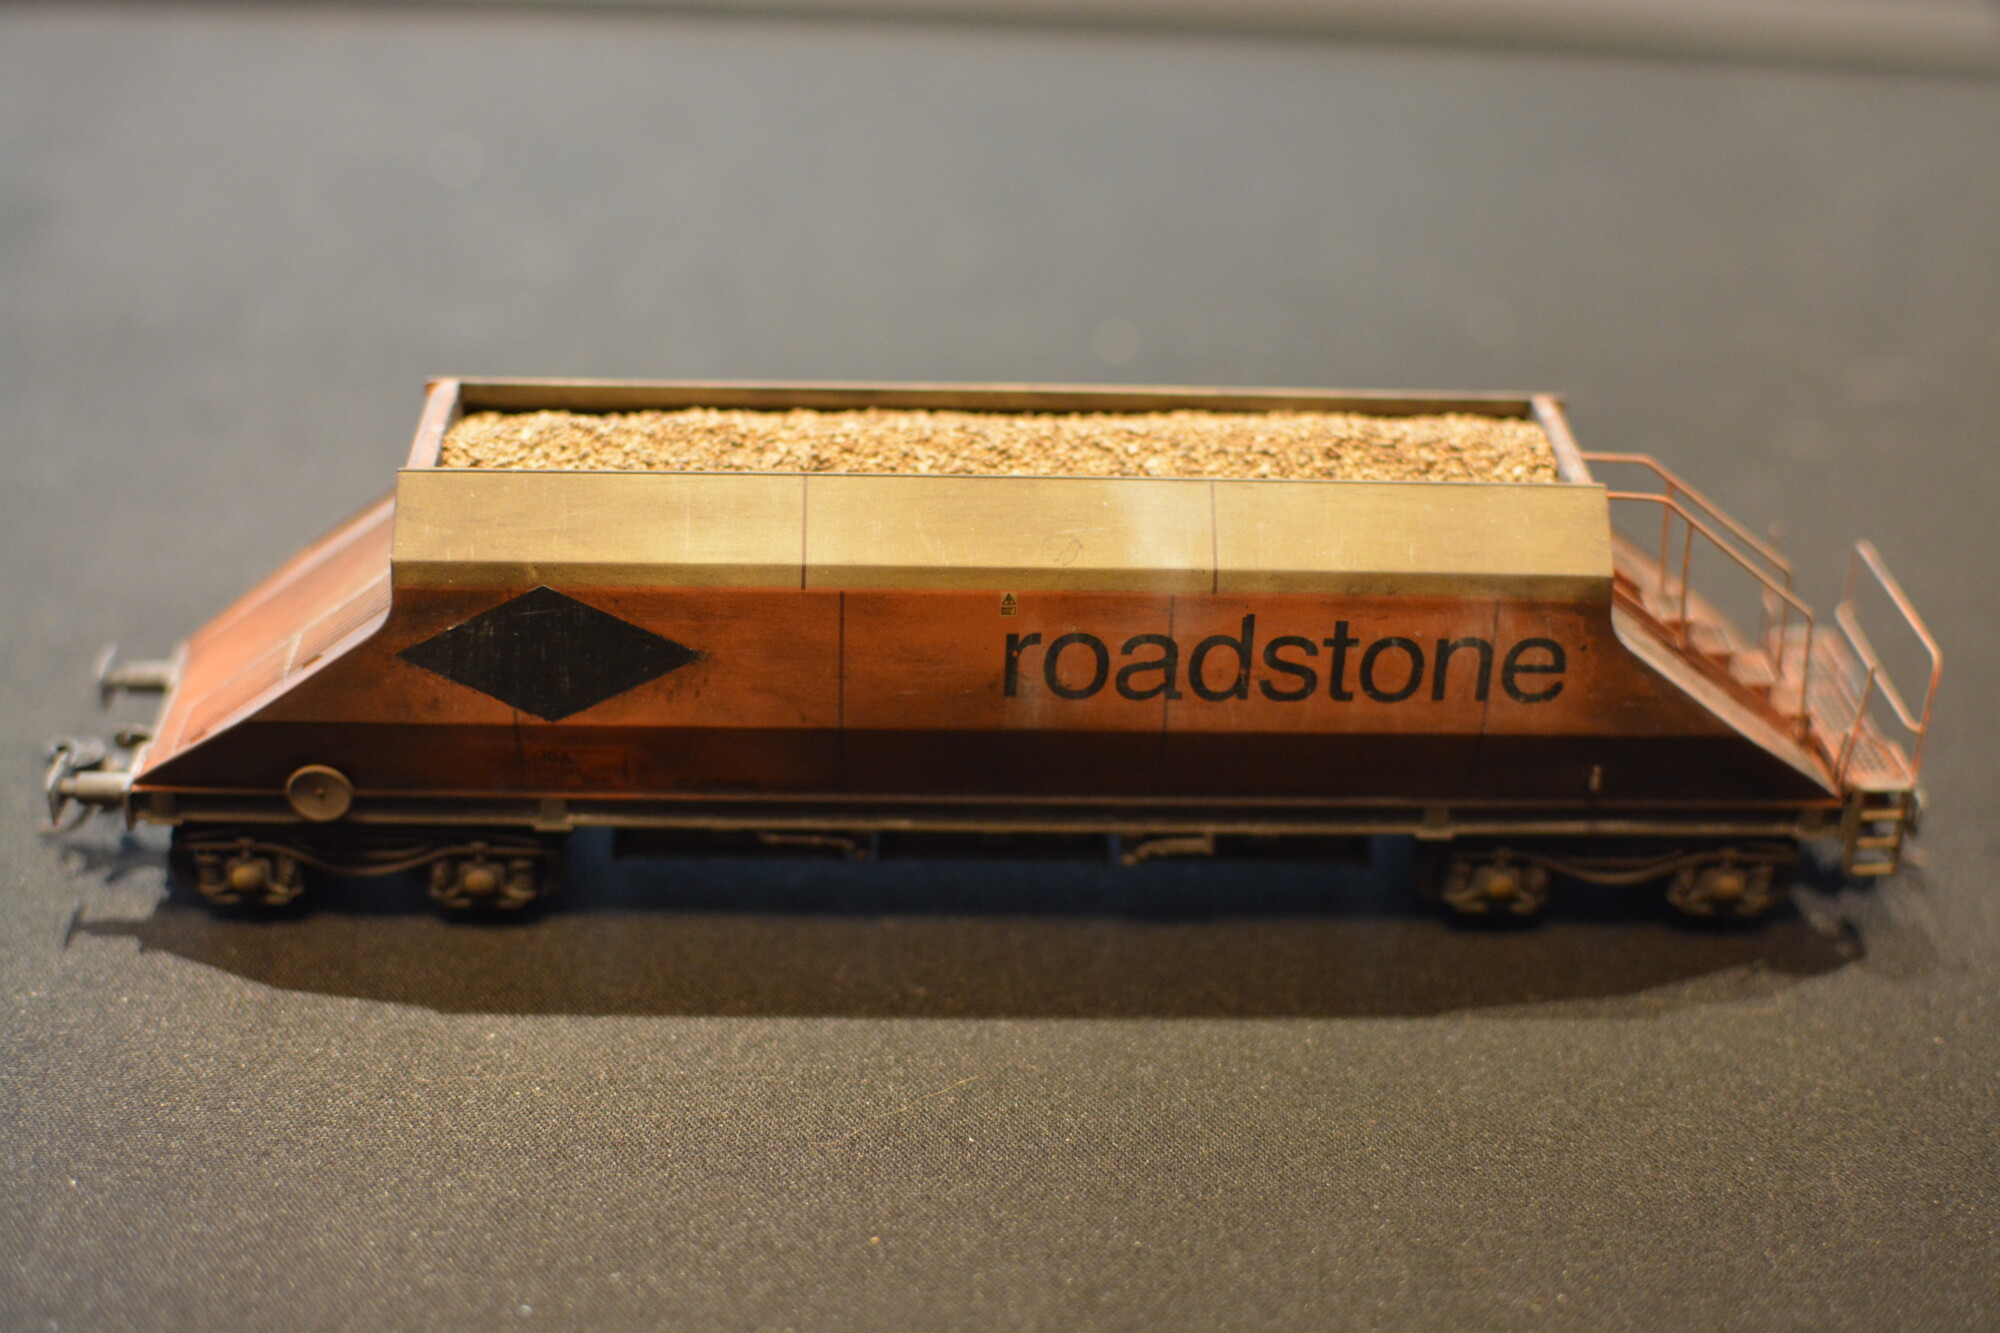
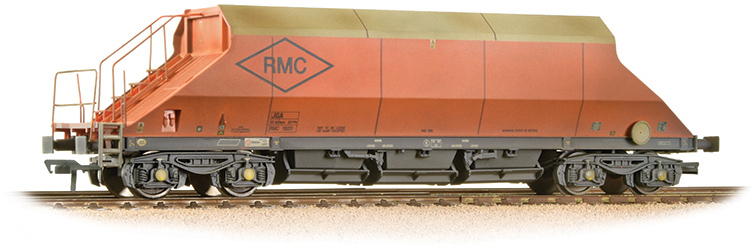
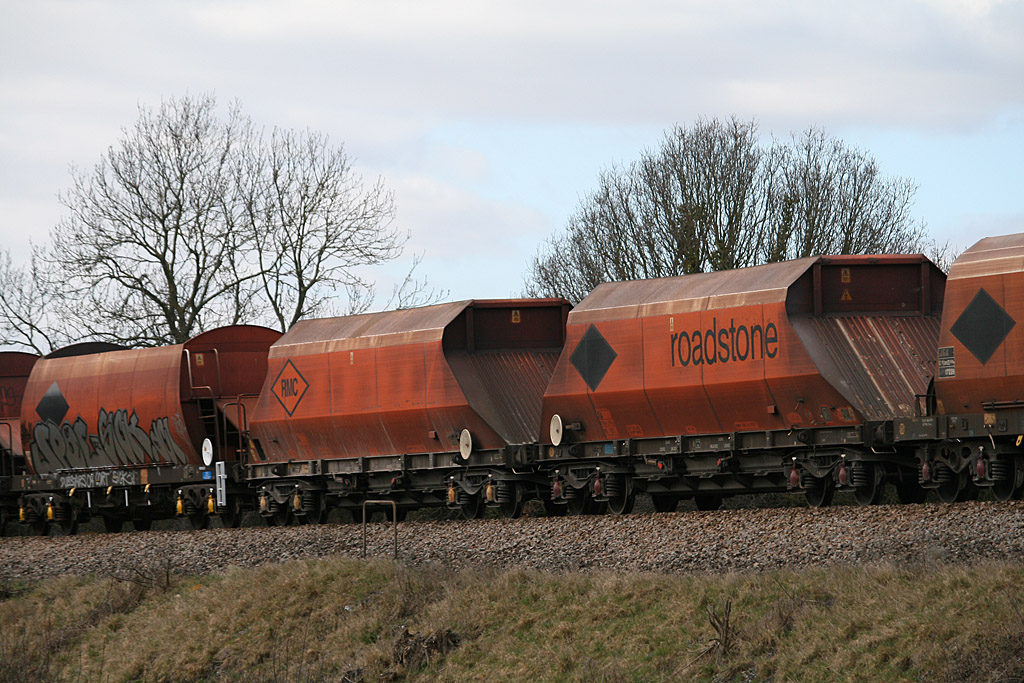
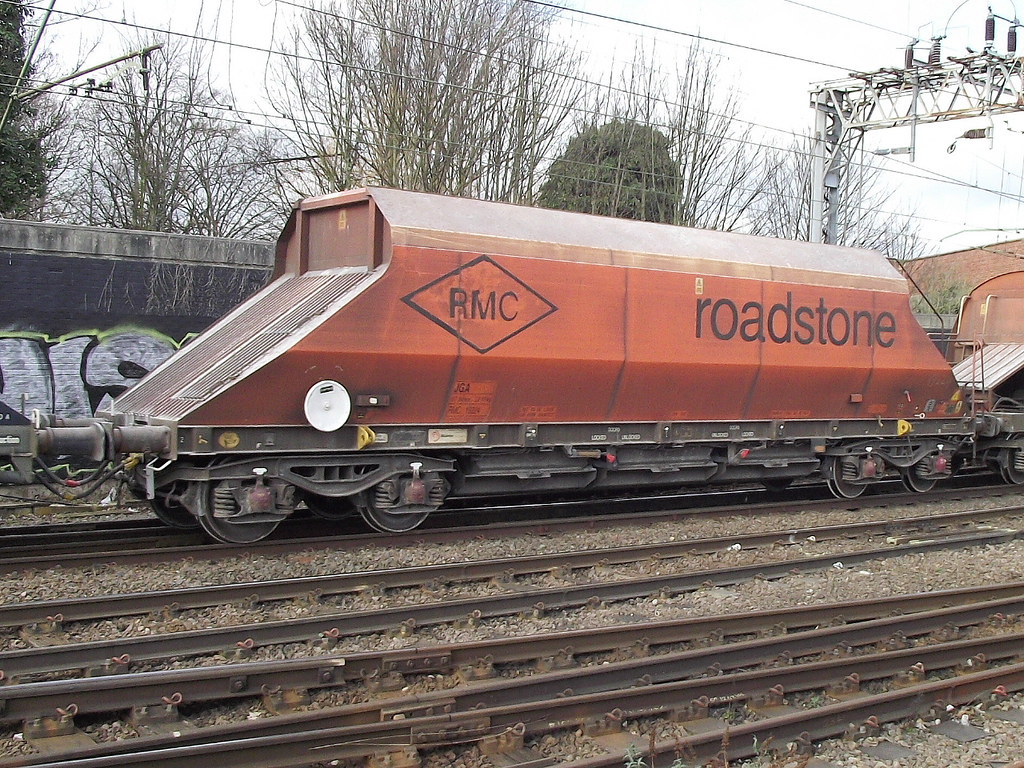
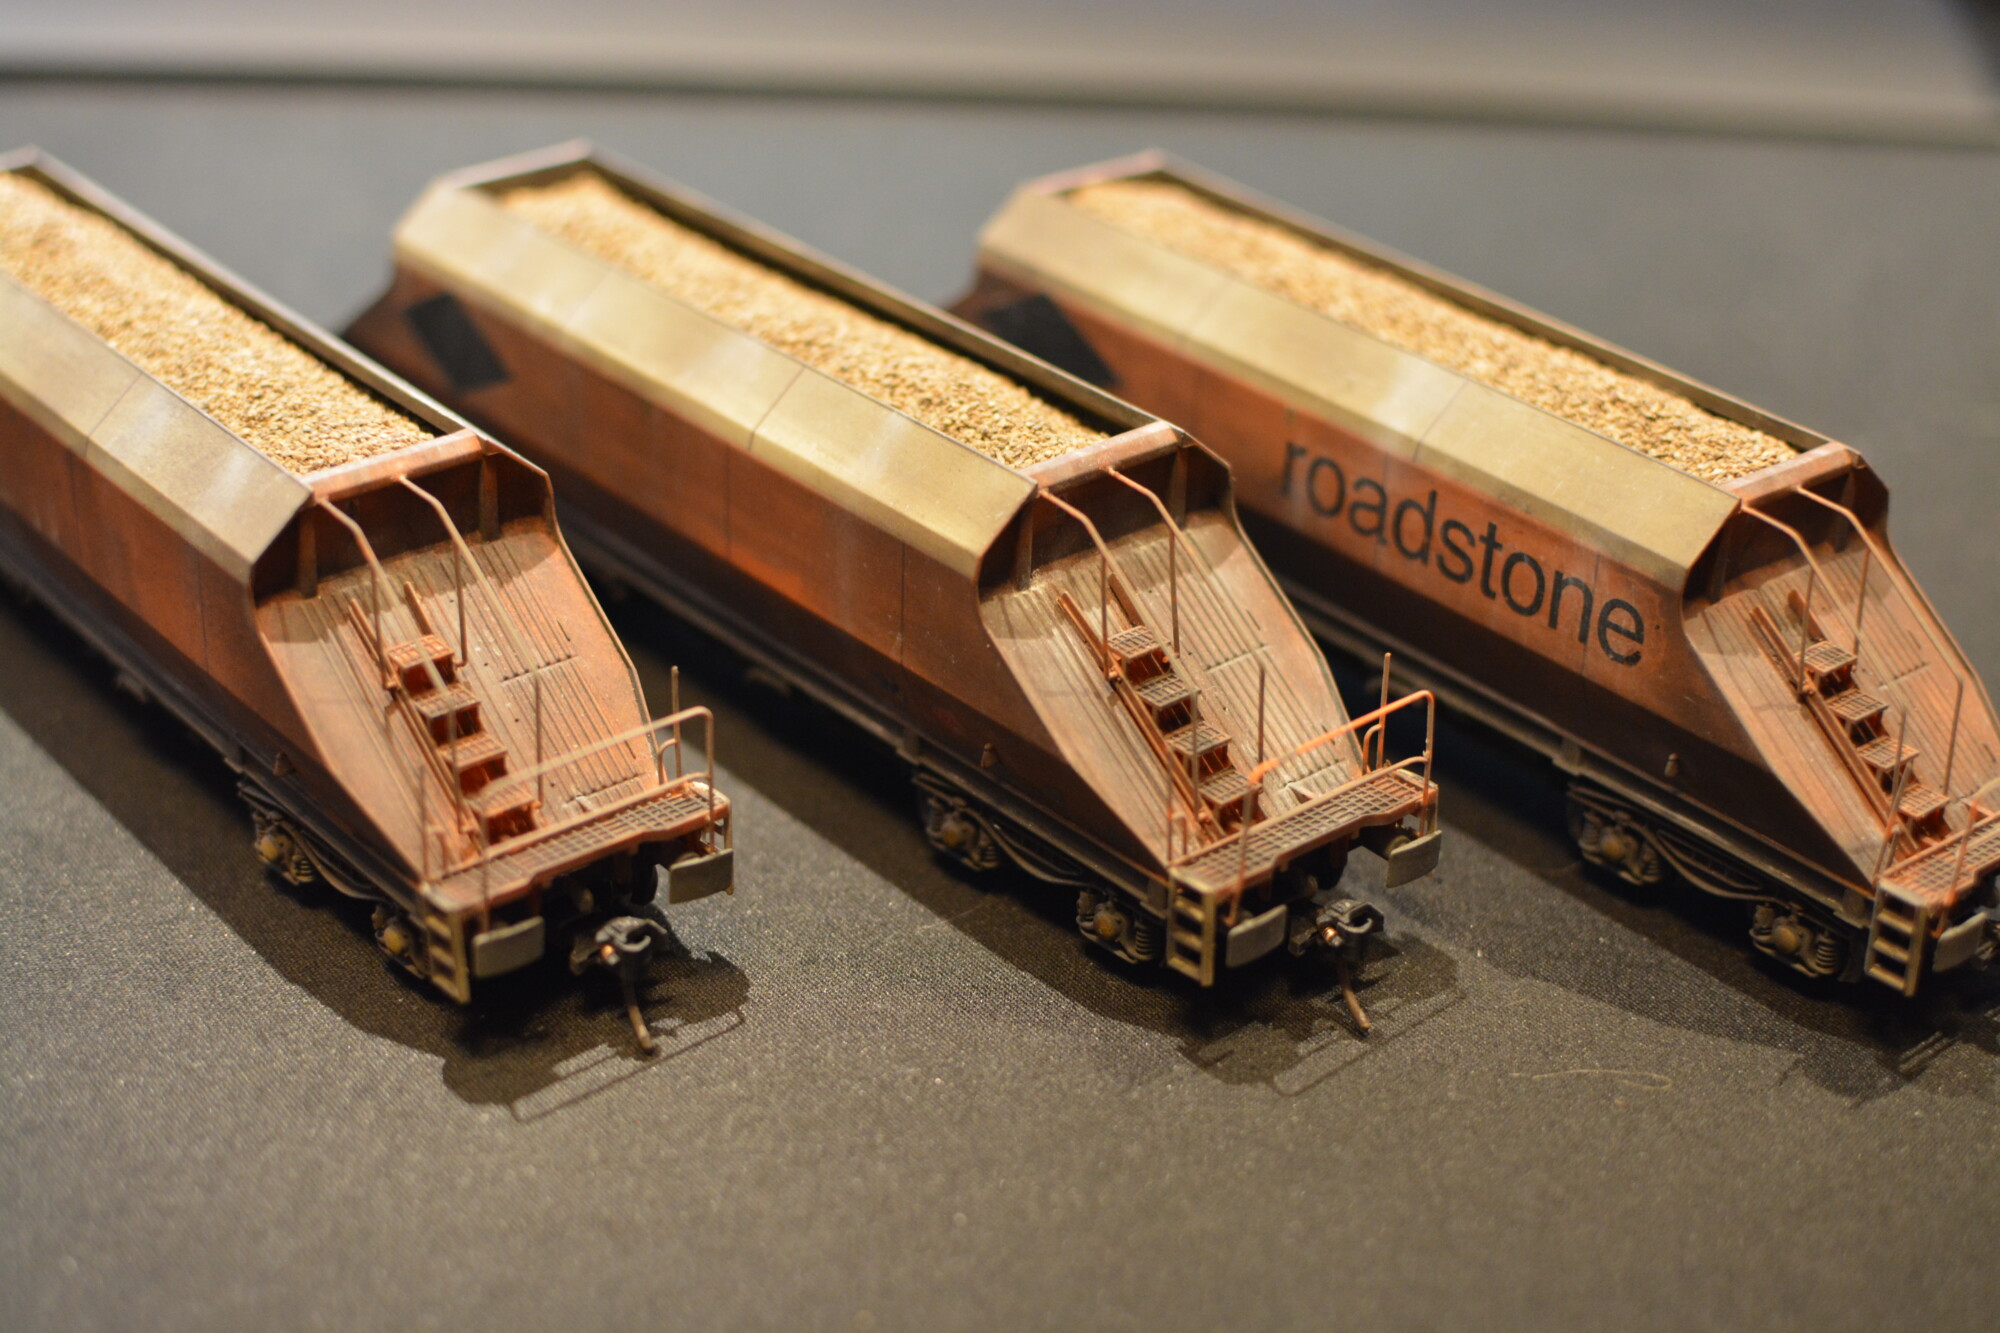
There are lots of livery variations, presumably due to the wagons changing owners at least once. Below you can see four variations of the RMC livery. Also note the mixing of the RMC and Buxton Lime liveries in a single train.
The project
I thought it would be an interesting project to try and represent a realistic rake of these wagons, with livery variations, varying degrees of weathering, and a unique set of TOPS running numbers. With that in mind, I purchased some weathering powders, extra transfers and numbering panels. The goal was to:
- Apply a variety of transfers / coverings to represent the various versions of the RMC / Roadstone livery.
- Renumber five of the RMC and one of the Buxton Lime wagons, meaning they’ll each have a unique TOPS number.
- Weather the wagons to a level seen in the photos above.
- Fit realistic stone loads in the wagons.
Livery variants
I decided to represent the four versions of the RMC / Roadstone livery. These are:
- Original RMC (RMC logo inside black diamond).
- RMC with “Roadstone” text added.
- RMC blacked-out (RMC logo with the diamond filled-in in solid black).
- RMC blacked-out with “Roadstone” text added.
I found Precision Labels did a nice-looking decal sheet for RMC Roadstone wagons, as well custom TOPS panels where you specify the TOPS code, operator code and wagon number, all at a decent price. John at Precision Labels was very helpful and produced some custom sheets with only the bits I wanted on them.
To apply the “Roadstone” text I followed the usual transfer application process – soak in water until the transfer releases from the backsheet, manoeuver into position with a cotton bud, and then use another (dry) cotton bud to to wick away the excess water, until the transfer sits down nicely on the wagon body. Once dry, I then very carefully went over the transfer with a light coat of Decalfix, to help it stay in place when applying the weathering powder later on.
I forgot to take a photo of the wagons with the decals applied before they were weathered, so scroll further down to see the end result.
Renumbering
The first step in this process was to remove the existing TOPS panels. This was done by rubbing the factory-applied panel with a cotton bud dipped in isopropyl alcohol. This had varied results – one some of the RMC wagons it came off easily, but on others it required a bit more work, and this meant that the underlying orange paint came off. However this ended up being disguised when the wagons were weathered.
I applied the new TOPS panels in using the same technique as the other transfers.
Weathering
I bought two sets of weathering powders from DCC Concepts: Shades of Grey and Locos and Wagons a while back. This gives me a wide range of colours suitable for dirtying up locos, rolling stock and pretty much anything that’s near the railway!
For these wagons, I ended up using a mix of the “Rich old rust”, “Brake dust” and “Yellow clay” to represent the dirt that builds up on the ends and lower half of the wagons, and “Pure white” for the stone dust that can be found on the tops and sides.
When applying the powder, I sat at my computer desk, with several photos of the prototype open on-screen. This means I could constantly refer to these images so I didn’t deviate too far from reality. I tried to highlight a few things:
- More dirt on the ends of the sides of the wagons than in the middle.
- Really dirty body ends.
- The odd vertical streak of brown dirt on the body sides.
- White patches of stone dust on the top parts of the body, with some white streaks continuing down the body sides.
When I was happy, I gathered all the wagons together on the patio and applied a couple of passes of Humbrol matt spray varnish (item #AD6049) to seal the models and fix the powders in place. What I didn’t realise is that the varnish would dramatically tone down the lighter powders that I’d applied – so much so that the white stone effects almost disappeared! So I went back and reapplied these, making sure to make them a bit “too heavy”. After a second coat of varnish, they ended up looking about right.

Fitting stone loads
Of course, these wagons need to carry something! Whilst they do spend half their lives empty, I wanted to try my hand at fitting realistic stone loads to them to add interest. I already had some fine stone ballast in various colours, so I washed a tub of it and dried it in the oven to get rid of the dust (a tip I picked up from Everard Junction) and set to work. I decided fairly early on that these loads would not be removable, as the shape of these wagons (with the upper body sides coming back in) means it would be basically impossible to insert or remove a separate piece. Additionally, the body shape means that the “ice cube tray” inserts inside the boxes these models come in do not extend down into the body as with most other wagons, so therefore there is no need to remove the loads when putting the models away.
My (old) commute to work came in handy when deciding how the wagons loads should look, as it turns out I’d taken two photos of these (or very similar) wagons from the overbridge at Reading station:
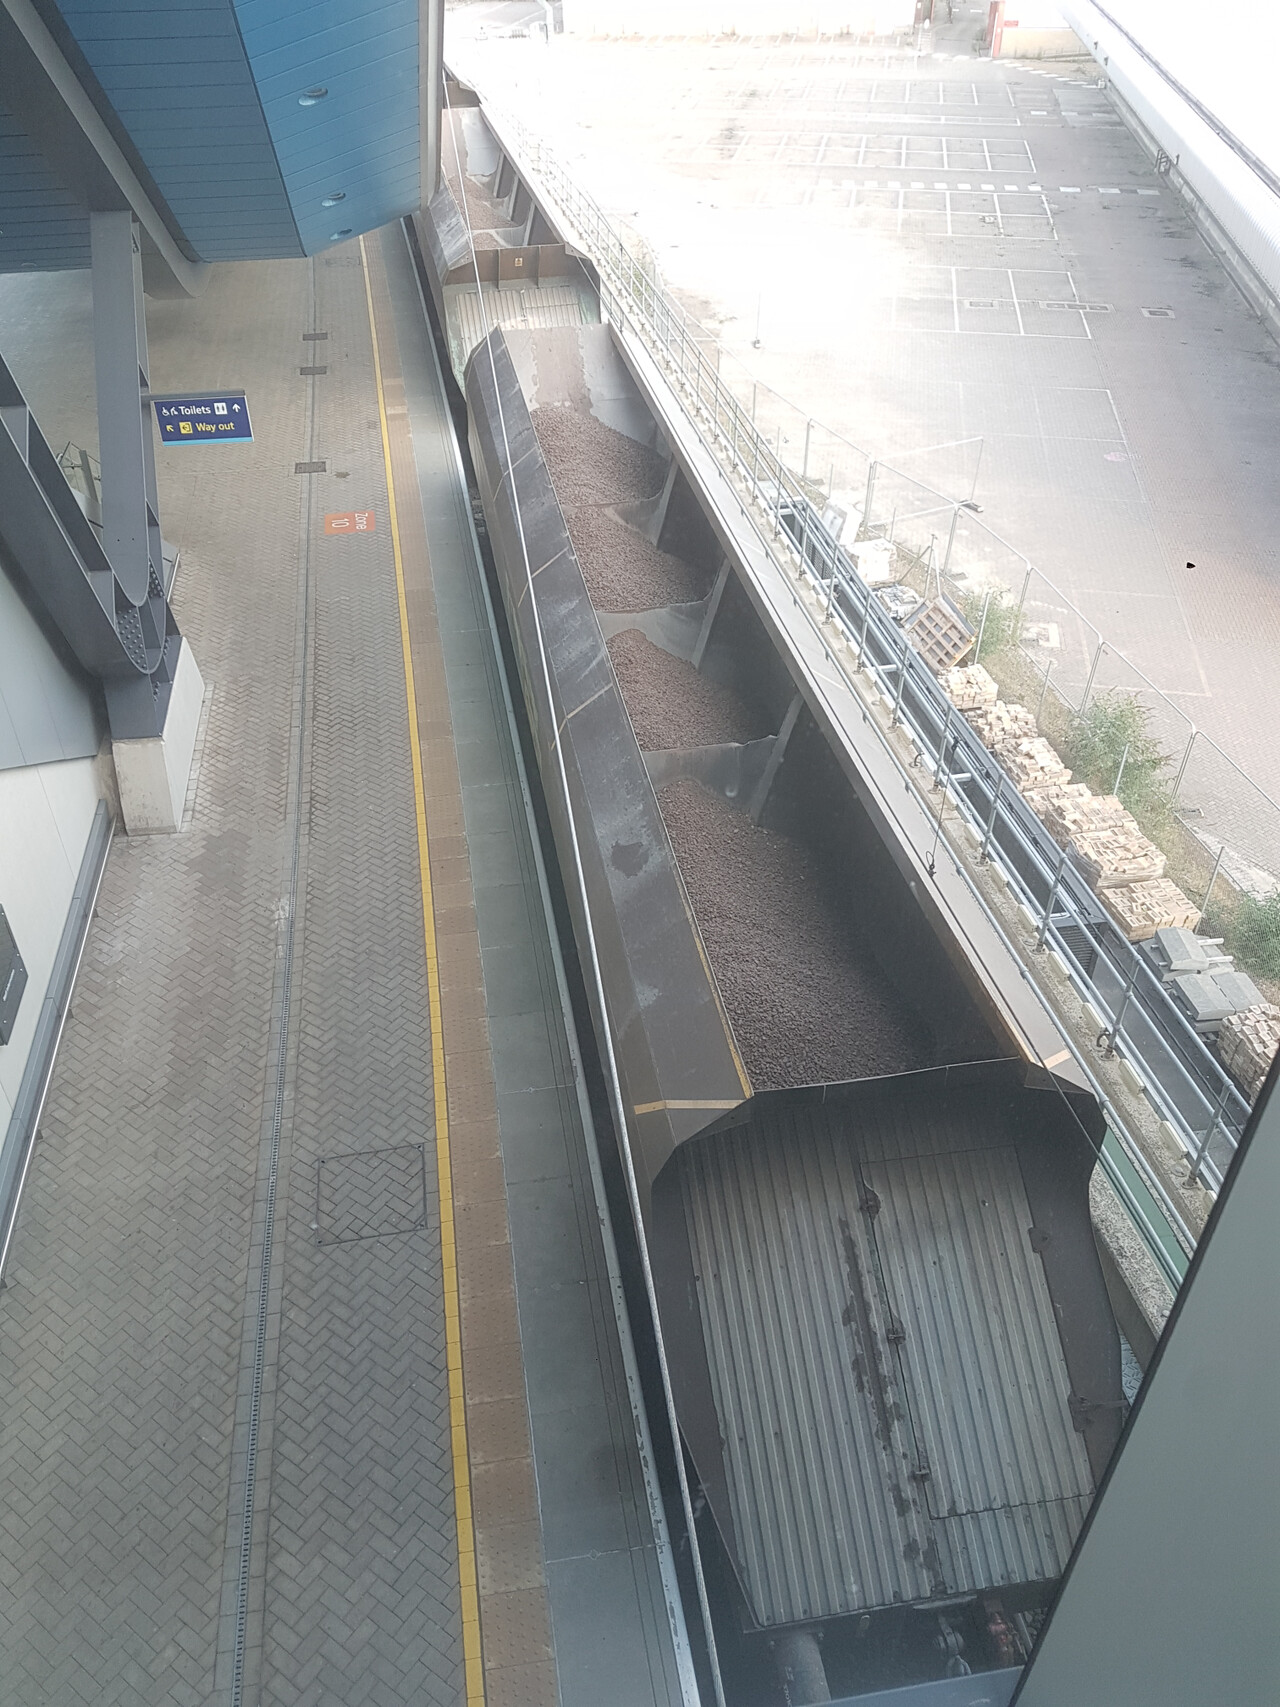
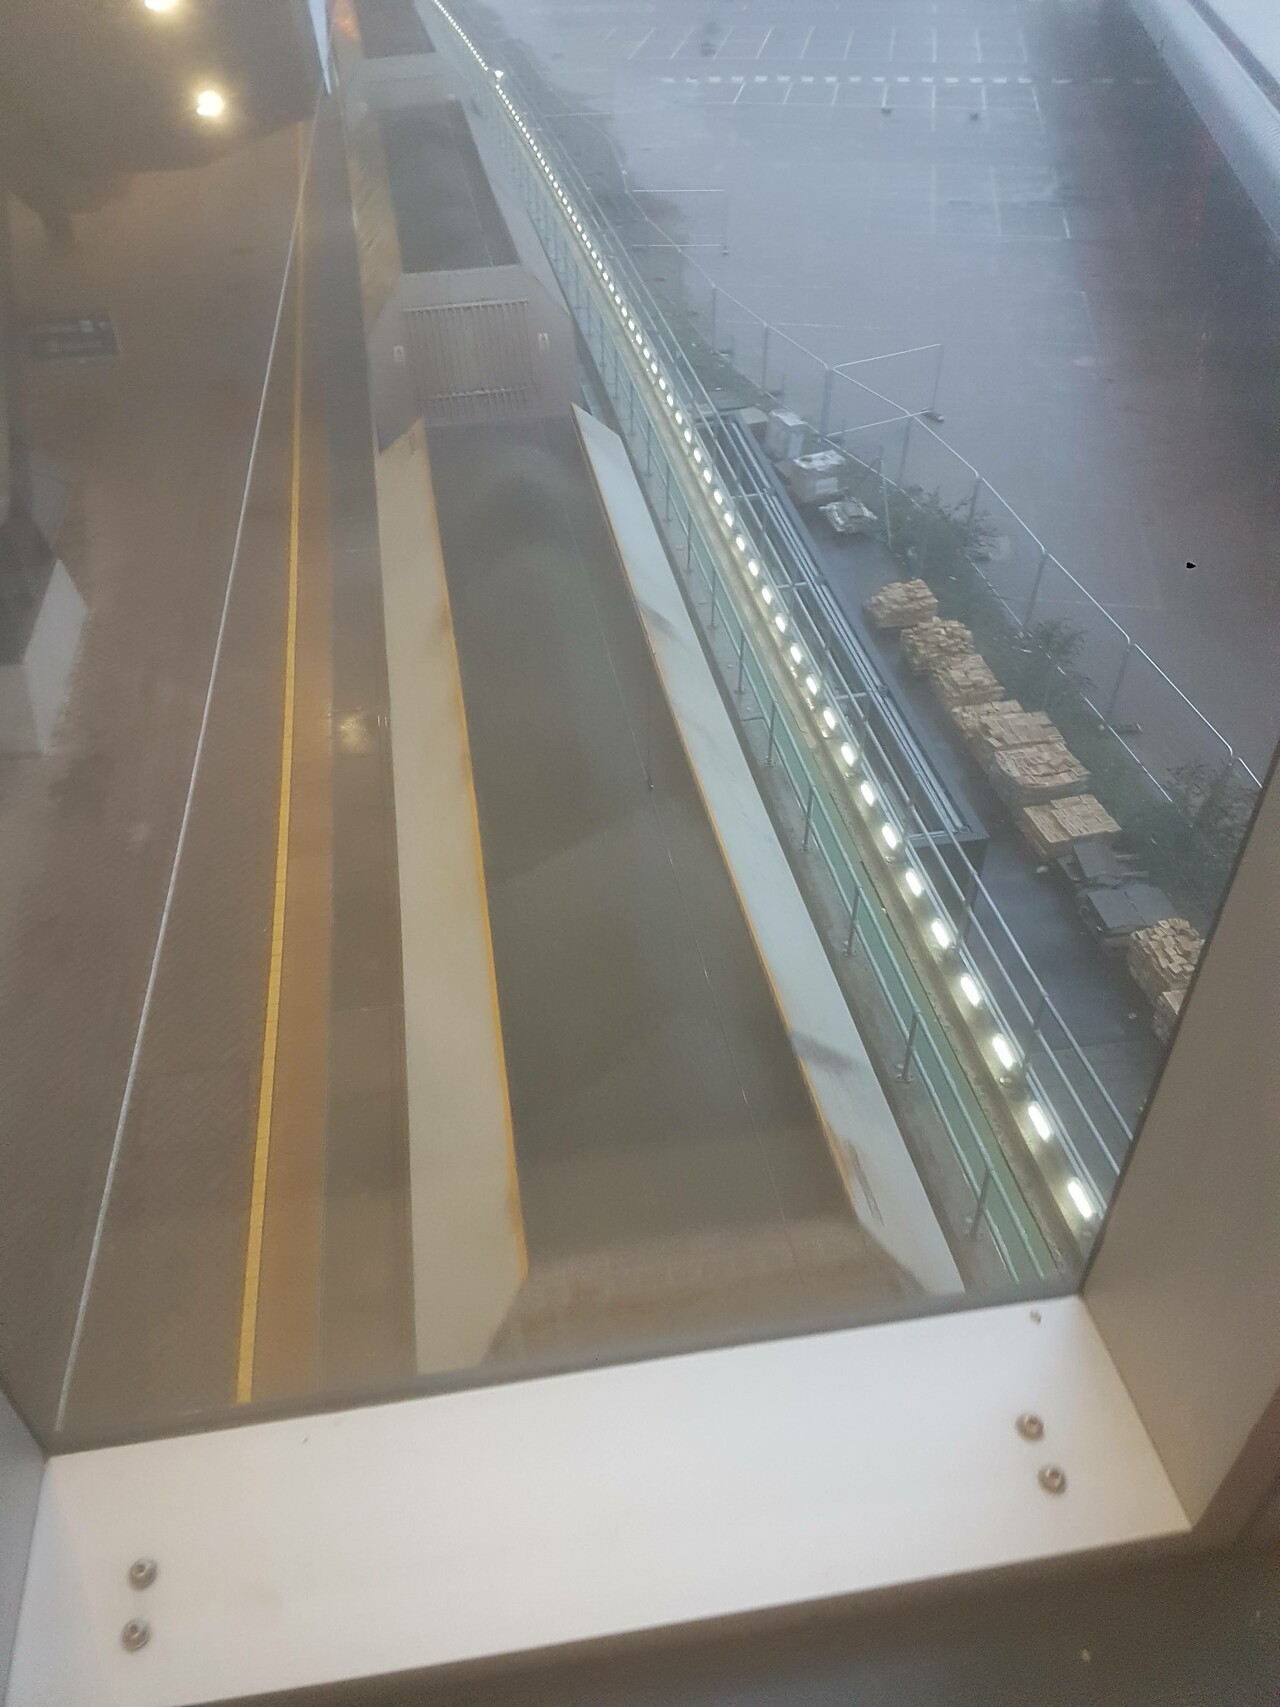
Granted, the quality isn’t brilliant as I was probably in a rush, and the reflections from the glass don’t help, but you can see in the full hoppers how the stone sits with a ridge down the centre, with the odd bump where the level is higher. I therefore tried to reproduce this by gluing a rectangular strip of thin (0.25mm) plasticard in place, making sure to cut it about 4mm too wide, which meant it bowed upward naturally, forming the shape I was after.
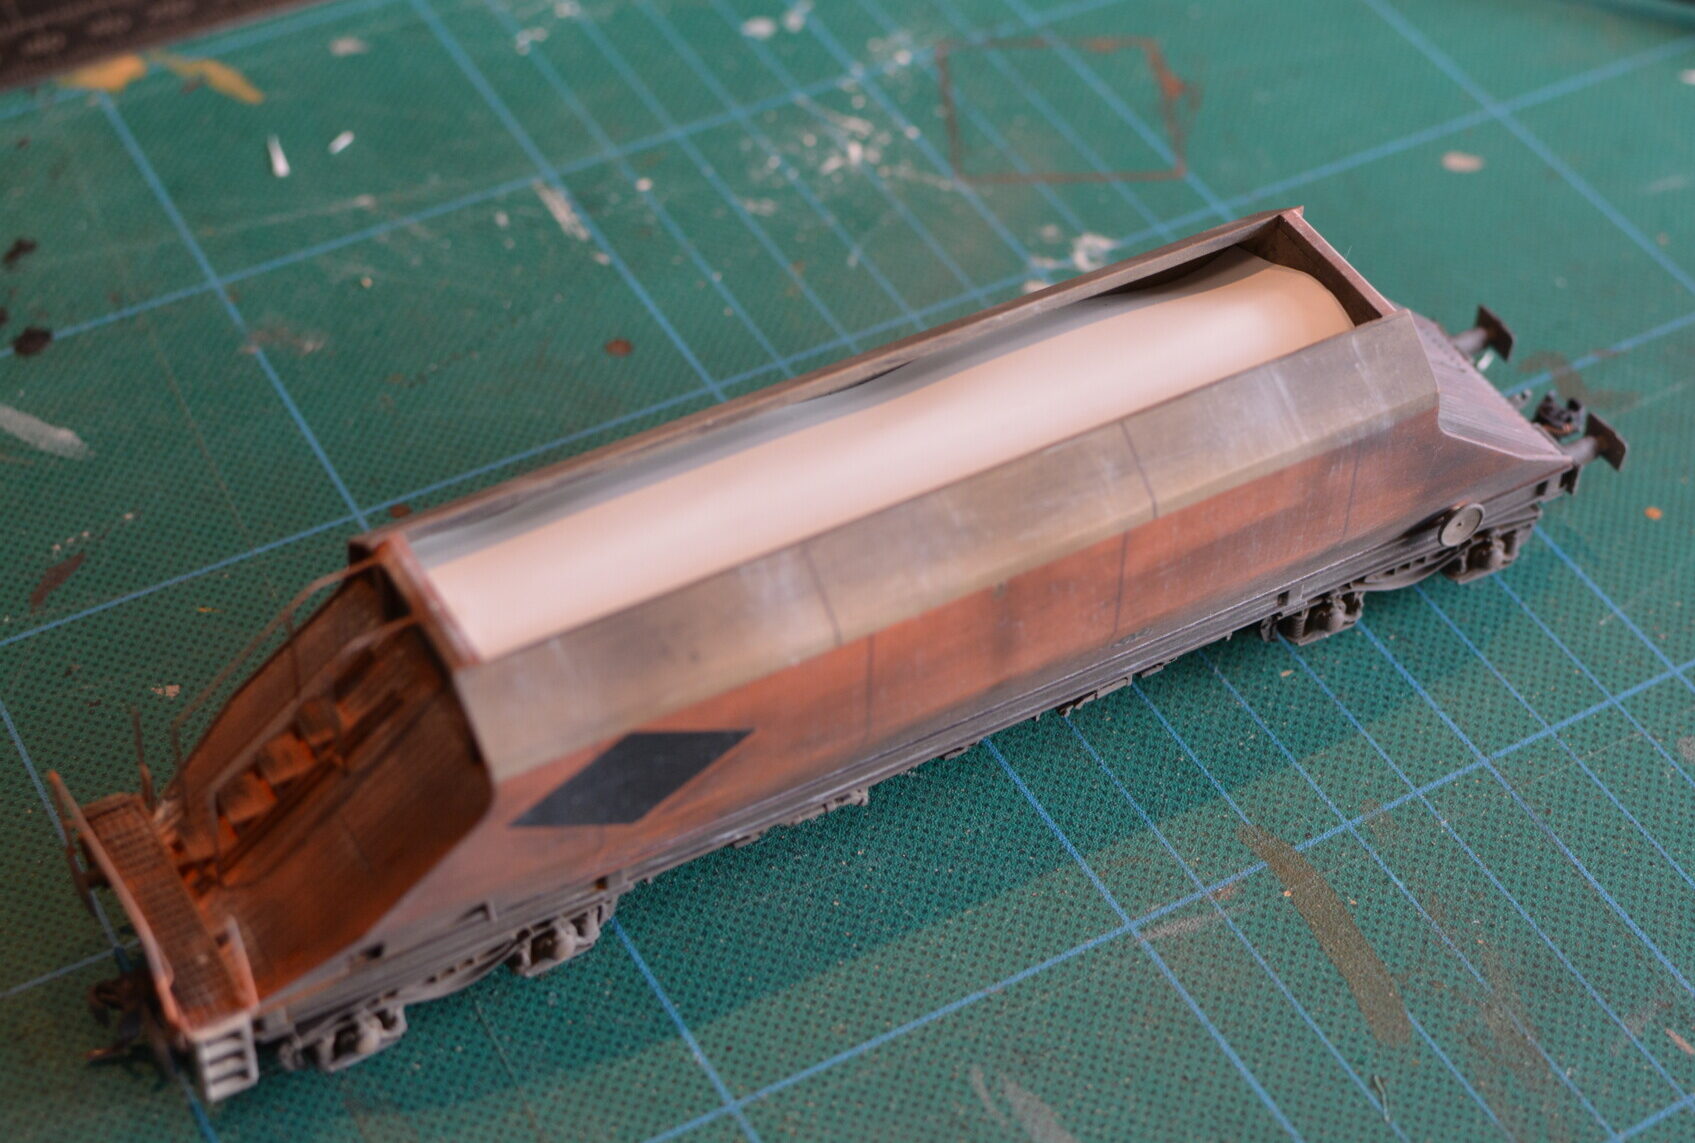
Once the glue had dried, I then applied the stone load using a similar method as I would when ballasting track. I first applied a light coat of slightly diluted PVA glue to the plasticard (this is not something I would do when ballasting, but I needed something to stop the stone from falling down away from the centre ridgeline). I then carefully dropped the ballast in place with a teaspoon, and arranged it how I wanted using a dry brush. Finally, I applied a generous amount of 50-50 PVA / water mix and let it dry for 24 hours.
The end (of the train!)
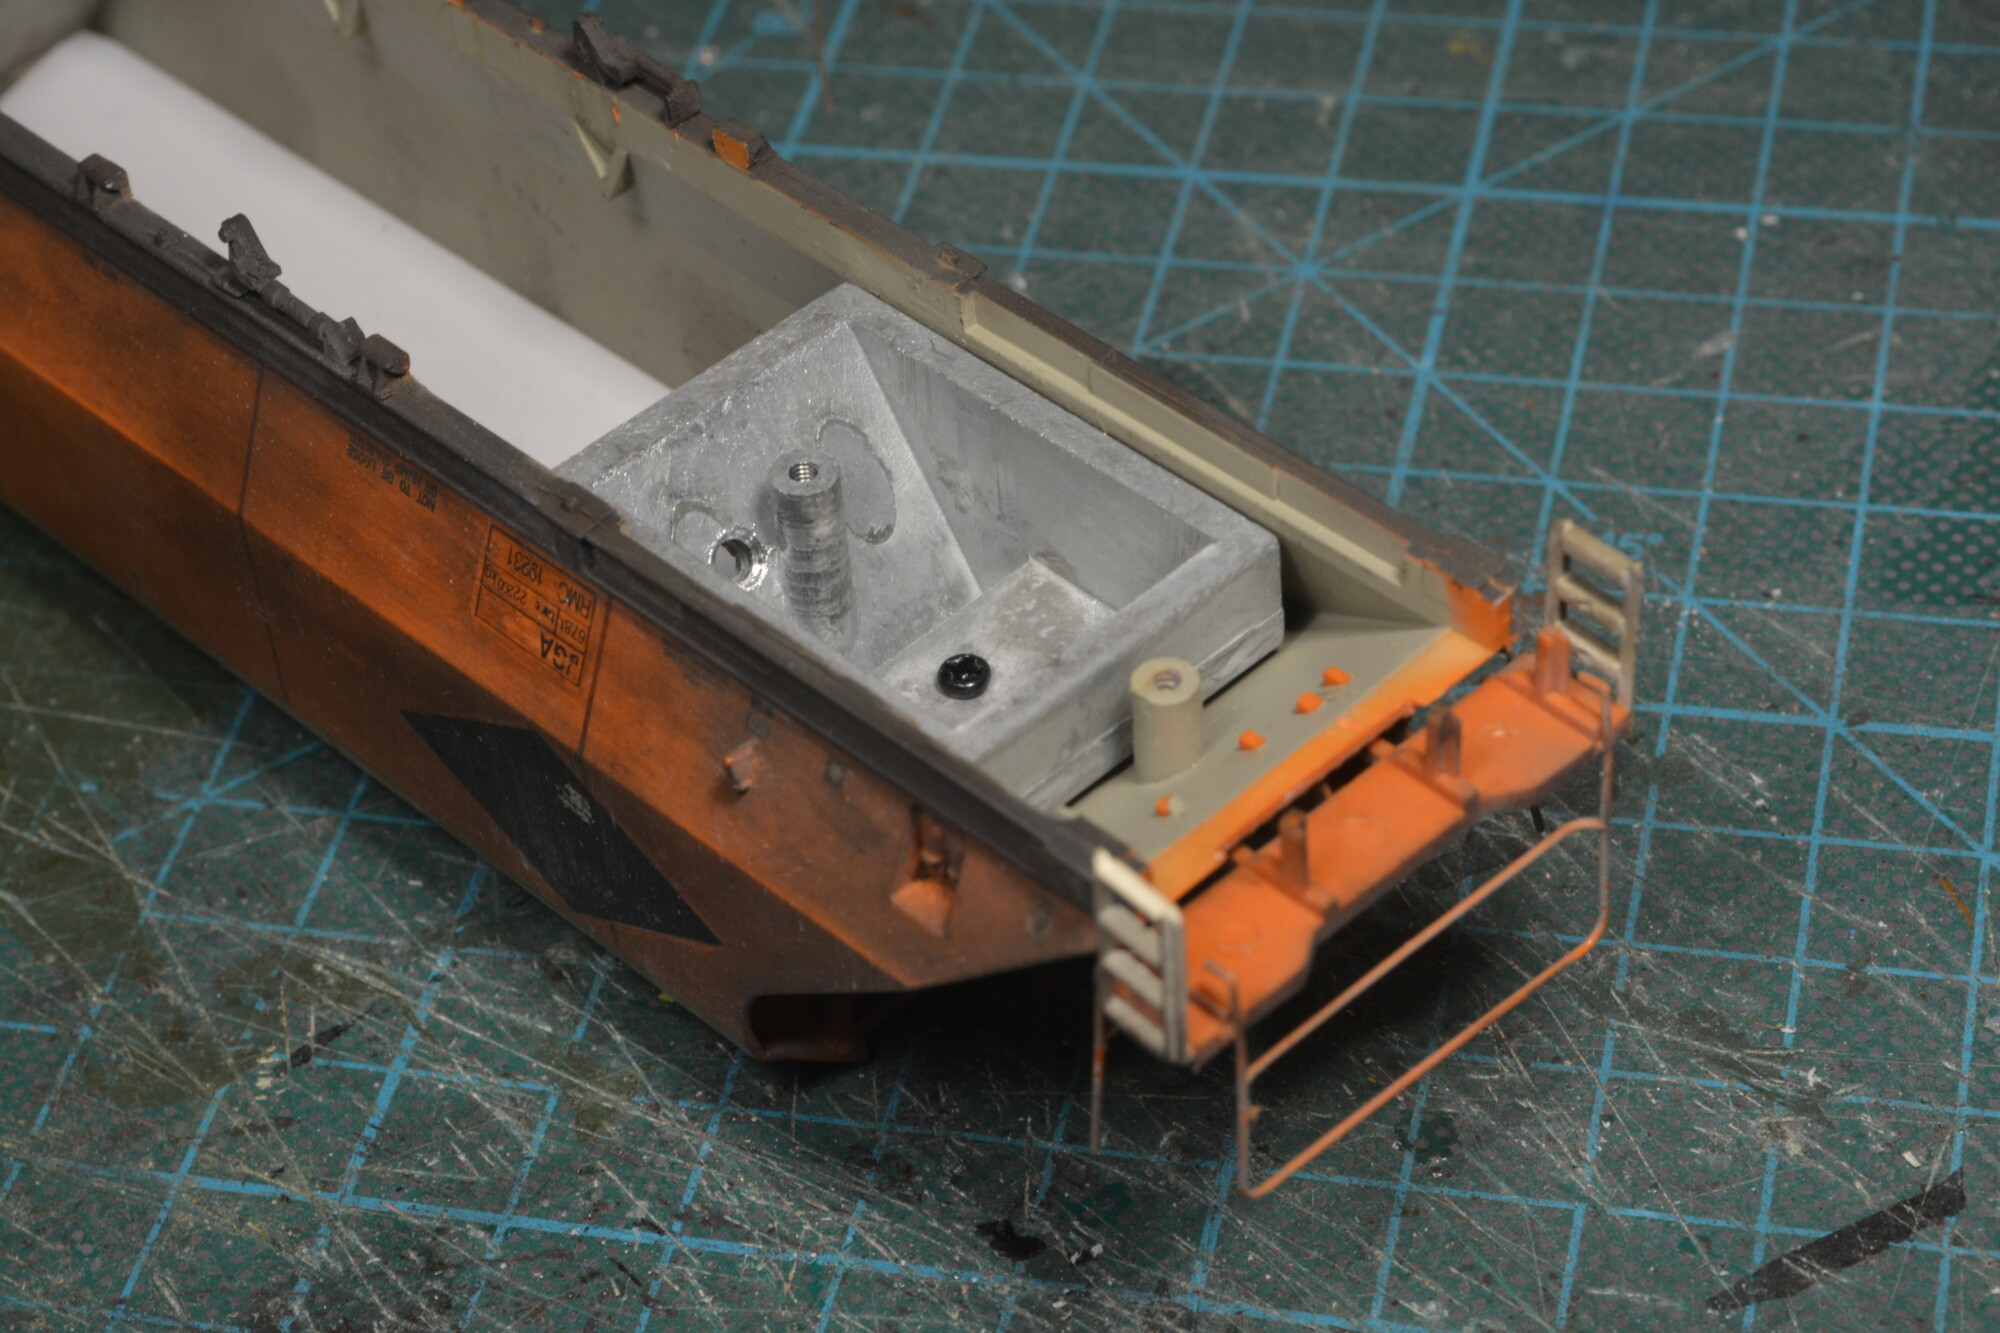
With the stone loads fitted, I realised that there is an enormous amount of space inside these wagons for electronics, so I decided to fit a flashing End-of-Train (EoT) lamp to one of them. The lamp and flasher circuit would use the exact same hardware as in my FEA wagon tail lamp install, but with a twist: Instead of using a spare decoder, I’ve used a home-made one, based on Paul Harman’s excellent DIY DCC decoder. This worked out much cheaper (about £3 for the components). I’ll go into more detail about these decoders in a future post, as it’s a bit much to cover here, but they’re a great way to add DCC control of functions to a model without breaking the bank.
Pickups
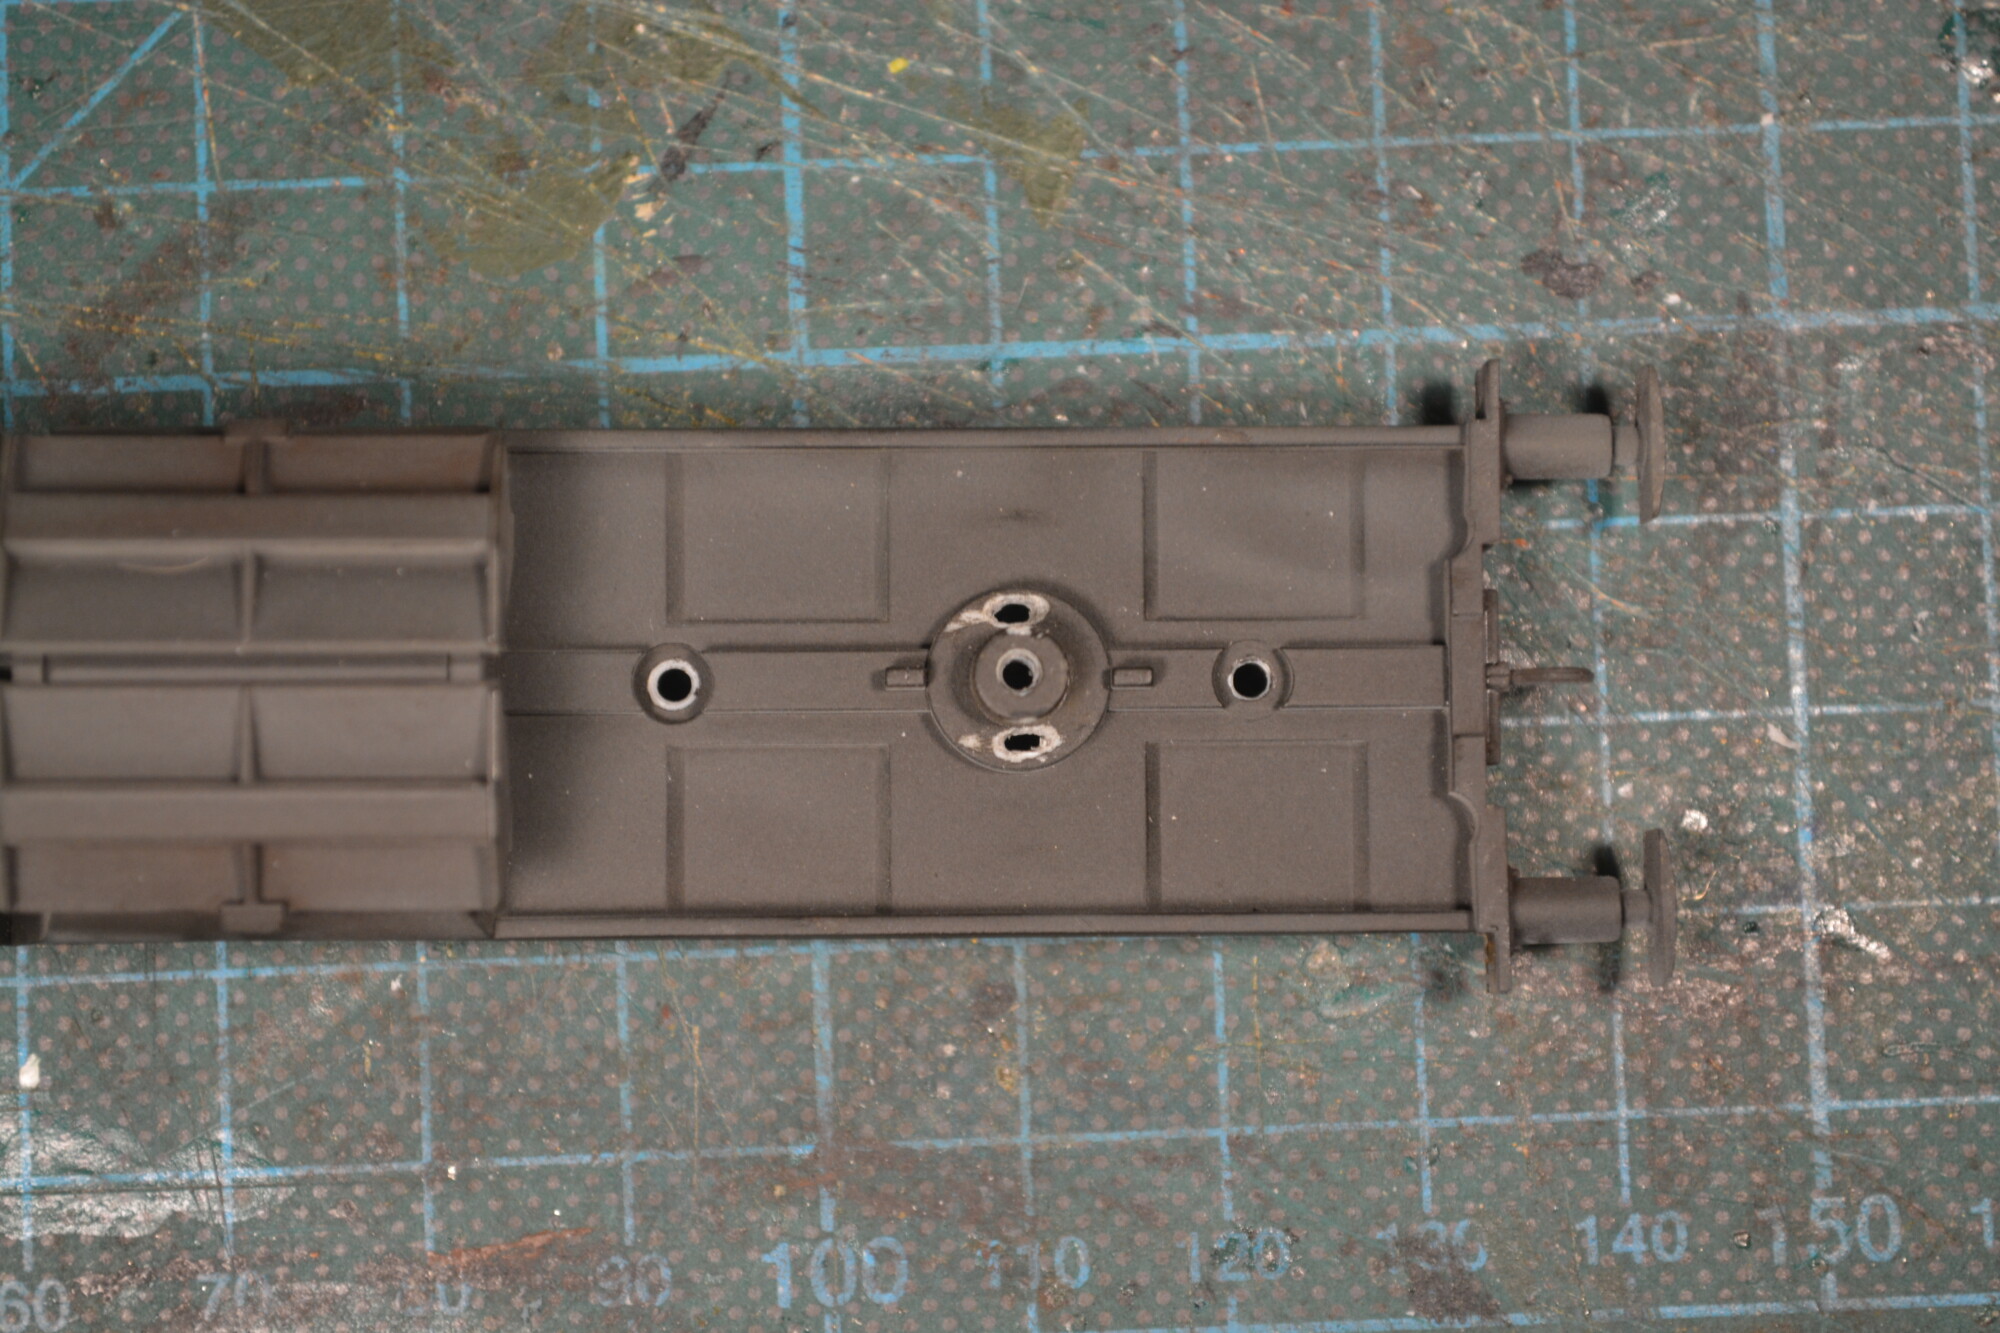
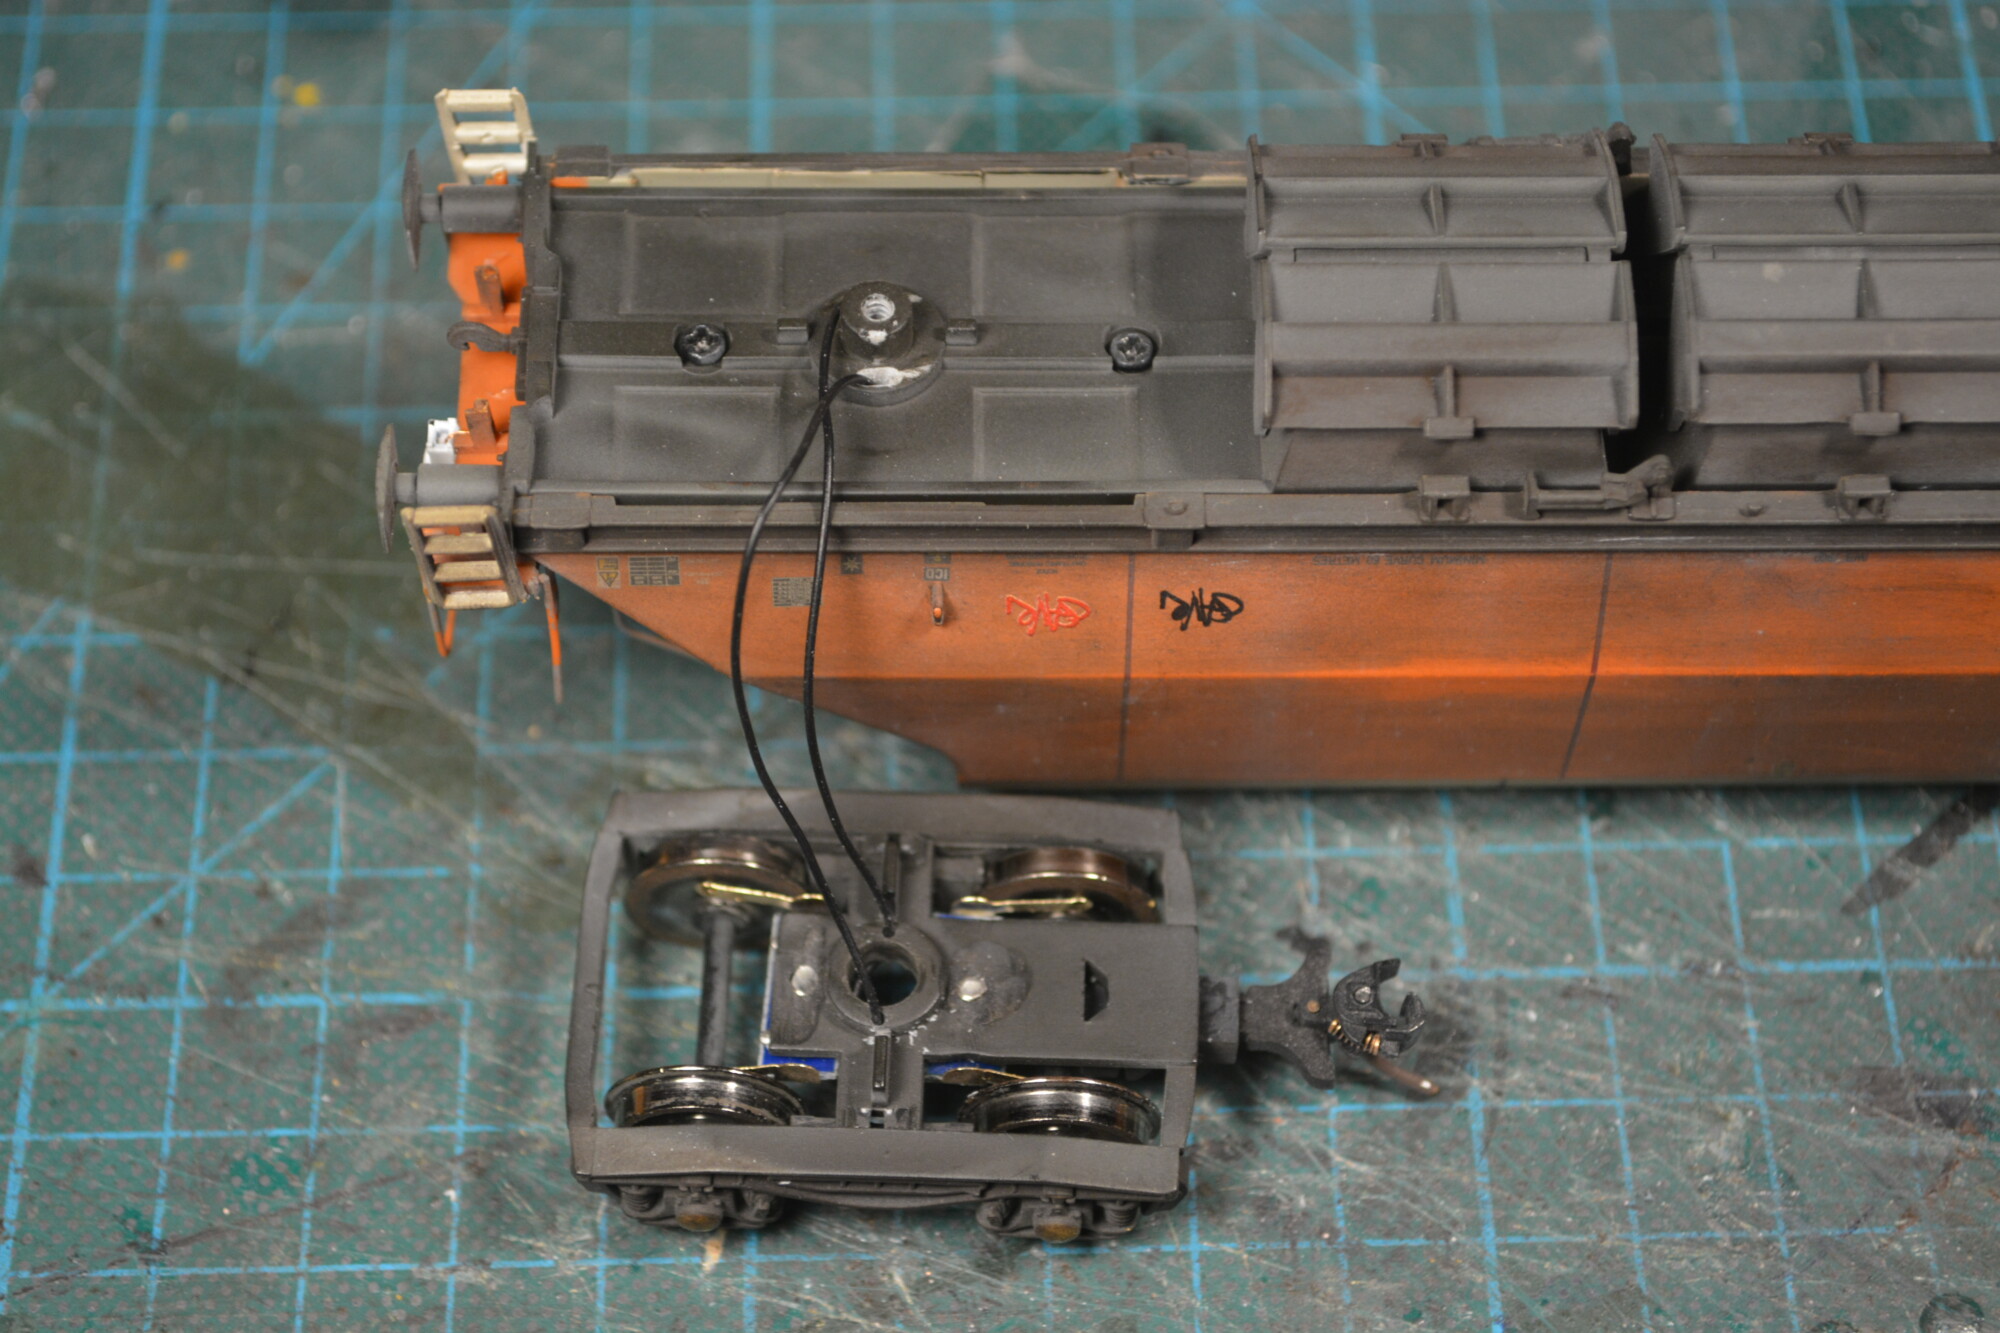
To collect the DCC feed from the rails, I fitted a pair of DCC Concepts wiper pickups to the rearmost bogie. I bought a pack of these a while back and hadn’t used any up until now, but I thought this was a good project to test them on. They will generate a bit more friction than the pickup springs on axles method, but these wagons are nice and heavy (especially after fitting the stone loads), so this should not be an issue.
First I cut two narrow slots in the chassis. The wires from the bogie will pass through these on their way into the wagon. They are slots rather than holes so that the bogie can rotate freely.
I then drilled holes in the bogie that line up with these slots, and fitted the wiper pickups. They are linked by offcuts of component wire (chopped-off legs from resistors / LEDs / whatever). The DCC feed then travels via the two black wires through the holes drilled in the bogie and chassis and up into the body. I chose to take each wire across the centre and into the hole on the opposite side, as this forms a nice little dog-leg of slack that allows the bogie to rotate freely.
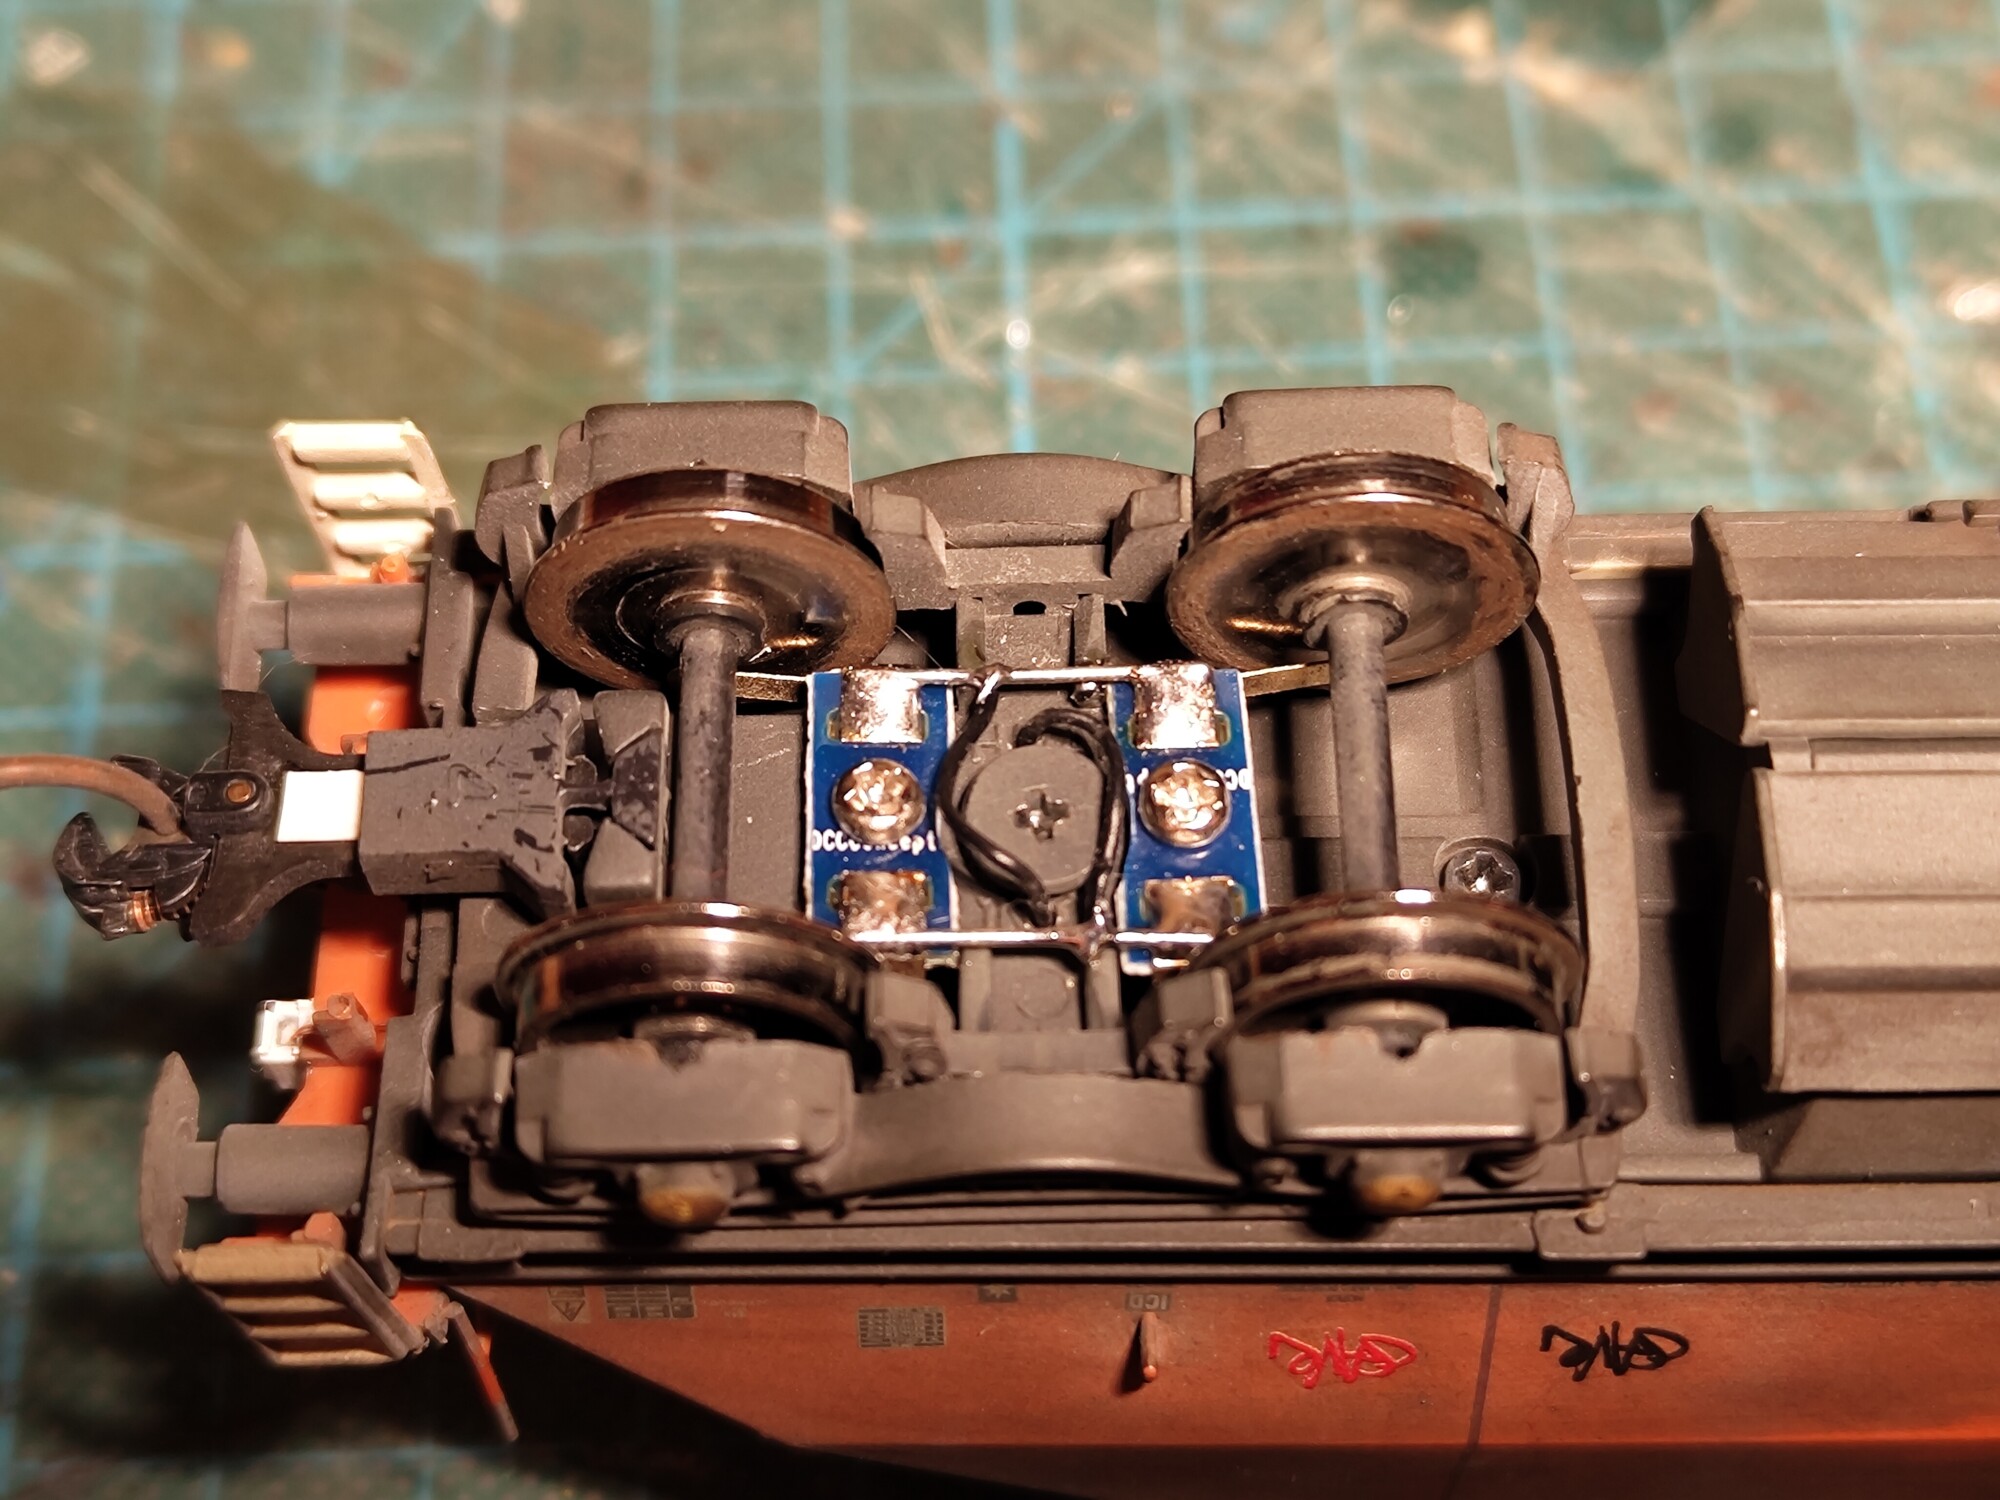
Once inside the body, the wires needed to pass through one of the large cast metal blocks in order to reach the centre of the wagon. This was as simple as drilling a 2mm hole in the block with the wagon (carefully!) clamped in a vice.
Finally, I had to leave a good amount of slack (about eight cm) because the way this wagon is designed means that you need to remove the bogie in order to access the screws that hold the body and chassis together. The bogie must therefore be removable. I didn’t want to mess around with a micro plug and socket, so I chose this approach instead. There’s plenty of space in the body for the slack when the bogie is fitted.
The decoder
As I mentioned earlier, I’ll do a proper write-up of this DIY DCC function decoder in the near future, but for now it can best be described as a PIC12F series microcontroller mounted in a relatively simple circuit on a piece of stripboard. I’ve taken Paul Harman’s design and modified it to add a keep-alive capacitor and a constant-current regulator on the function side.
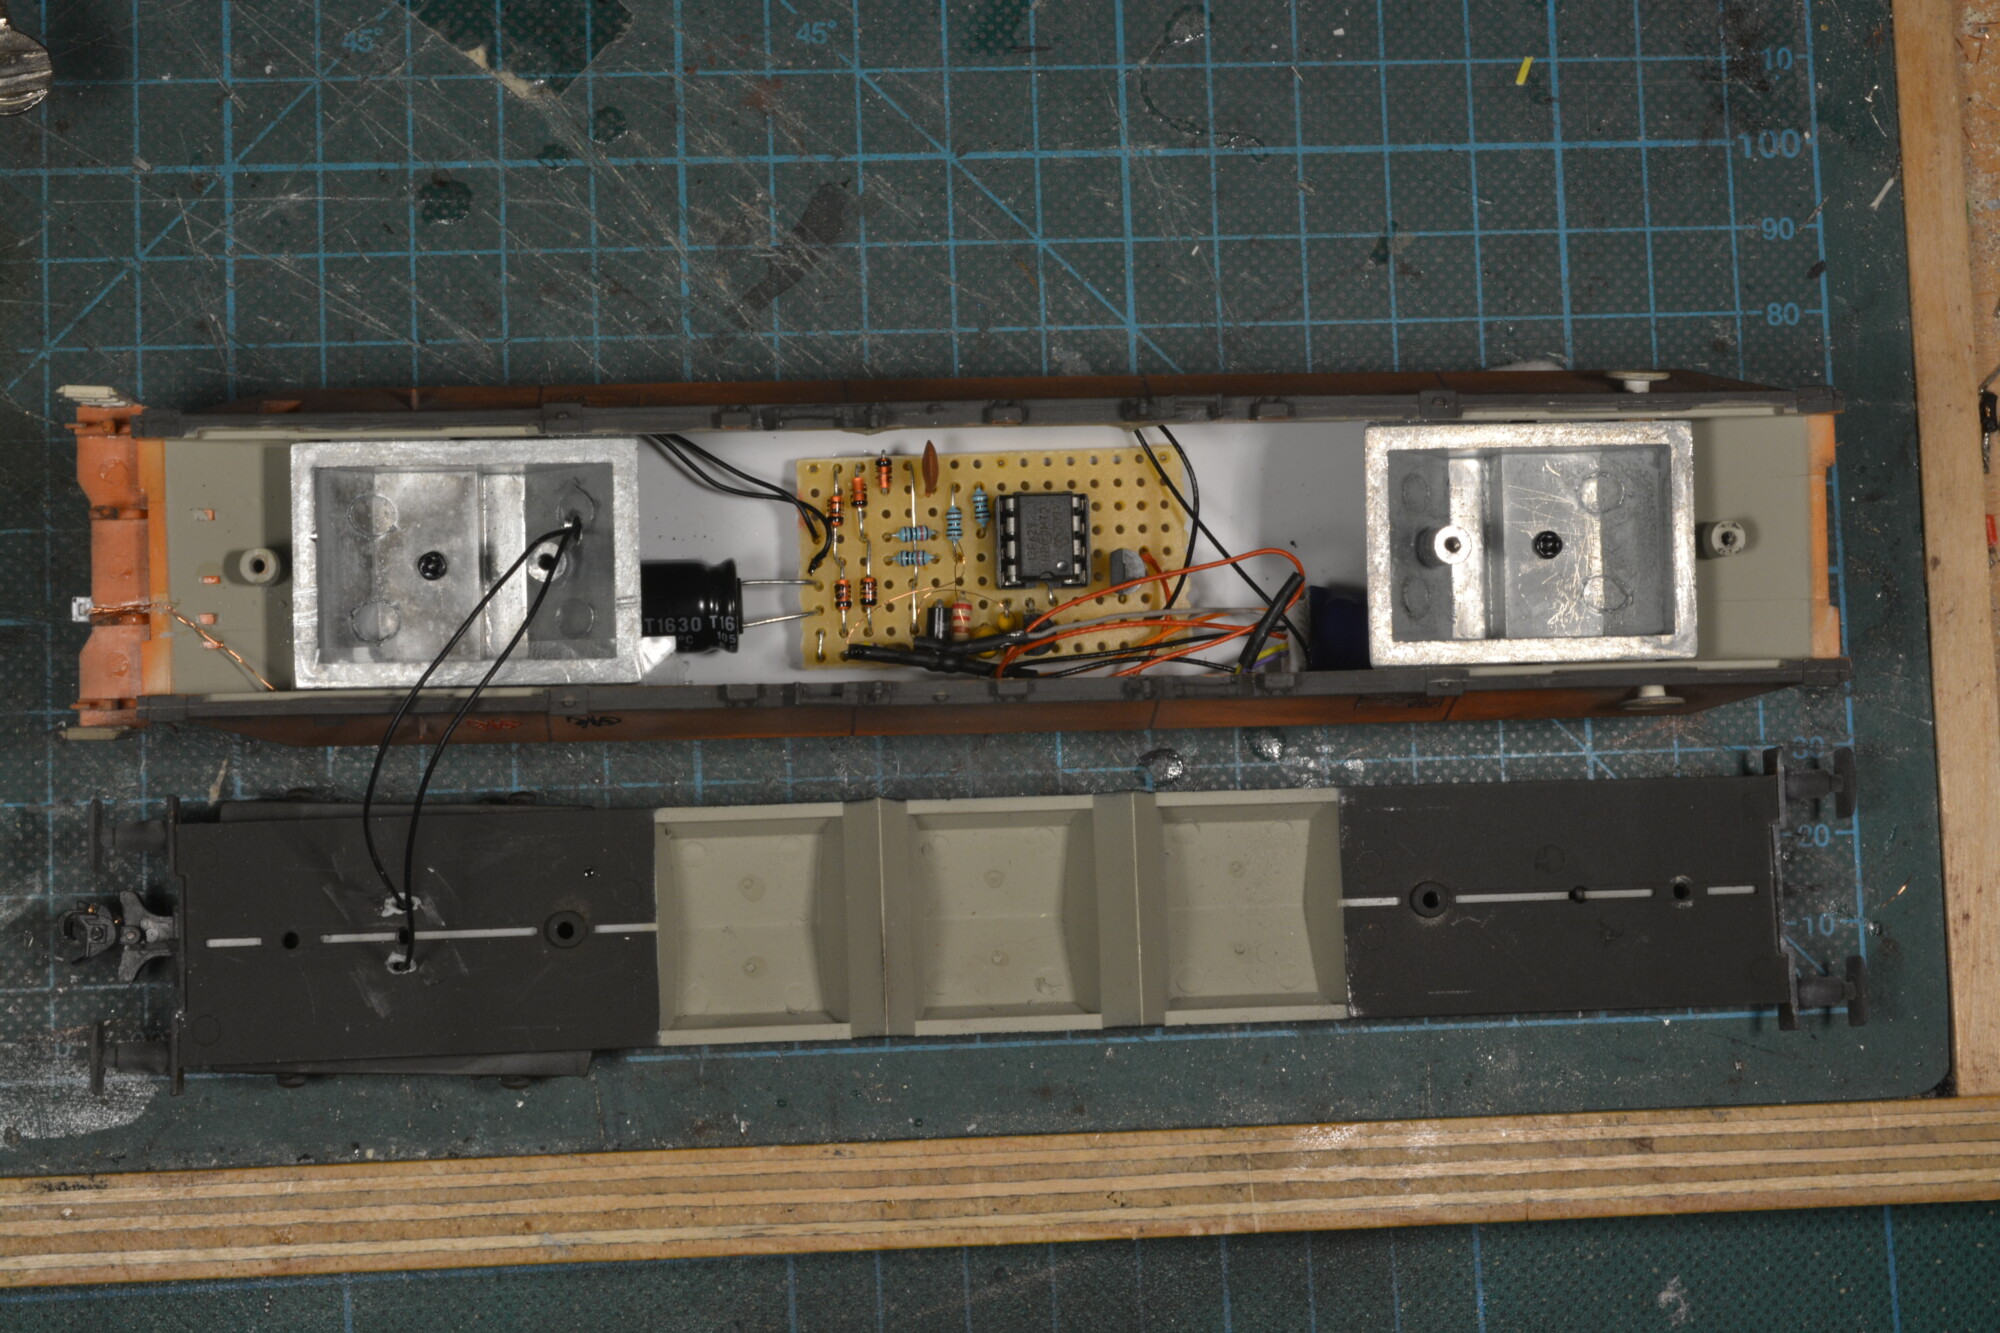
As you can see, the decoder is quite large, but it doesn’t matter in this wagon. I have plans to miniaturise the design in future by having PCBs made up for it and using surface-mount components, which are much smaller. If this works, I’ll be able to fit these decoders in the majority of my coaching stock as well!
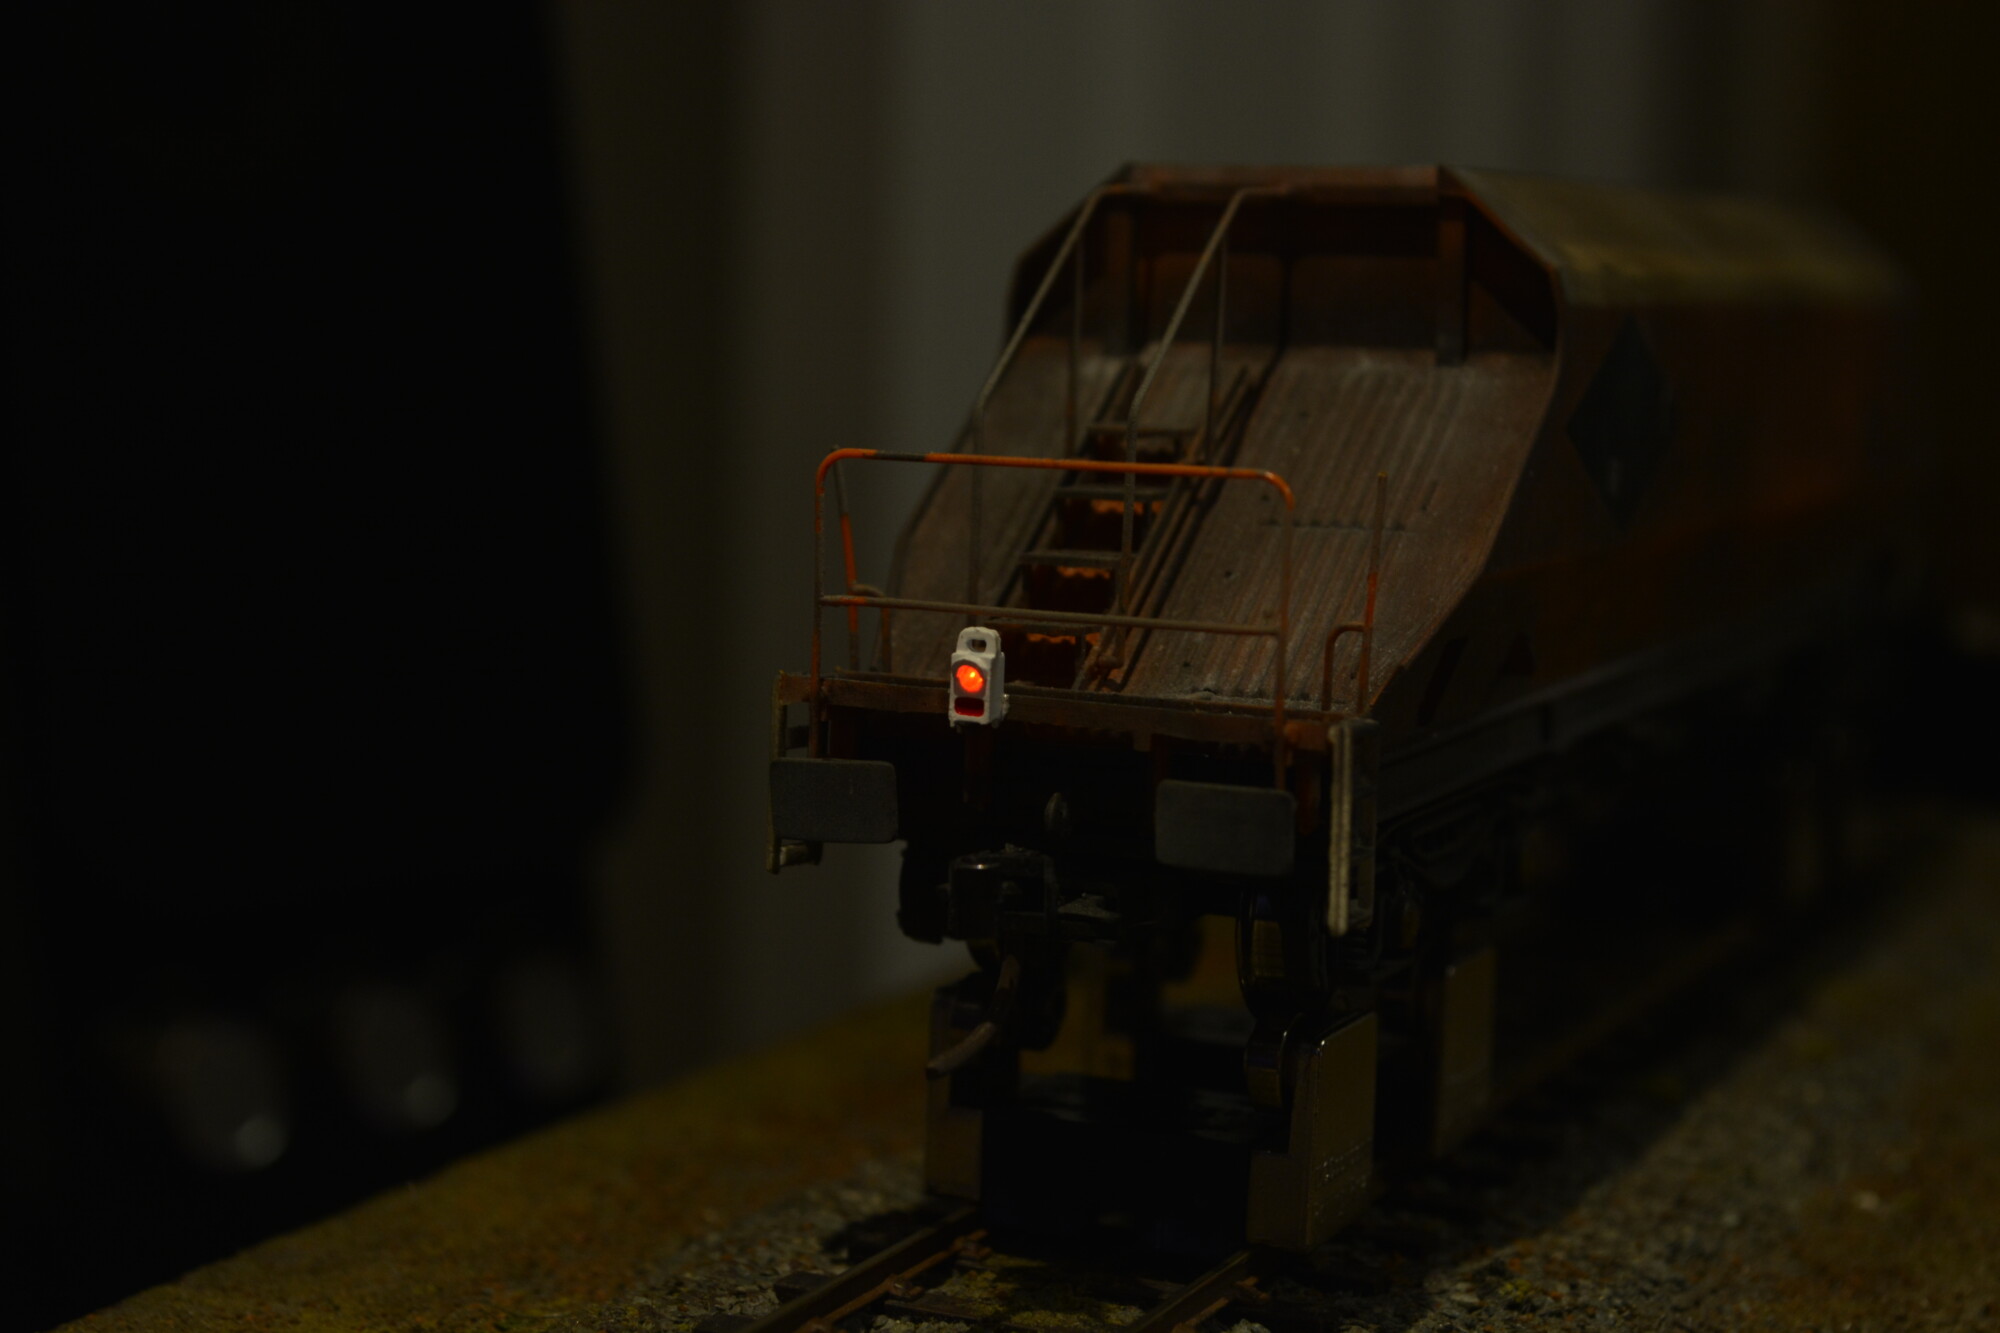
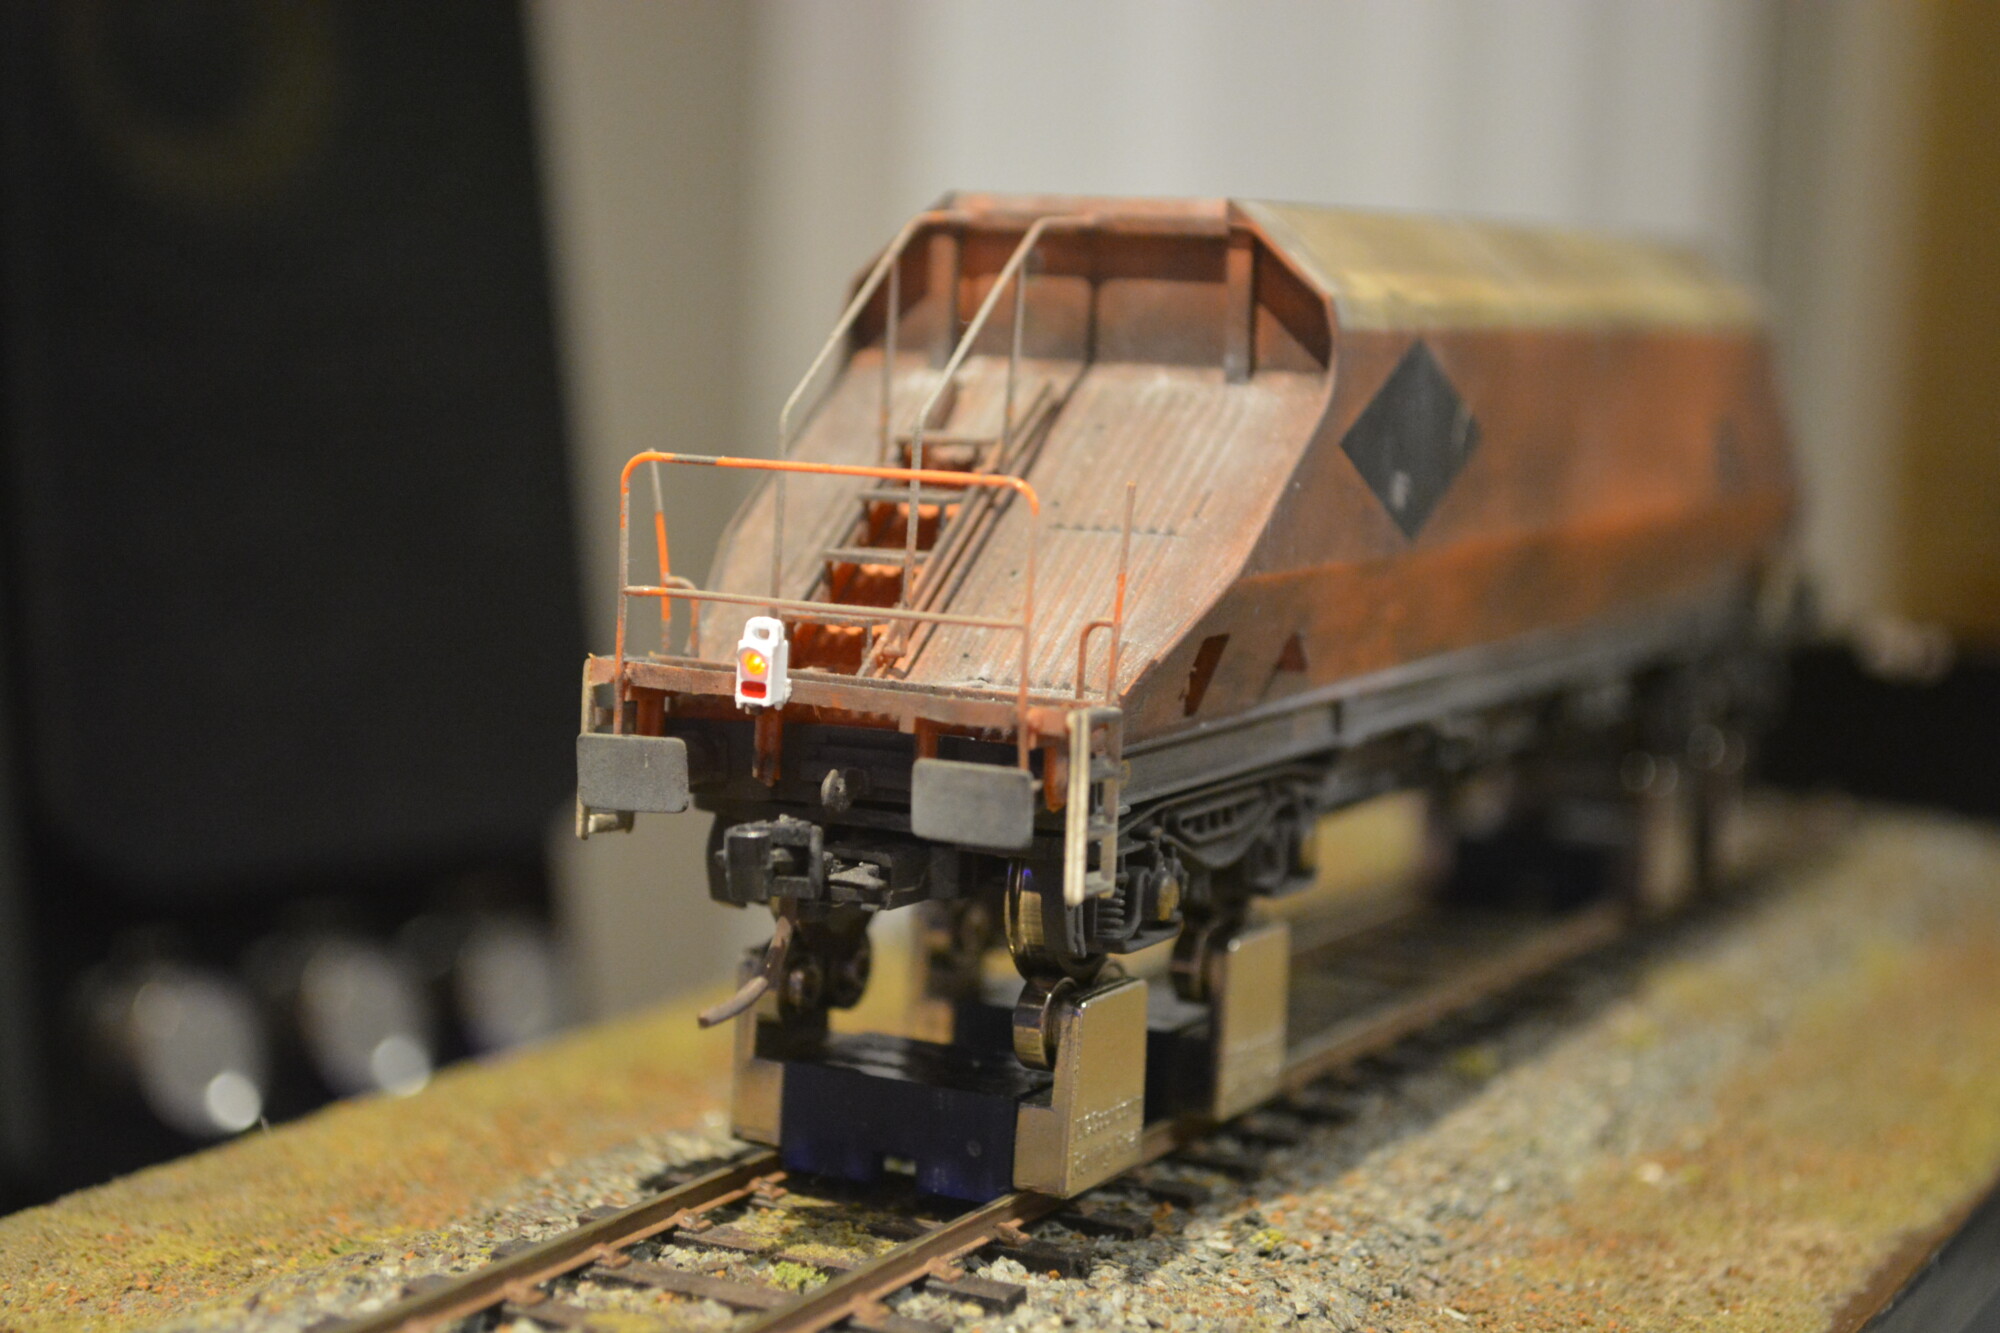
The finished wagons
This was a fun mini-project – I think the weathering on the wagons, combined with the variation of livery details, and unique TOPS running numbers really makes this rake of JGAs look the part. The controllable EOT lamp is the icing on the cake. This was my first proper attempt at weathering, and while I’m sure I’ll look back on it in a few years and see some things that aren’t quite right, I’m pretty happy for now.