
A lot has been written and said about Rapido’s excellent APT-E, so I won’t talk about the model’s merits here, except to say I’m really happy I took that chance to grab one when the second batch came around last year. That said, when I tried out the sound, I was a touch underwhelmed by the speakers fitted to the model. Higher-pitched tones (and there’s a lot of them on a model of a gas turbine locomotive!) seemed to cut through and grate on my ears pretty badly.
Last year I picked up a batch of Tang Band speakers in two sizes: the larger T1-1925s (also sold as the EM2 Earth Mover by DCKits) and the slightly smaller T0-2008S. I originally discovered these gems when I bought a pair of Hattons 66s a few years ago, so I thought I’d pick up a load of them for sound installations in larger locos. Since then I’ve used them to upgrade four HST power cars, and the difference over the “standard” Zimo twin dumbo speaker is huge.
I had two of these left, so I wondered if I could fit them to my APT-E to improve the sound. Let’s take a look inside one of the power cars and see!
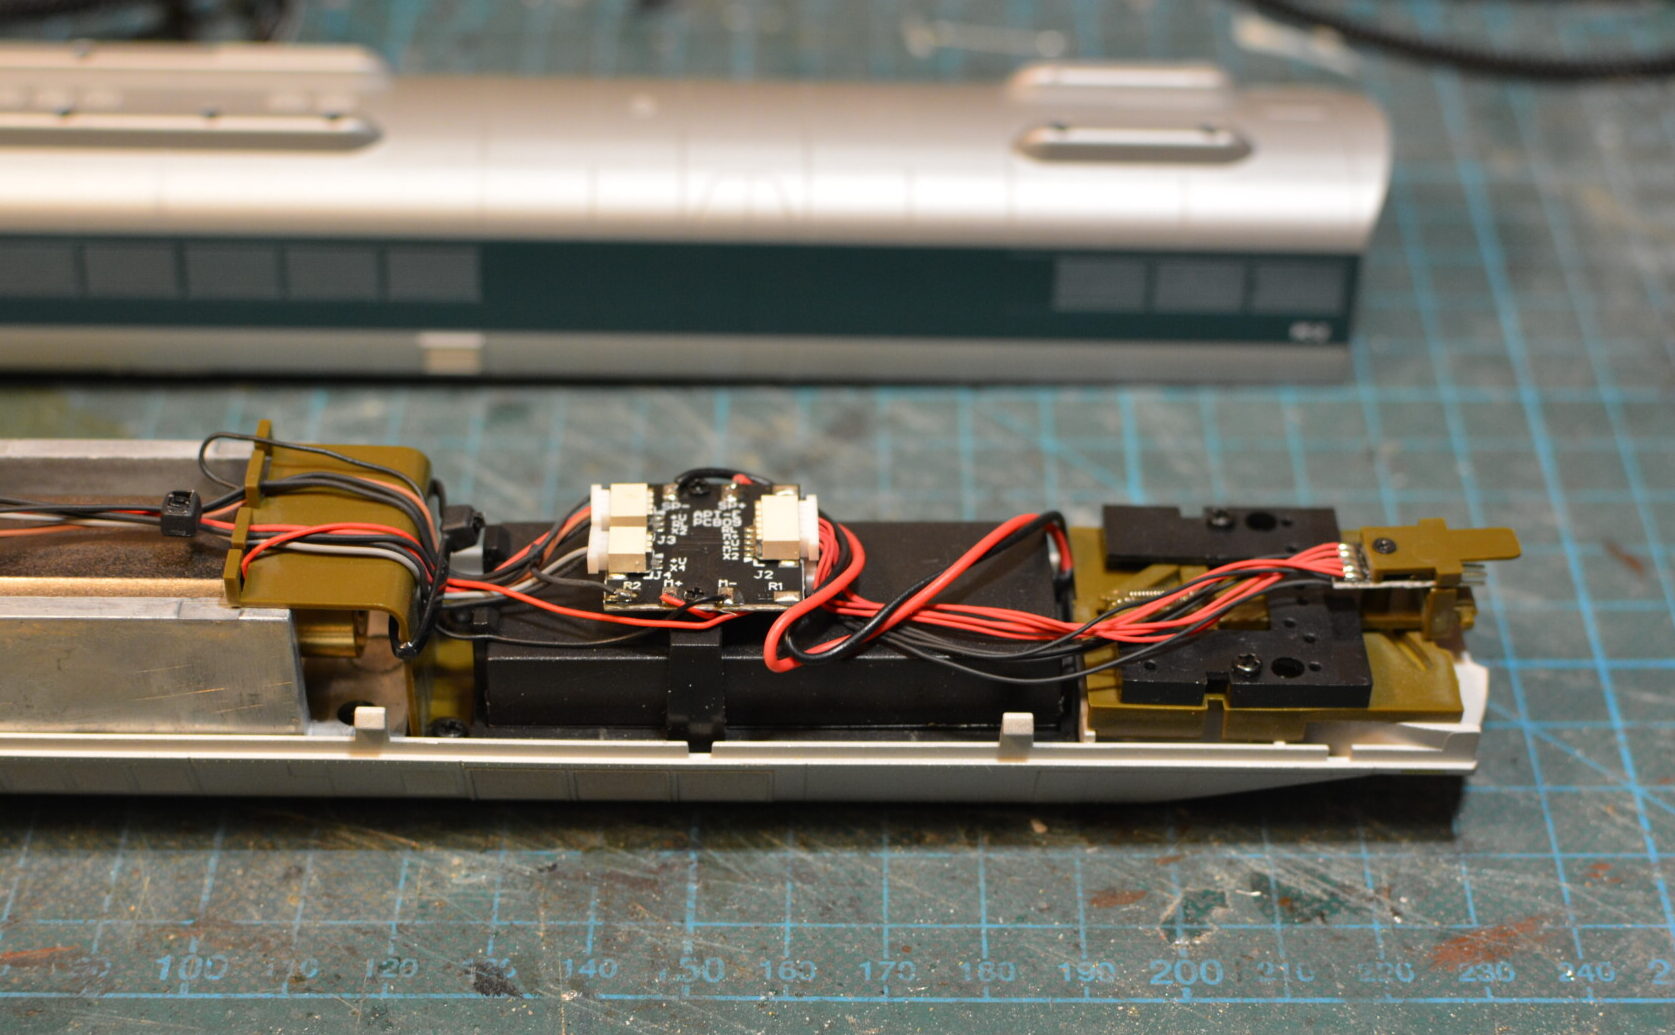
There’s plenty of space in the speaker well, but the massive T1-1925S will need all of it, so I needed to remove the speaker, cradle and the brown L-shaped piece on the right (which serves to prevent wires from becoming entangled in the motor’s flywheel).
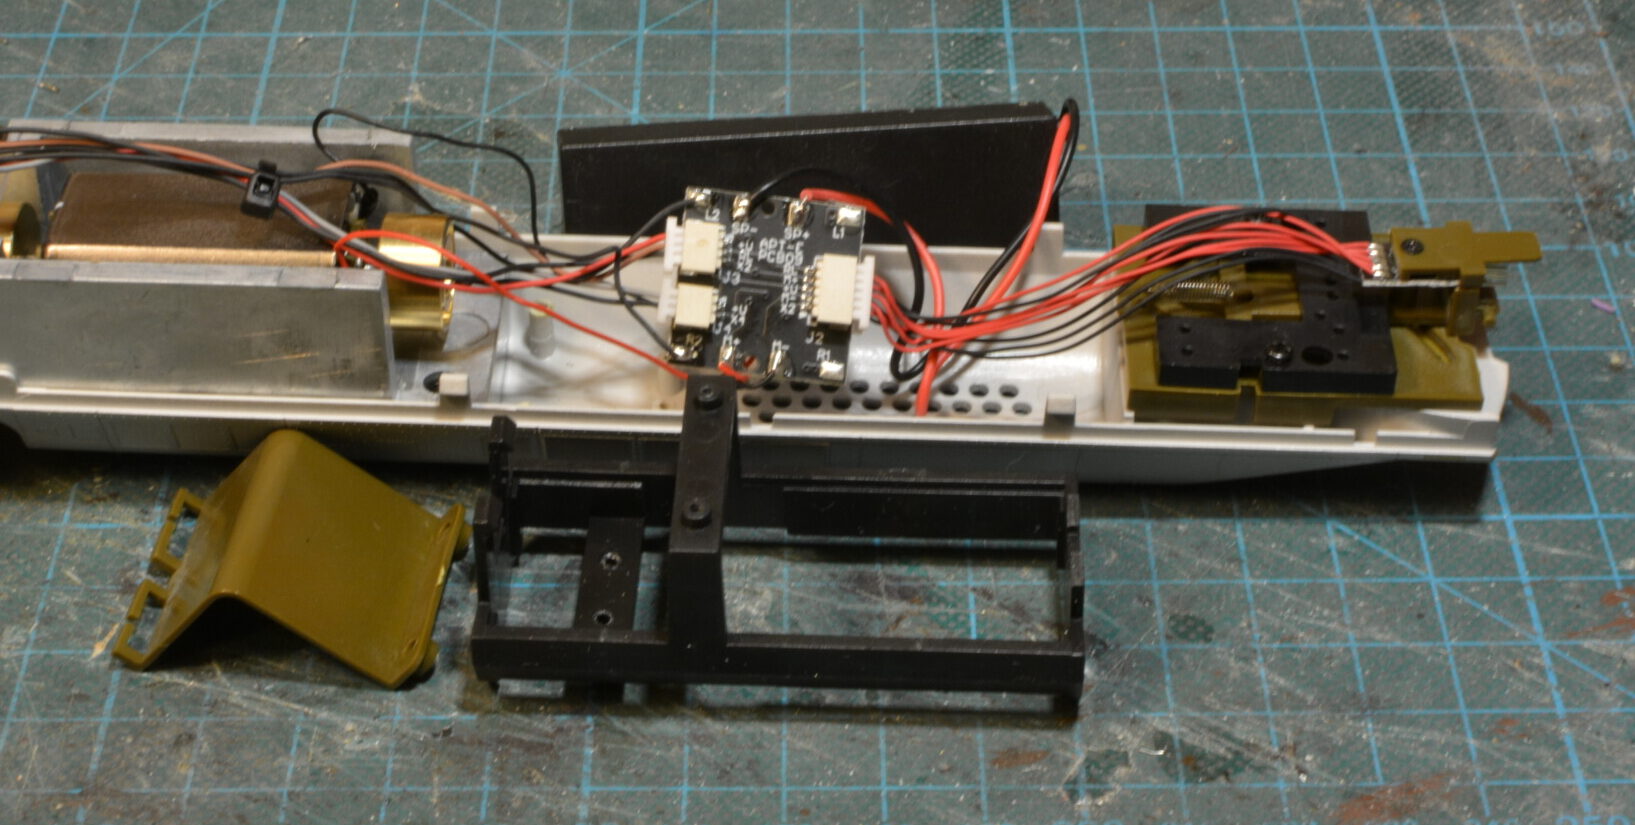
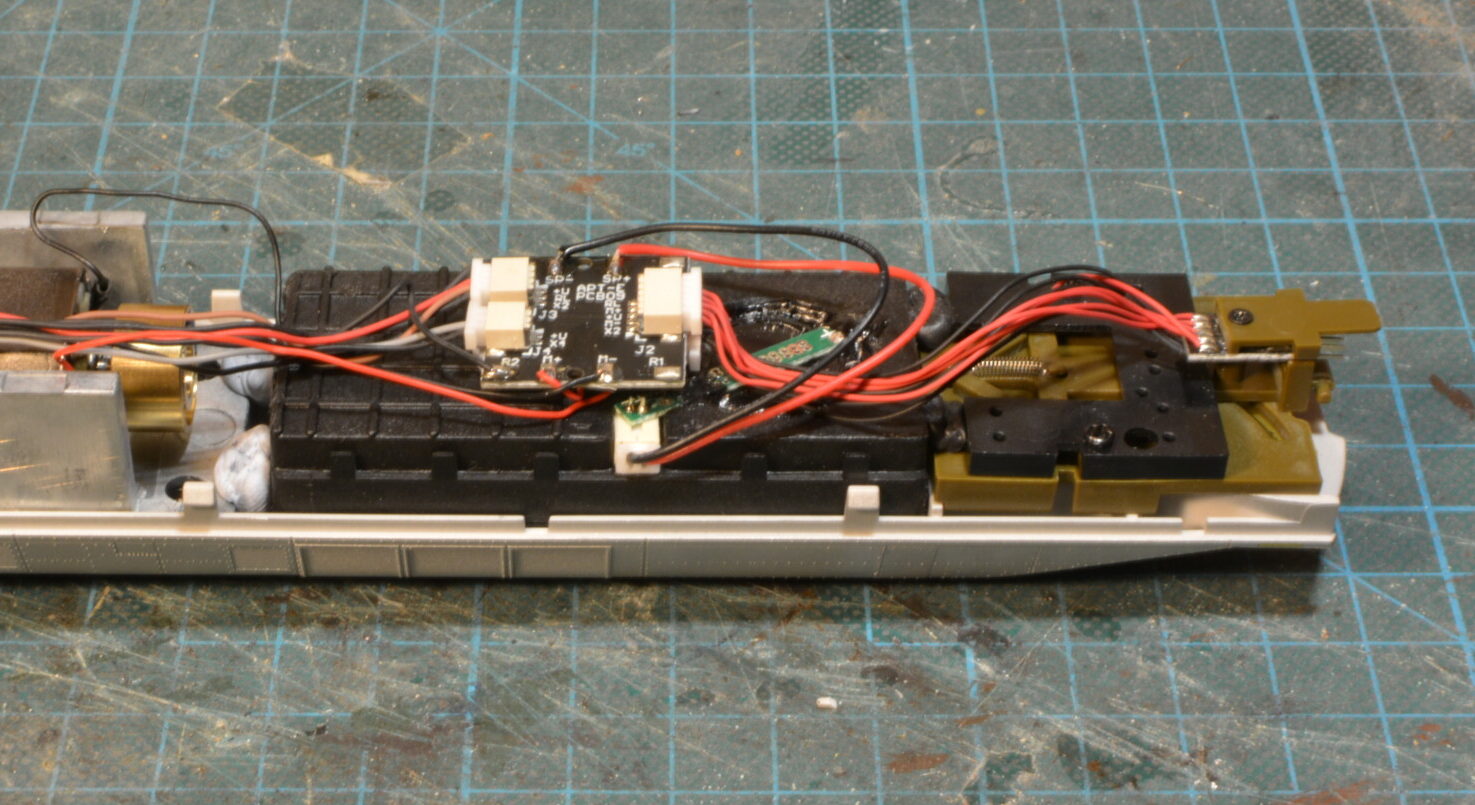
To fit the speaker, I cut off the mounting tabs (one at each end), and gently filed the ribs off the ends. I took care not to remove too much material, as I didnt want to compromise the (almost) airtight speaker box, as this would affect the sound. With this done, I simply stuck a large pea-sized blob of trusty black-tack in each corner of the well, and pushed the speaker down onto them. The speaker cone faces downward, so the sound can escape via the grid of holes on the underside of the loco.
As you can see in the image above, I was able to retain the original PCB, which was very helpful. The only soldering required for the speaker installation was to desolder the supplied speaker and attach a female micro-JST (1.25mm pitch – otherwise known as JST-GH) connector in its place. This connector then plugs directly into the speaker via a male socket on the side.
To allow the body to fit back on, I found I had to remove the lower 10mm or so from two of the inner supporting ribs on the inside of the body shell. Without this, these ribs would hit the speaker and cause the body to bow outward slightly. I used a scalpel with a flat “spade” type blade to do this.
And that was it! Well for PC-2 anyway. The other power car, PC-1, was slightly different as it also contains the single DCC decoder that drives the speakers, motors and functions in both power cars, as well as the functions in the intermediate passenger cars.
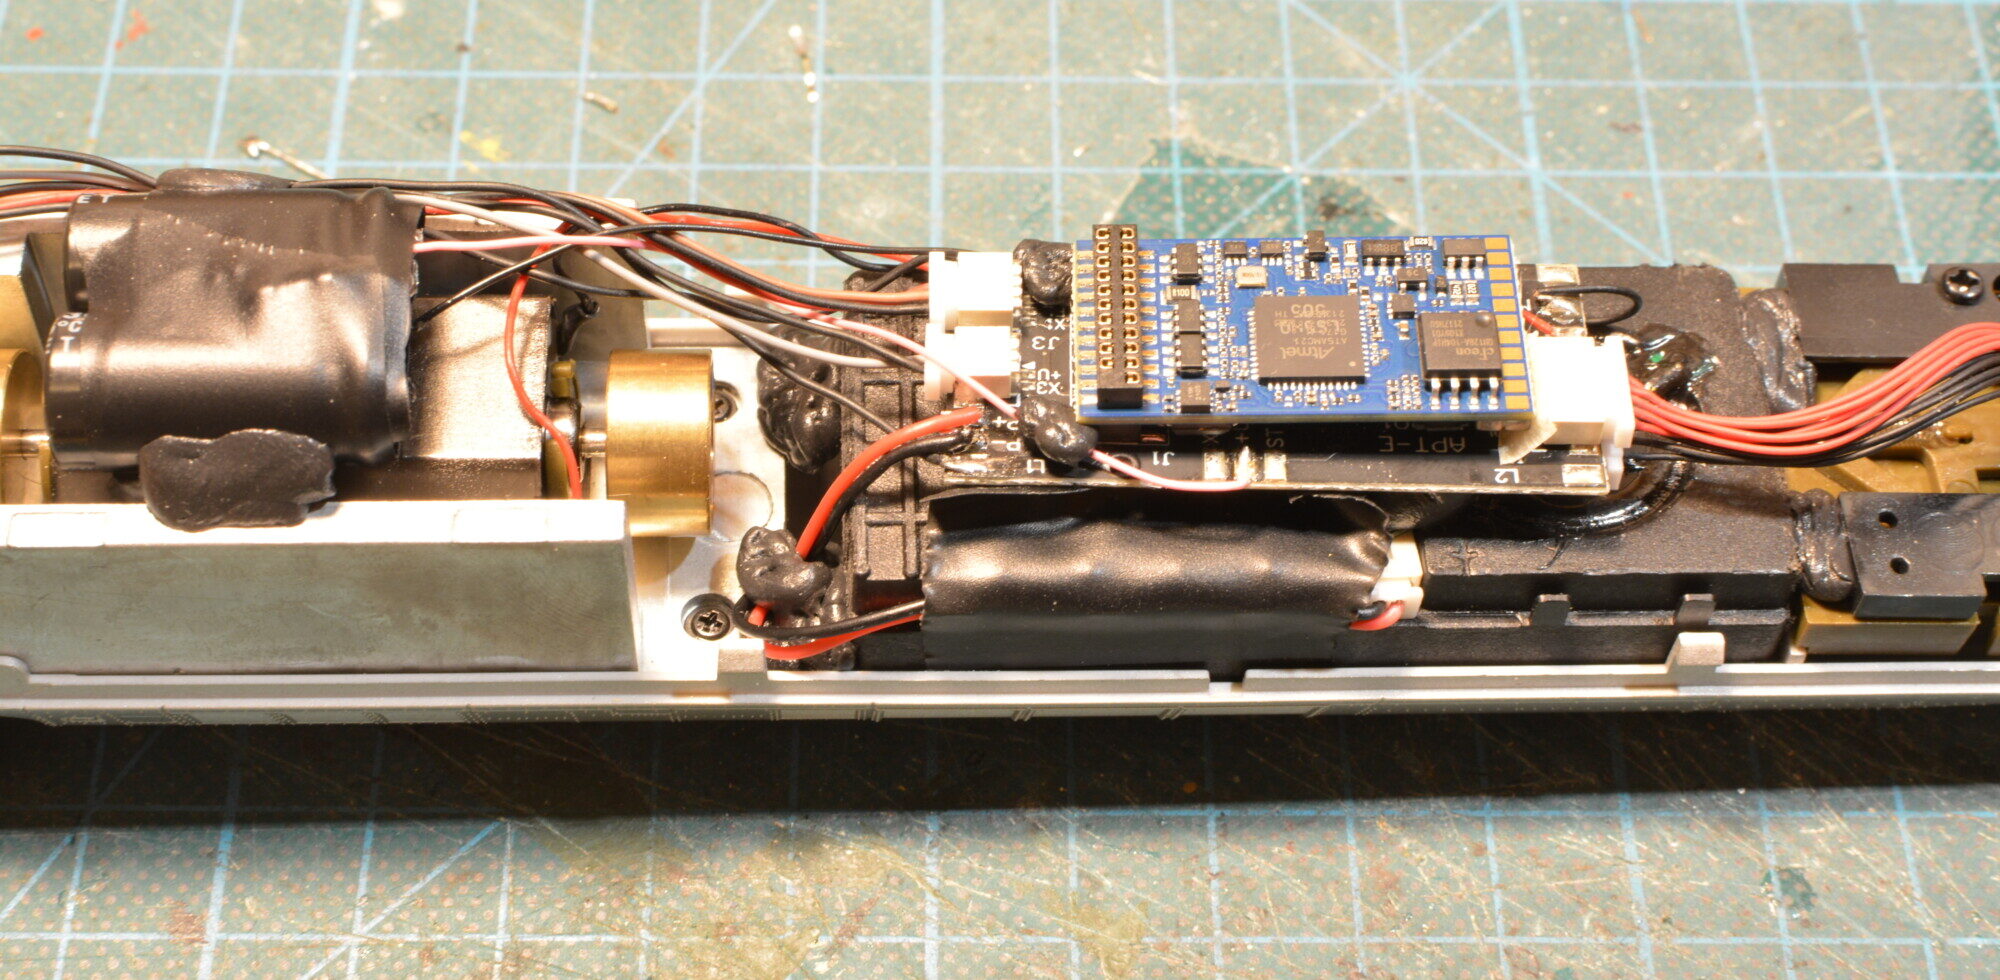
I also took the opportunity to keep a decent-sized keep-alive circuit to the locomotive. On the left is a pair of 2200uF capacitors, wired to the locomotive PCB, with the usual diode-resistor pair inrush protection in series with one of the poles to prevent large current draws when the capacitors are charging up. The nice thing about working with the 21-pin MTC (and for that matter the Next18 and Plux series) connectors is that they expose the decoder terminals required for a keep-alive (positive and ground), so you can attach a keep-alive circuit to the model rather than the chip itself. This makes swapping out decoders or performing maintenance a breeze.
The result
The improvement in the overall sound in the locomotive is significant. I took a recording of both locomotives connected together – one with the original speaker fitted, and the other one with the new T1-1925S. In the sound clip below, I ran through a normal sequence of startup, throttle up and throttle down, connecting and disconnecting the T1-1925S at regular intervals.
I first connected the T1-1925S at 22s in, and then disconnected it at 34s. It’s especially noticeable when it is disconnected – a huge part of the sound (the low-end) simply disappears!
This was a nice simple upgrade that gave a great result – I can heartily recommend it if you want to improve how your APT-E sounds! The fact that I didn’t have to modify the chassis (and only needed to make one small adjustment to the bodyshell) made this a pretty straightforward job.
Buying Tang Band speakers in the UK
For those who are interested, I got the Tang Band speakers from nonsolospeakers.com in Austria. They sell the T1-1925S (DCKits sell this as the EM2) and a smaller variant, the T0-2008S. I bought ten (five pairs), which came to €130 (about £112) all in, including delivery. There was no UK import duty to pay as the order came in under the threshold of £135. So for £11 a speaker, it was a no-brainer vs £20 from DCKits.