
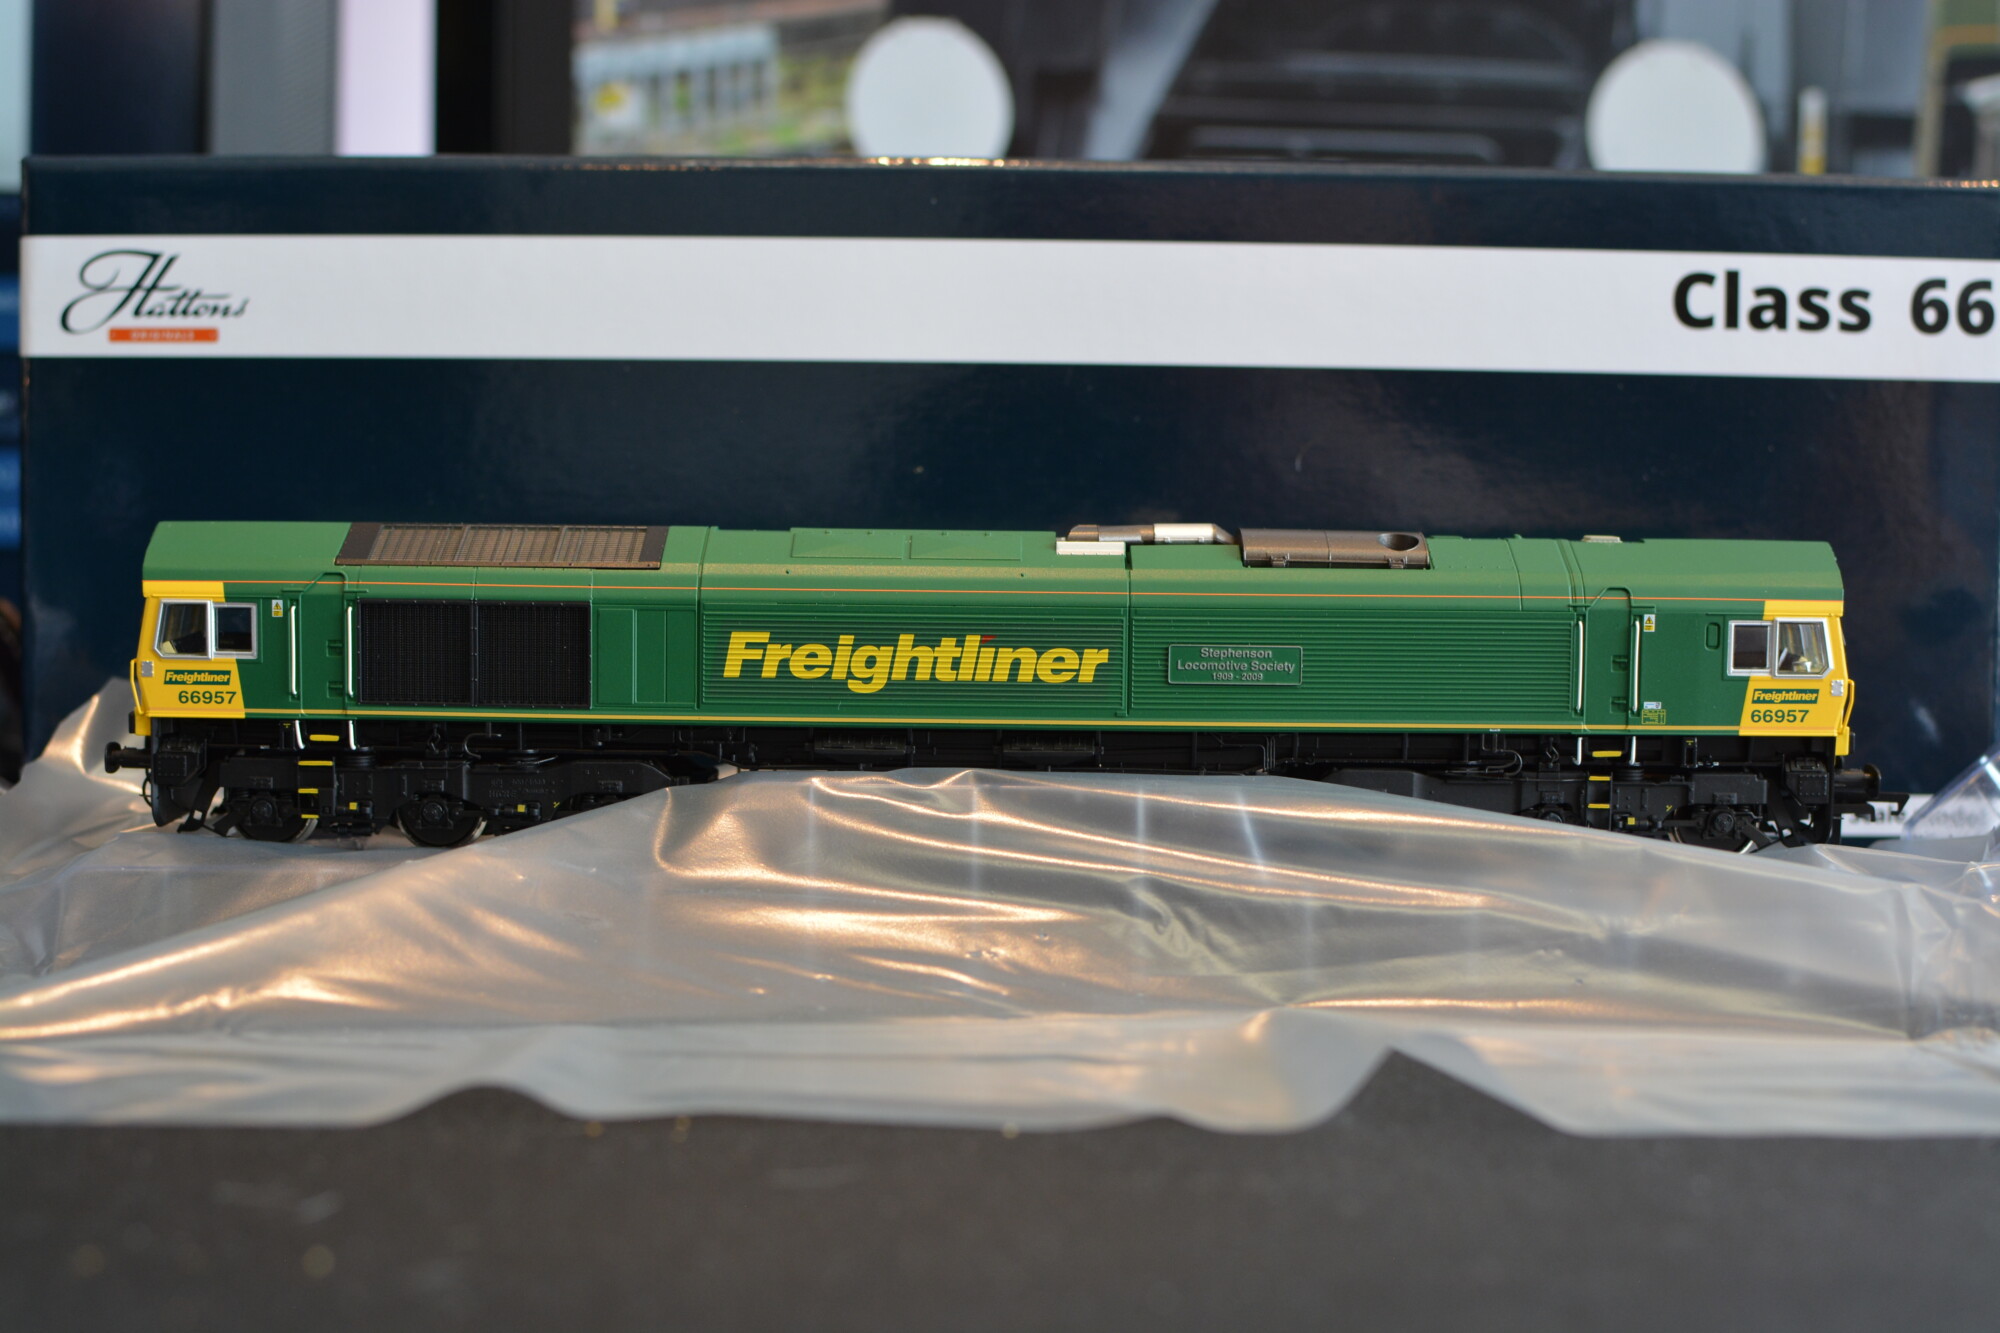
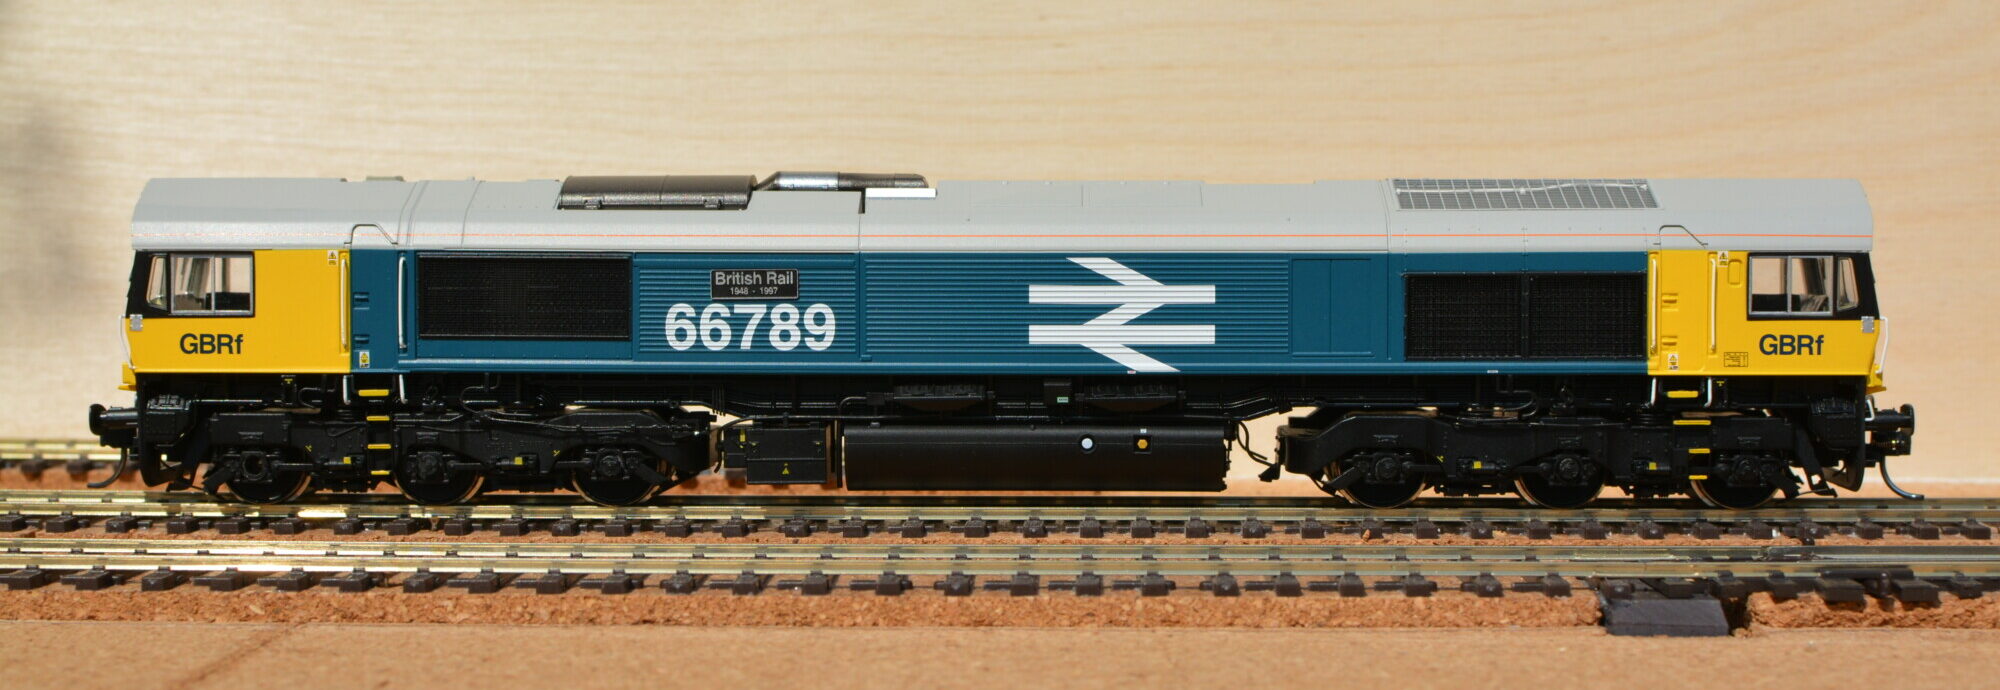
It’s finally here! After multiple delays, a false start around Christmas-time and certain global events threatening to affect its arrival, my sound-fitted Hattons Class 66 has finally arrived. Or rather, they have arrived – after placing my initial order for 66957 “Stephenson Locomotive Society” in original Freightliner green livery, I gave way to temptation a few months later and added a celebrity to the order: 66789 “British Rail 1948 – 1997” in GRBf’s tribute BR Blue large logo livery.
This review will start by looking at the packaging and included extras, then covering at the external appearance, followed by a detailed look at the lighting and sound features on the model. I’ll also open it up and take a look inside, and talk about some of the issues I’ve faced with the model and how I’ve attempted to solve them.
Packaging
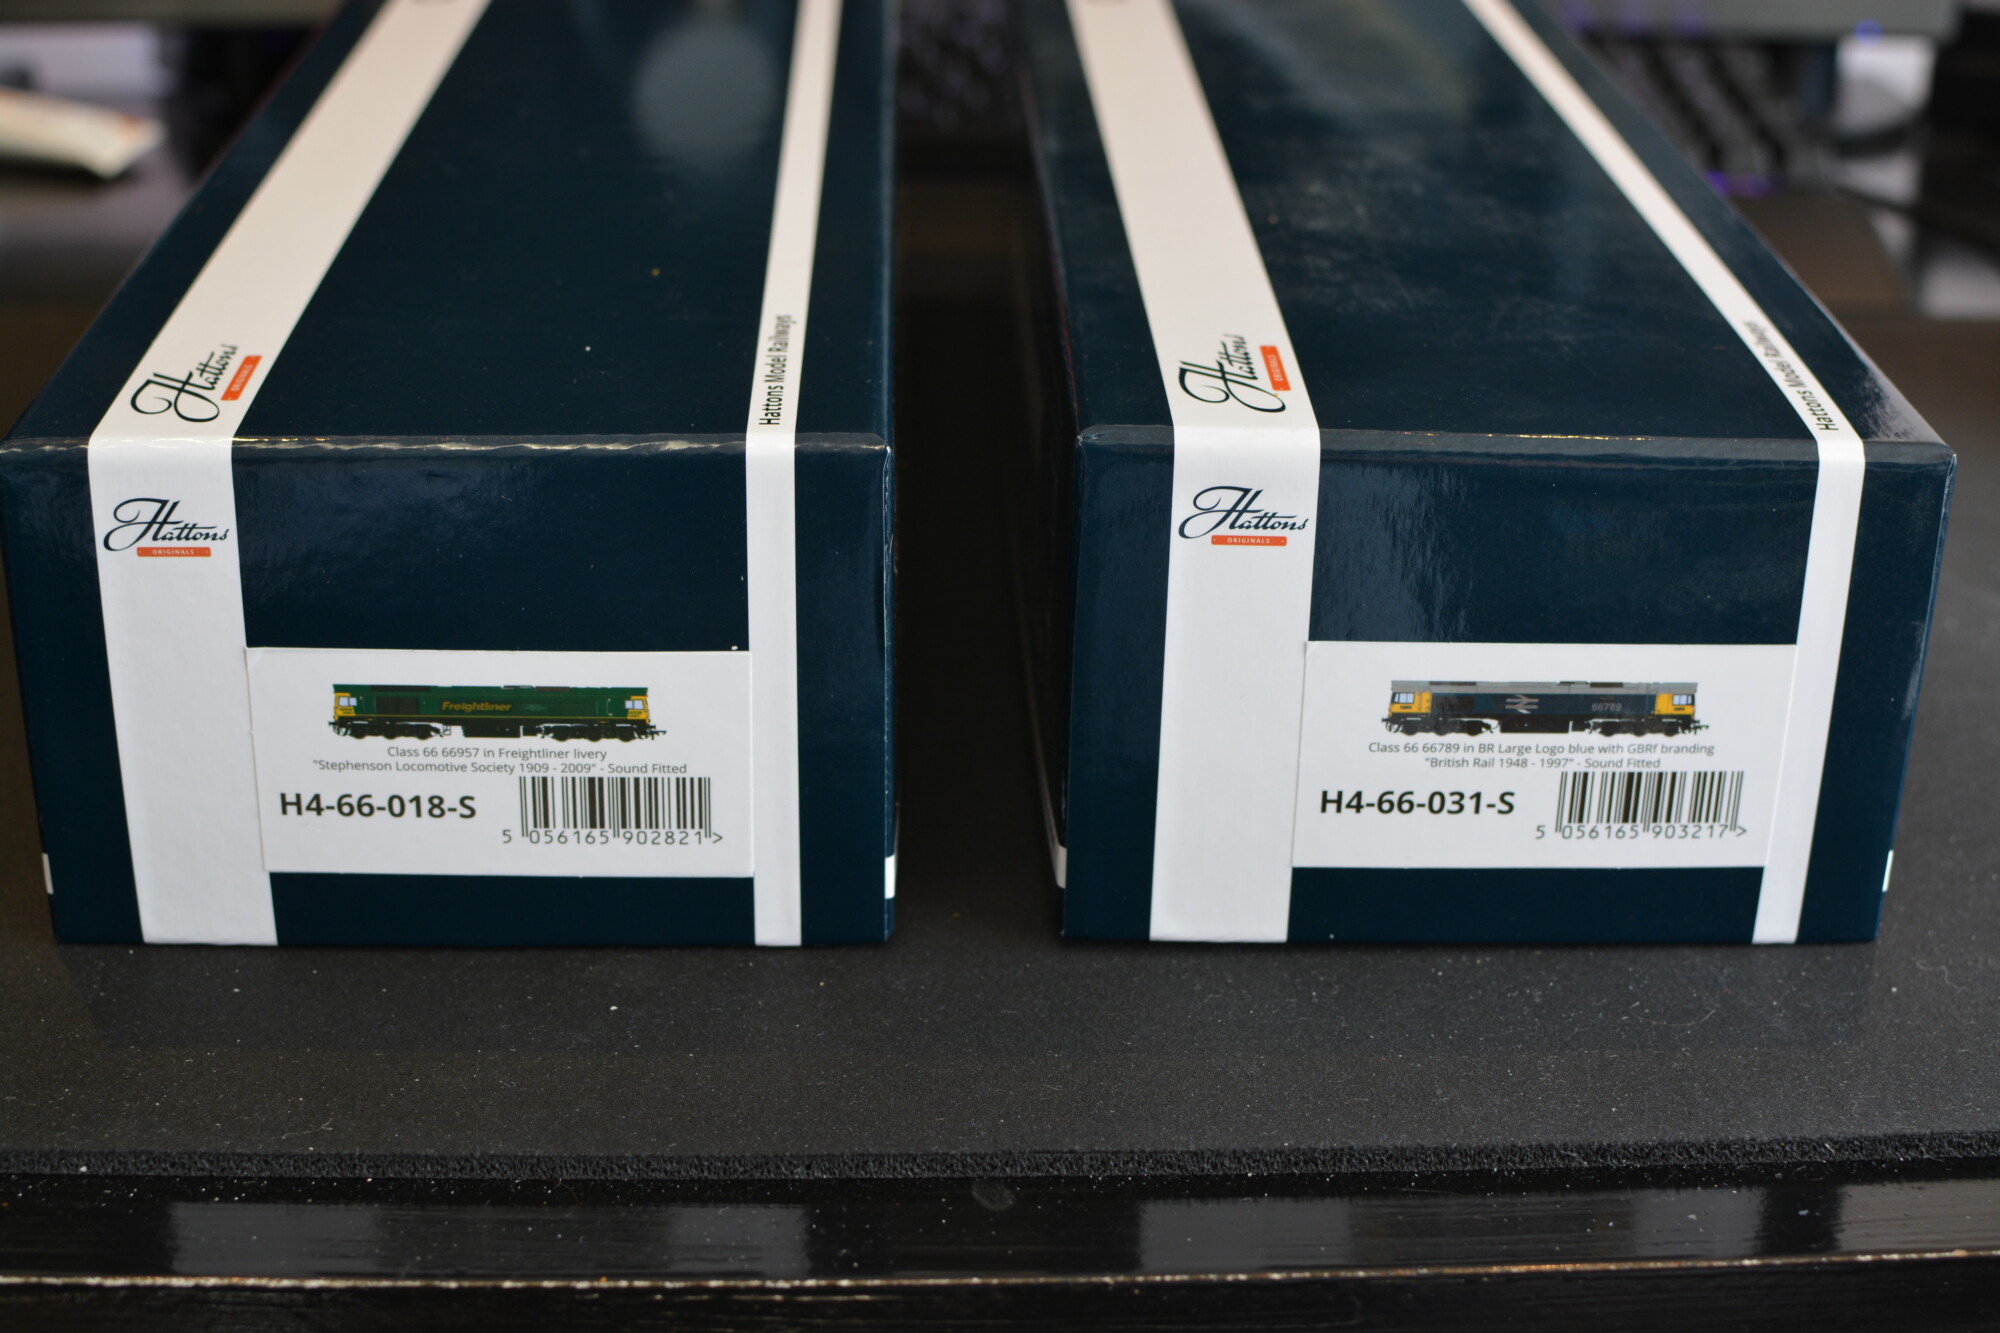
The first thing to note about the boxes is that they’re pretty big. Whilst this does protect the models during shipping, it means they do take up more space in my already-crowded storage cupboard. It might seem like a small point (no pun intended), but if all Hornby’s and Bachmann’s locos come in much thinner and narrower boxes, why can’t these?
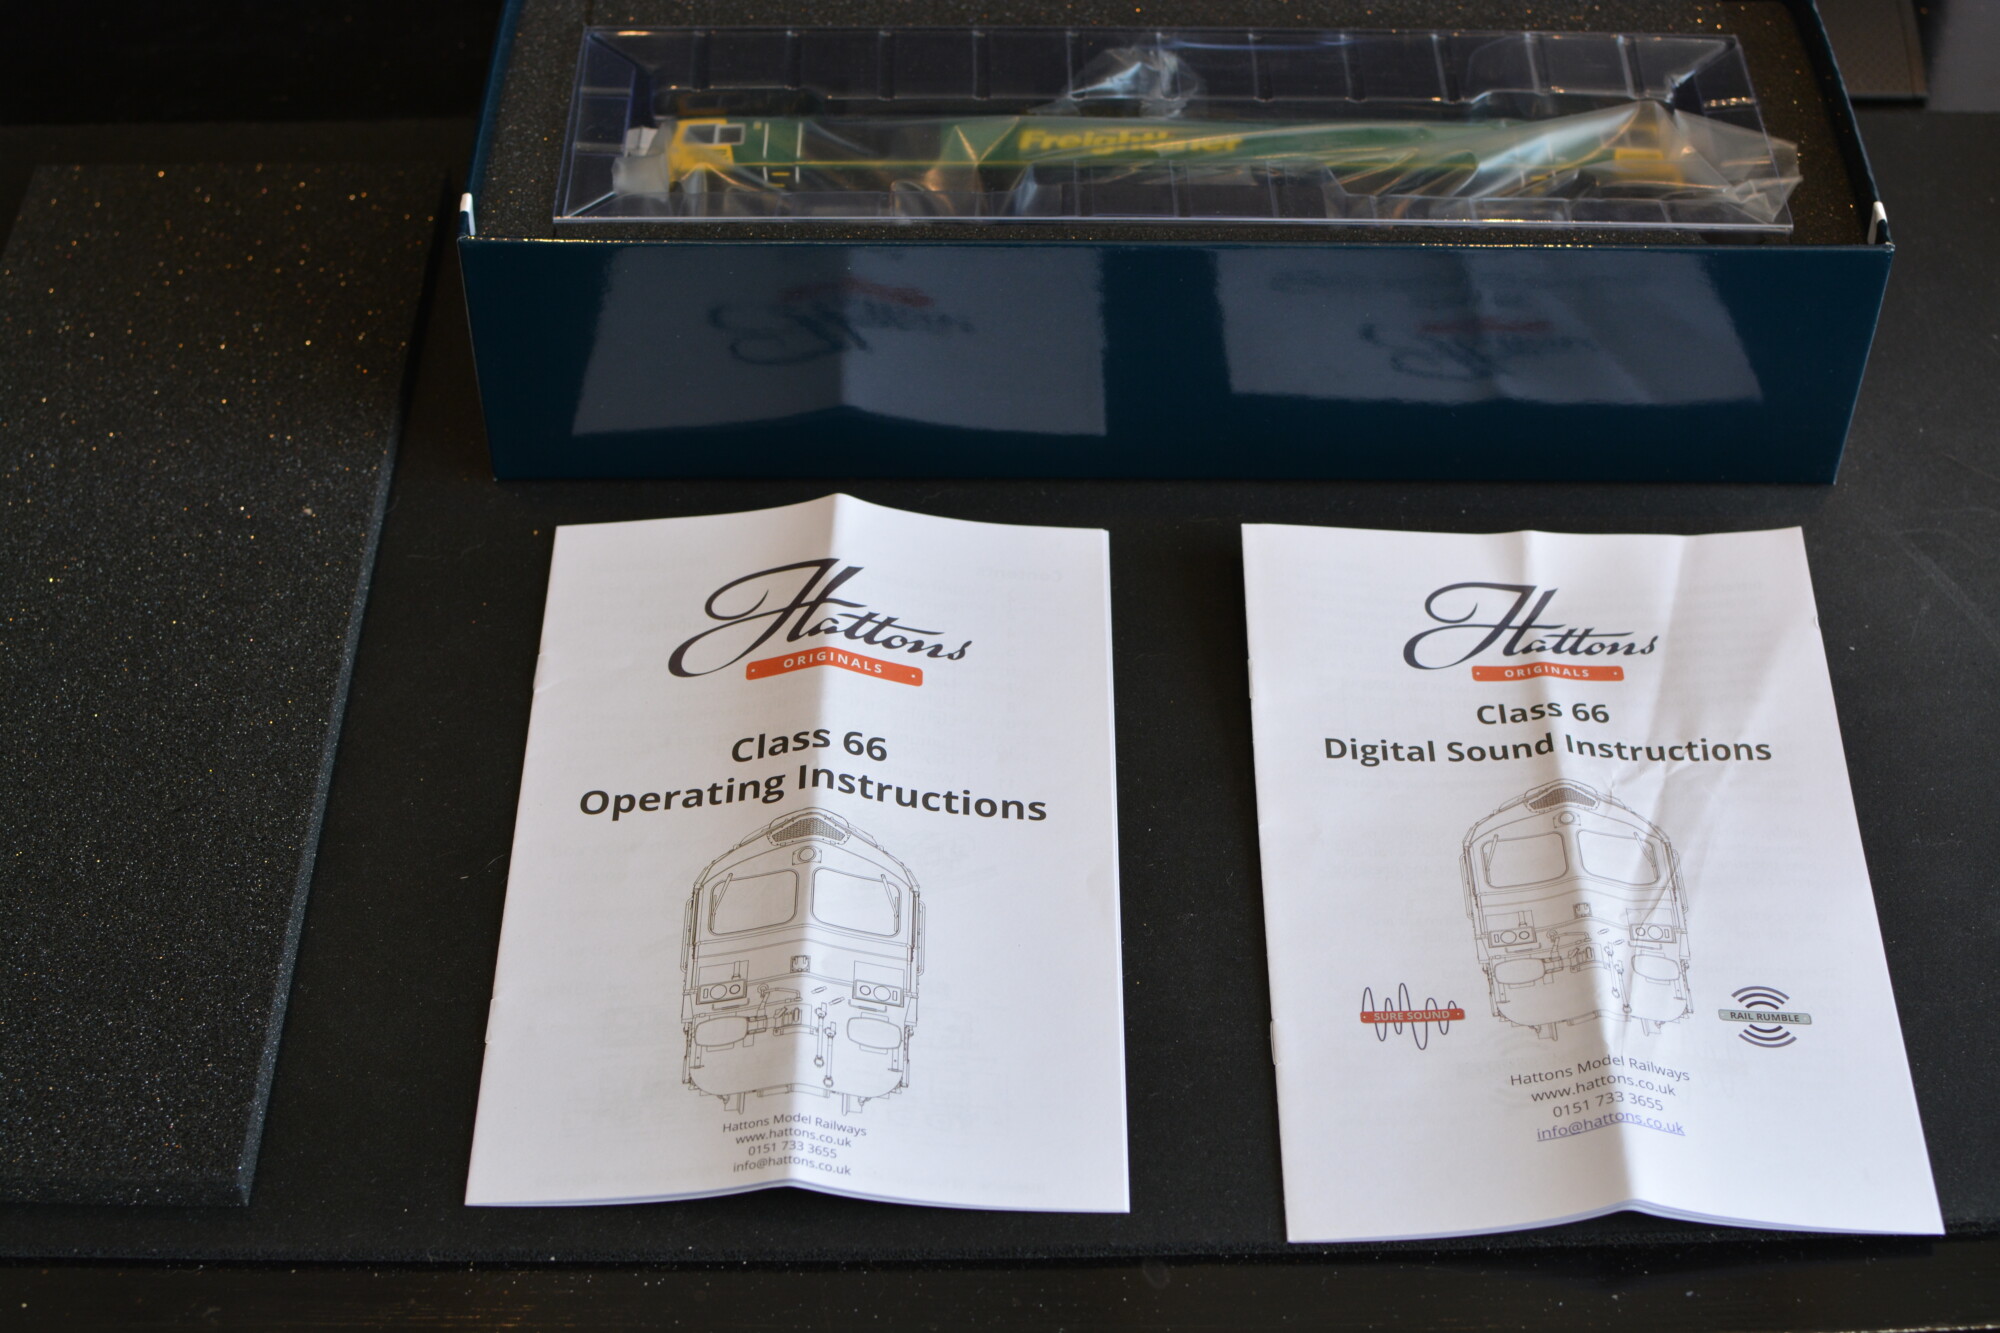
As the locomotives are both DCC sound-fitted from the factory, there are two instruction booklets provided:
- The Operating Instructions booklet gives a good overview of how to look after the loco, open it up, fit DCC decoders and change the air dams (the large skirts on the underside of each end). It goes into some detail explaining how to remove the bodyshell, which is very helpful as we’ll come to later!
- The Digital Sound Instructions booklet gives a clear overview of what each sound function does and when to use it. It also describes the CVs that can be adjusted to customise the sounds that are played for certain events (for example CV156 can be used to switch between normal and “fast” spirax valve popping, depending on exactly what locomotive you have).
Both booklets are well-written, with plain-English explanations of how things work and clear diagrams. One (tiny) gripe I have with respect to the booklets is that there’s no space allotted to them inside the box, and because they have to be folded in half to get them to fit, this causes the box lid to not close properly. This is easily fixed with a sharp scalpel:
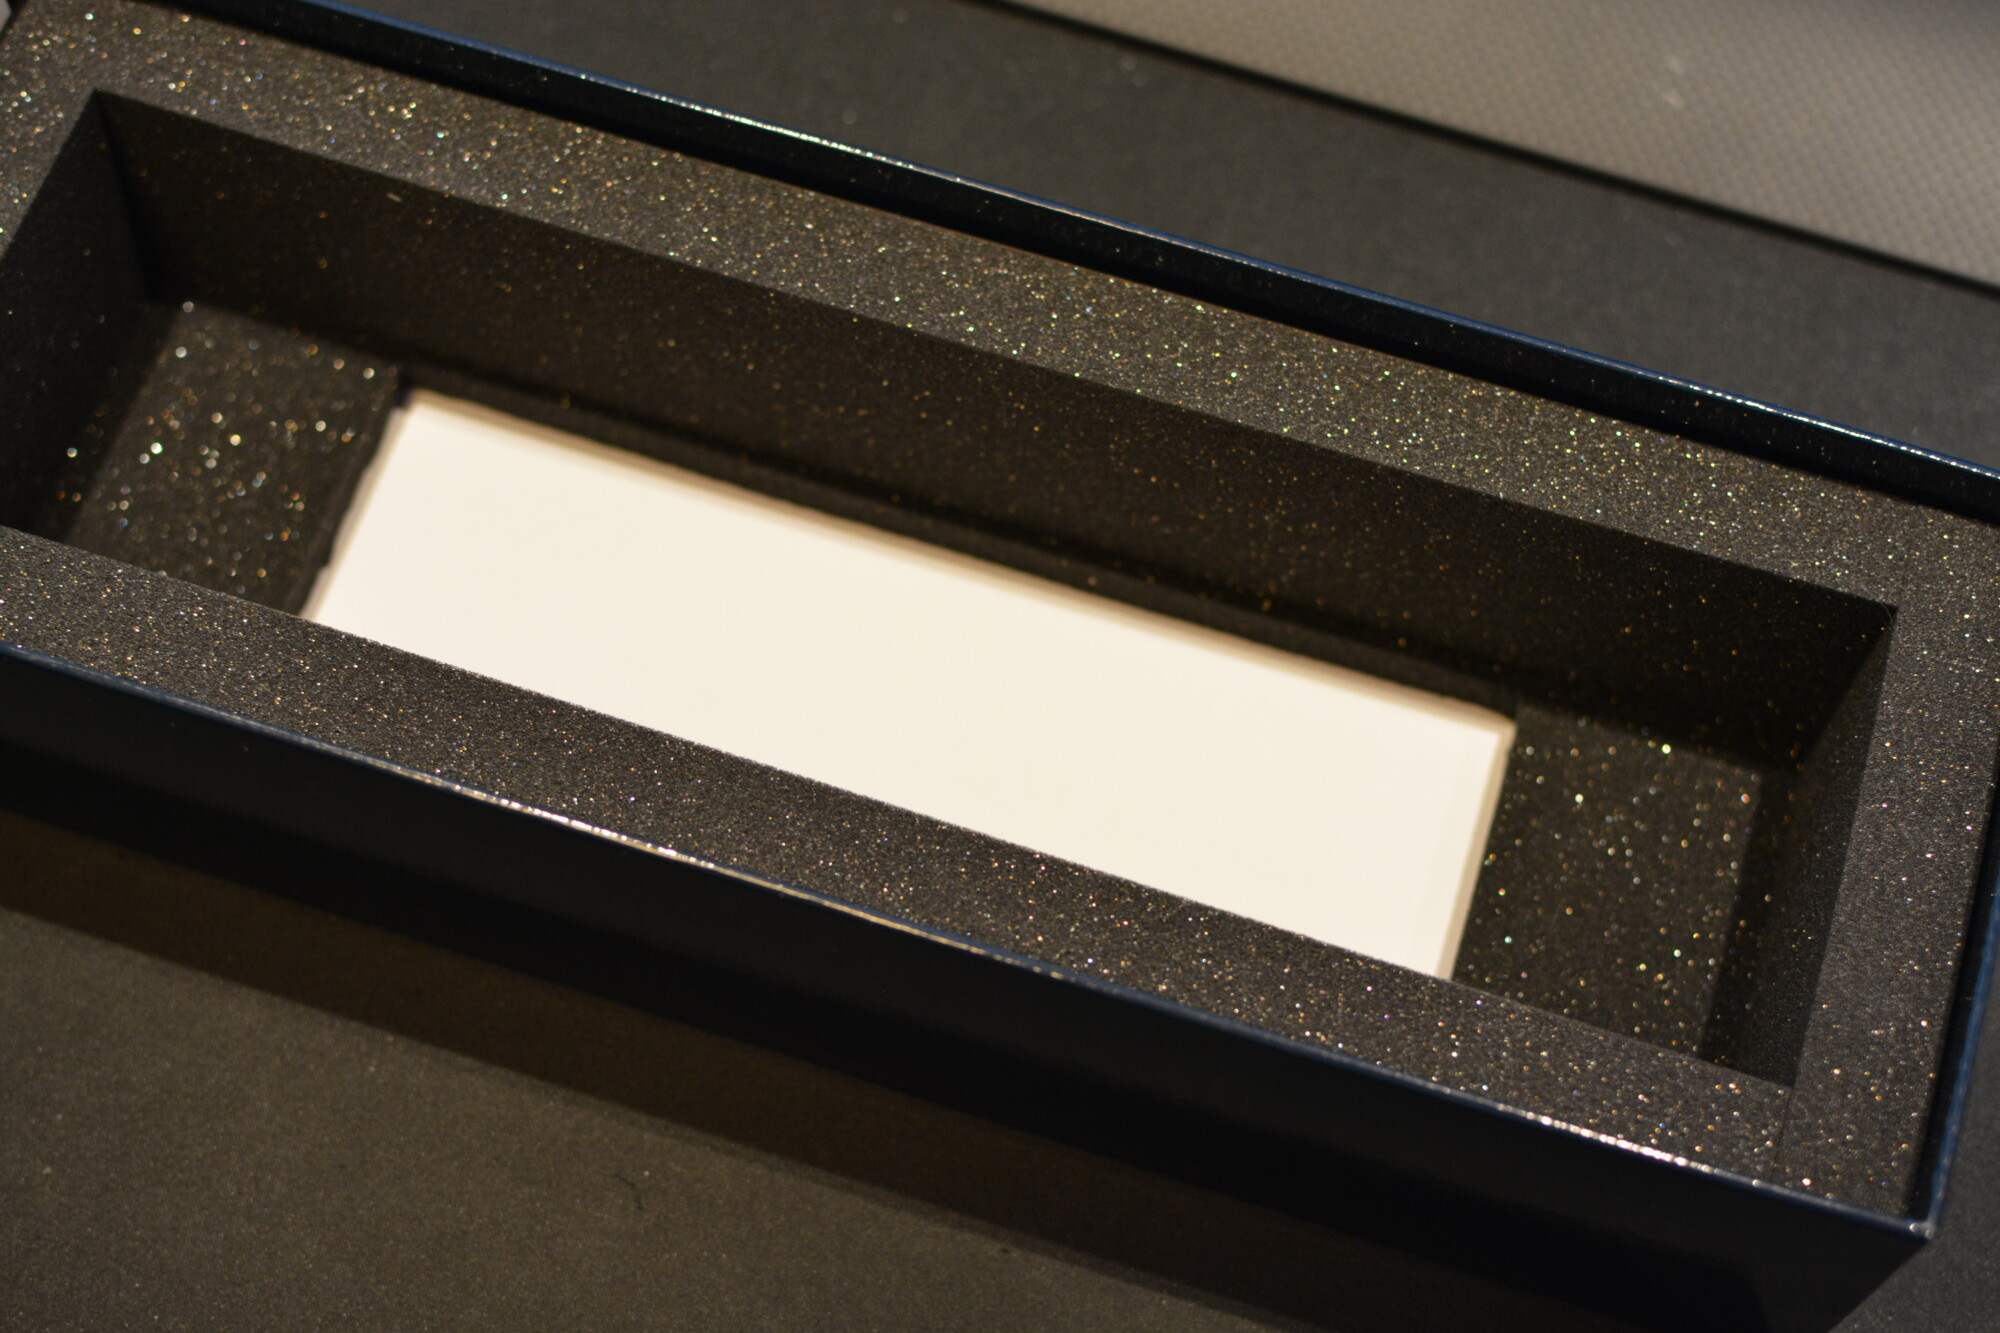
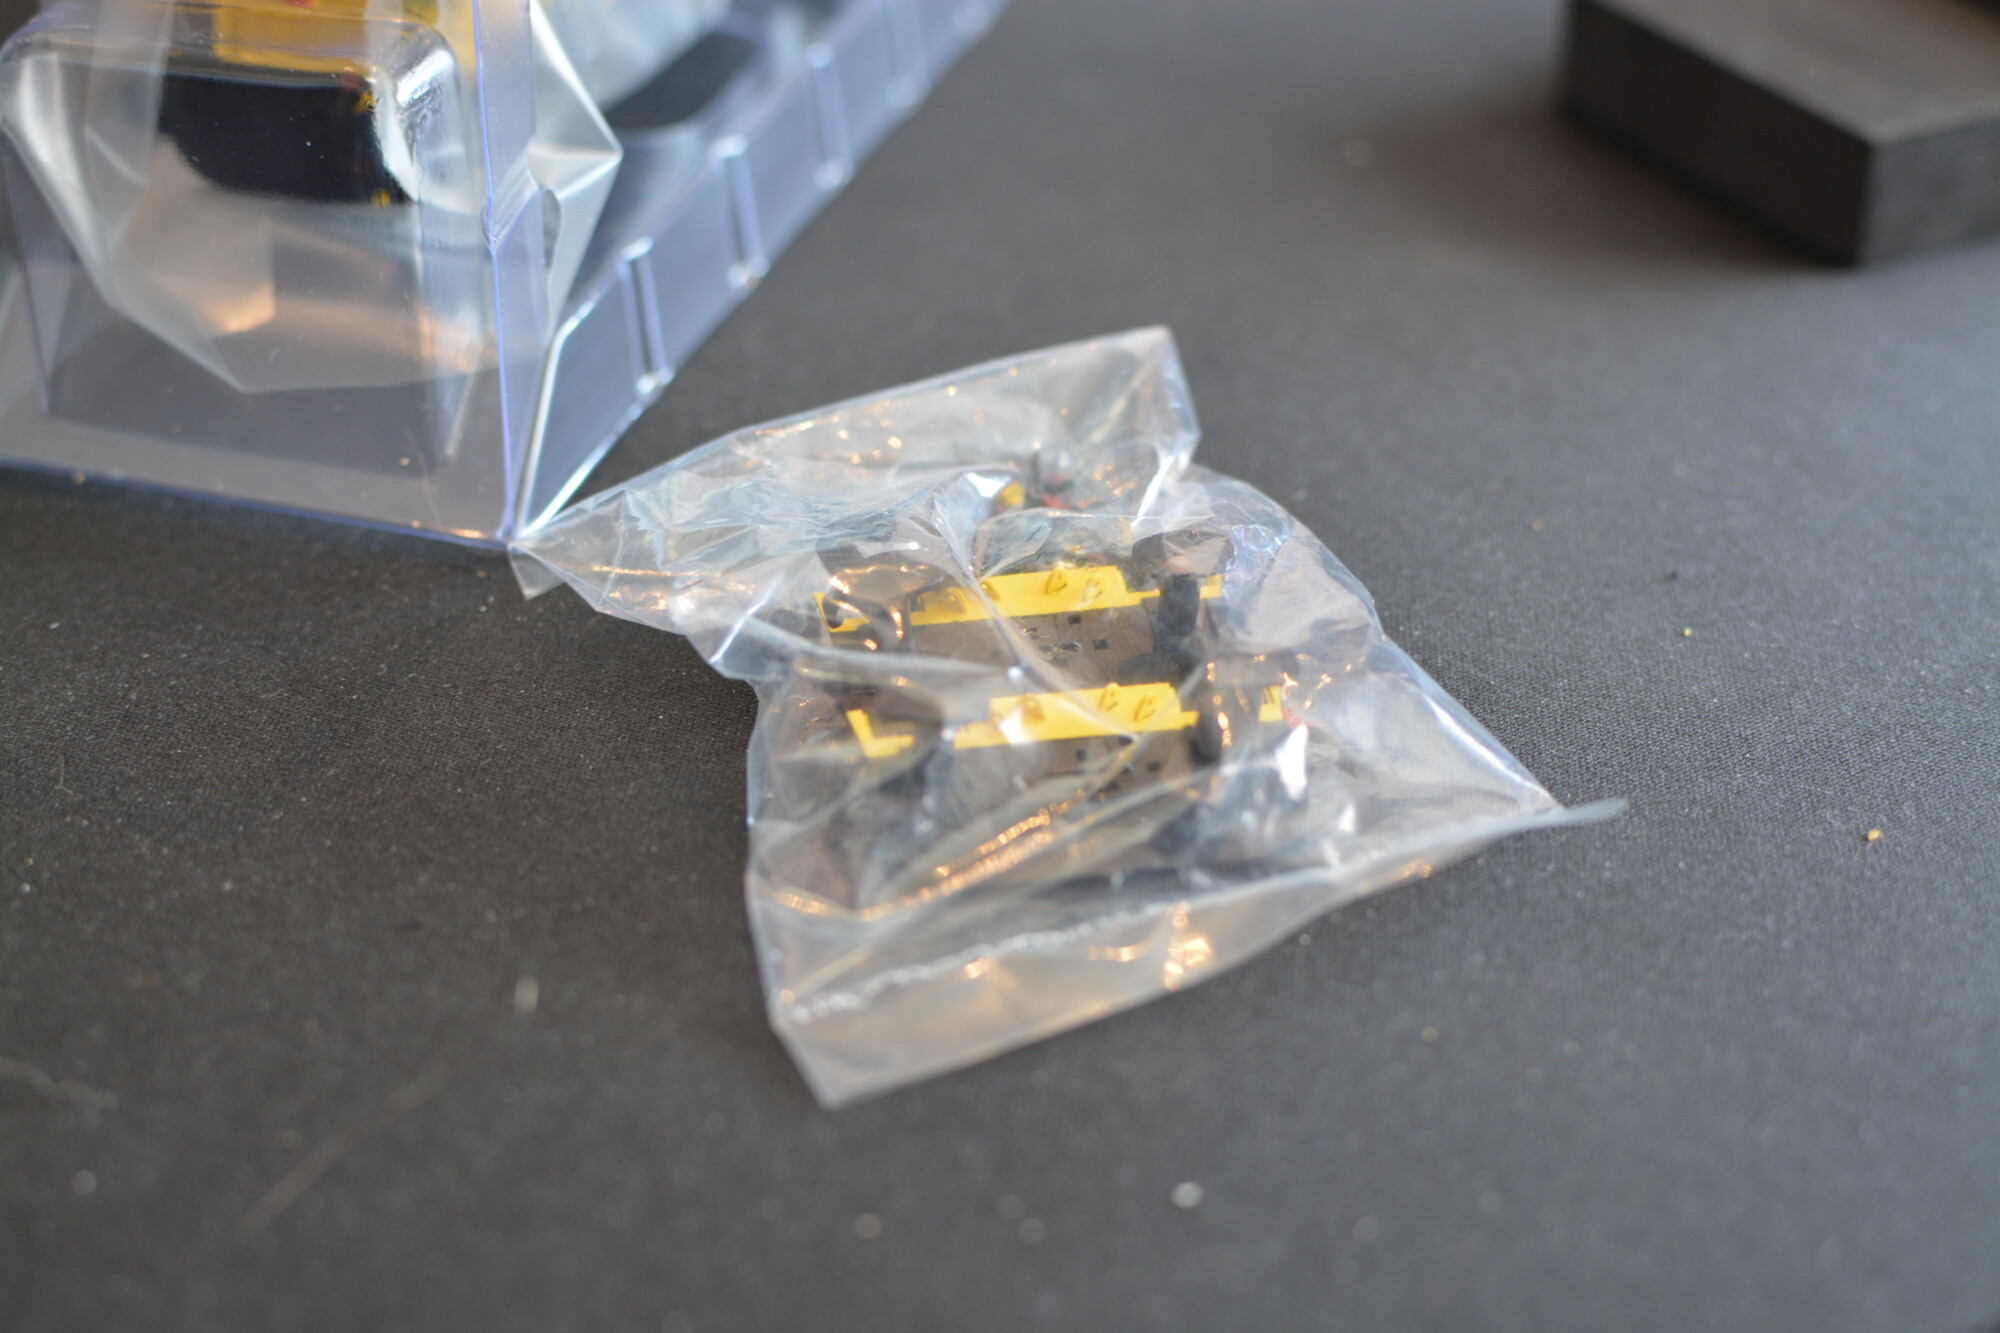
Inside the ice cube there is a bag containing two extra air dams (one cosmetic that matches the prototype, and one functional that has a slot for a coupling to pass through). The model is pre-fitted with one of each, so you can choose any combination of the two. It’s nice to see that these bags do not contain any extra detailing parts, as everything has already been fitted (or in order words, the model is finished when it leaves the factory!)
First impressions
Getting it out of the box, the first thing you notice is that this thing is heavy. Possibly the heaviest loco I’ve ever picked up, although we’ve yet to compare it to Dad’s old Hornby Dublo 8F. This is great, as it means that not only will movement be smoother, but also it will basically pull any prototypical-length train you need it to. In fact, if there’s a train this can’t pull, it’s either too long, or the gradient is too steep!
Detailing and livery also appear to be pretty good – let’s take a more in-depth look at this now.
Appearance
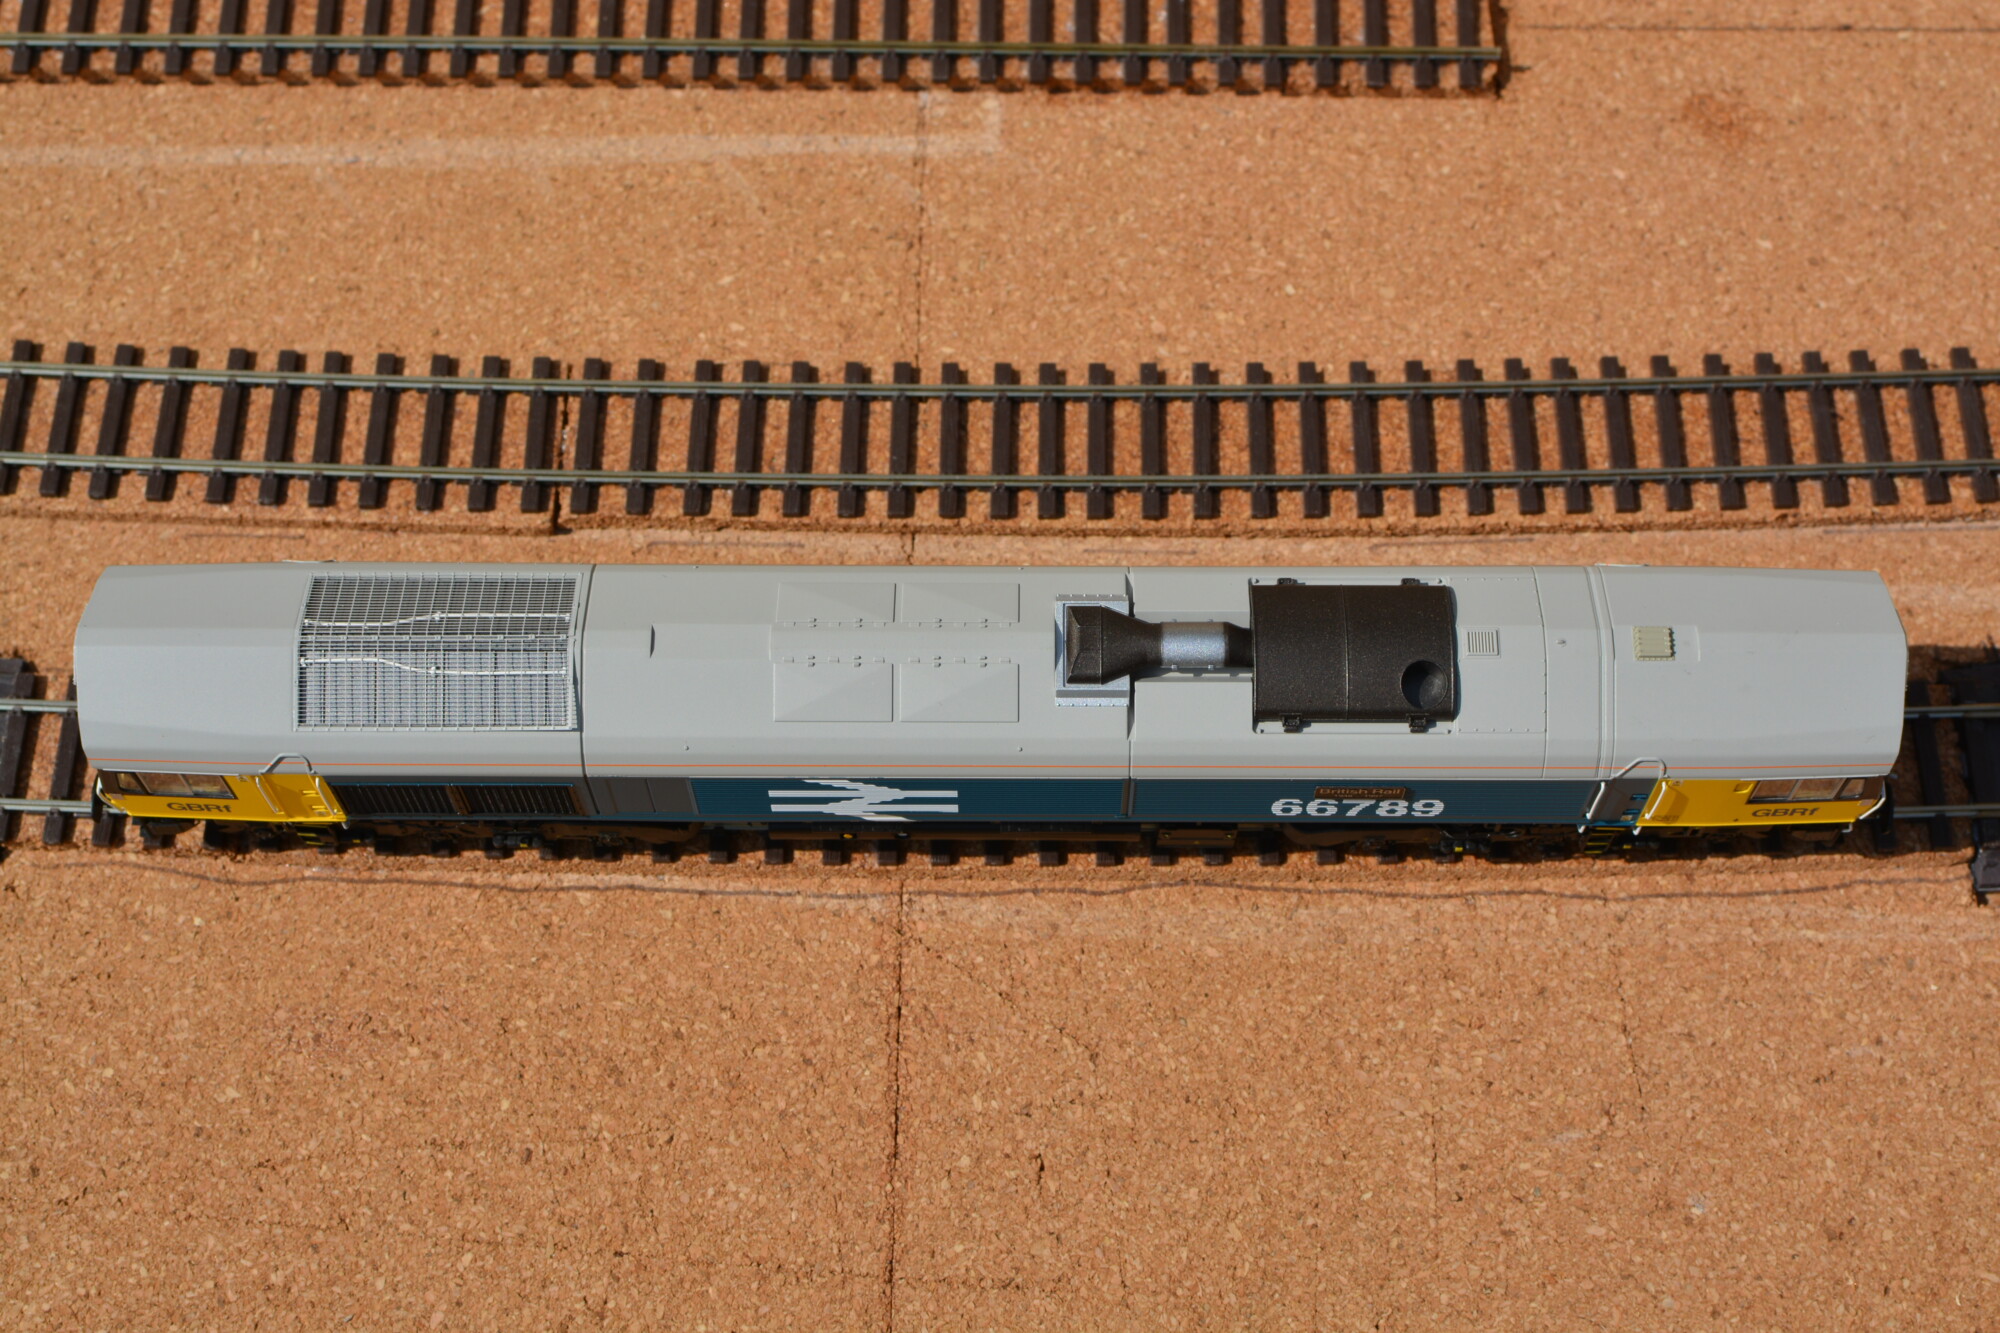
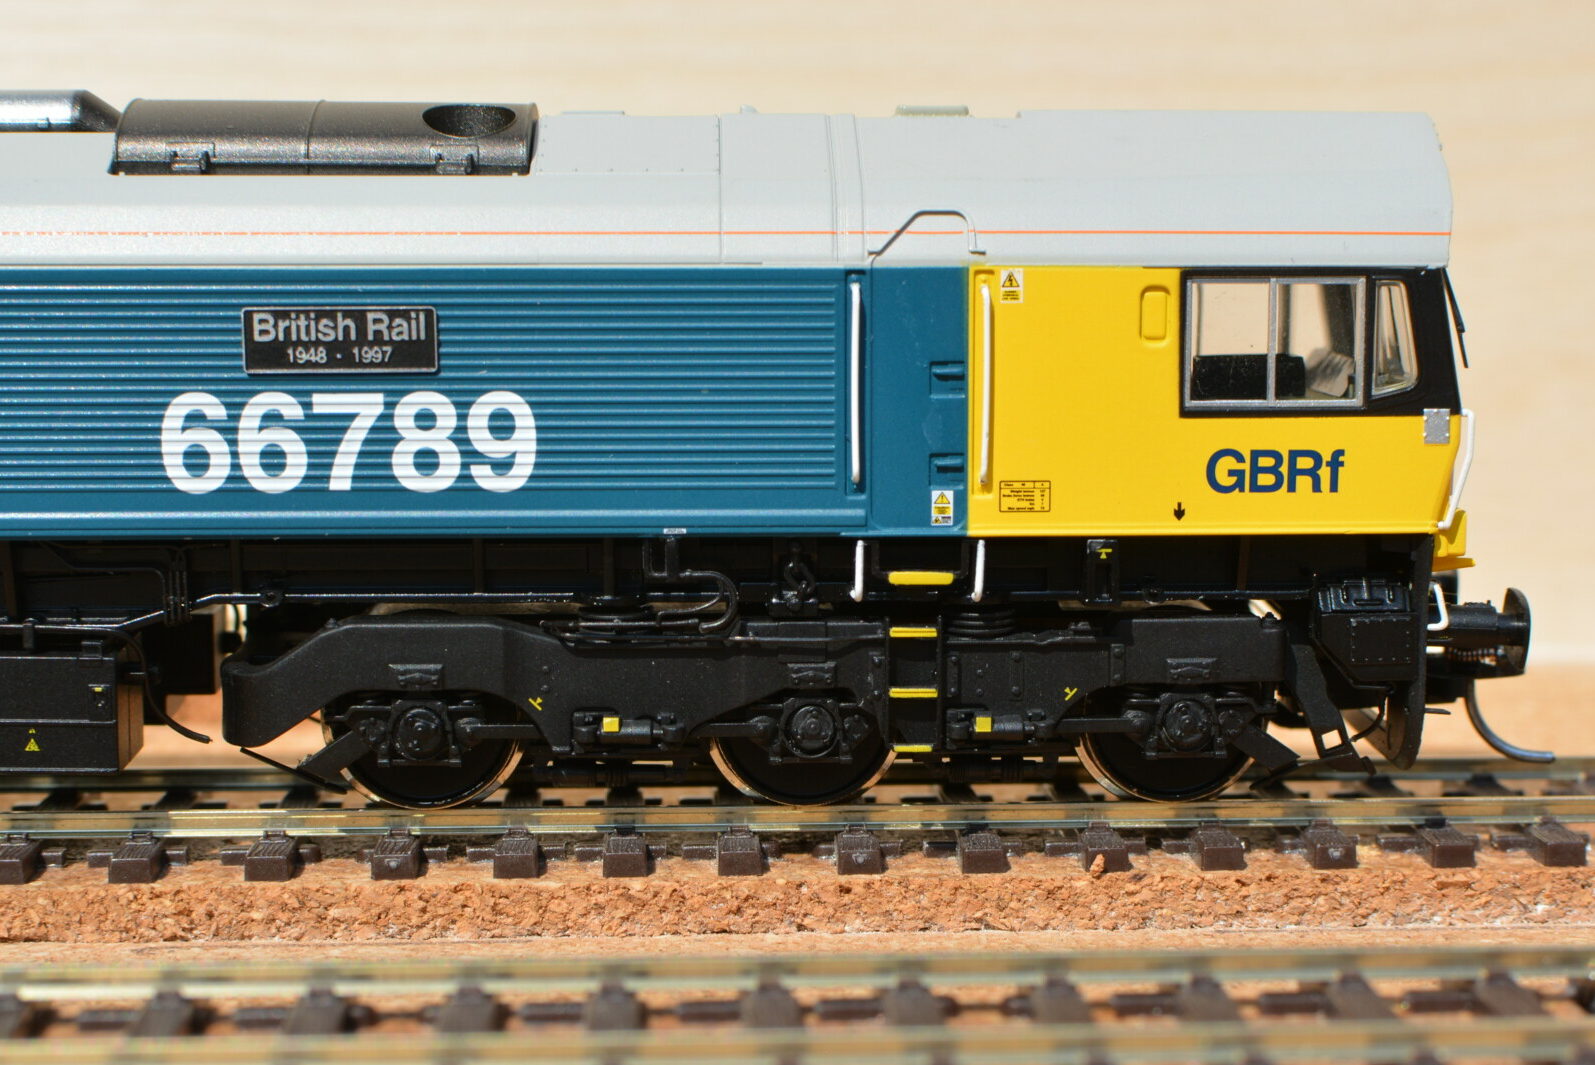
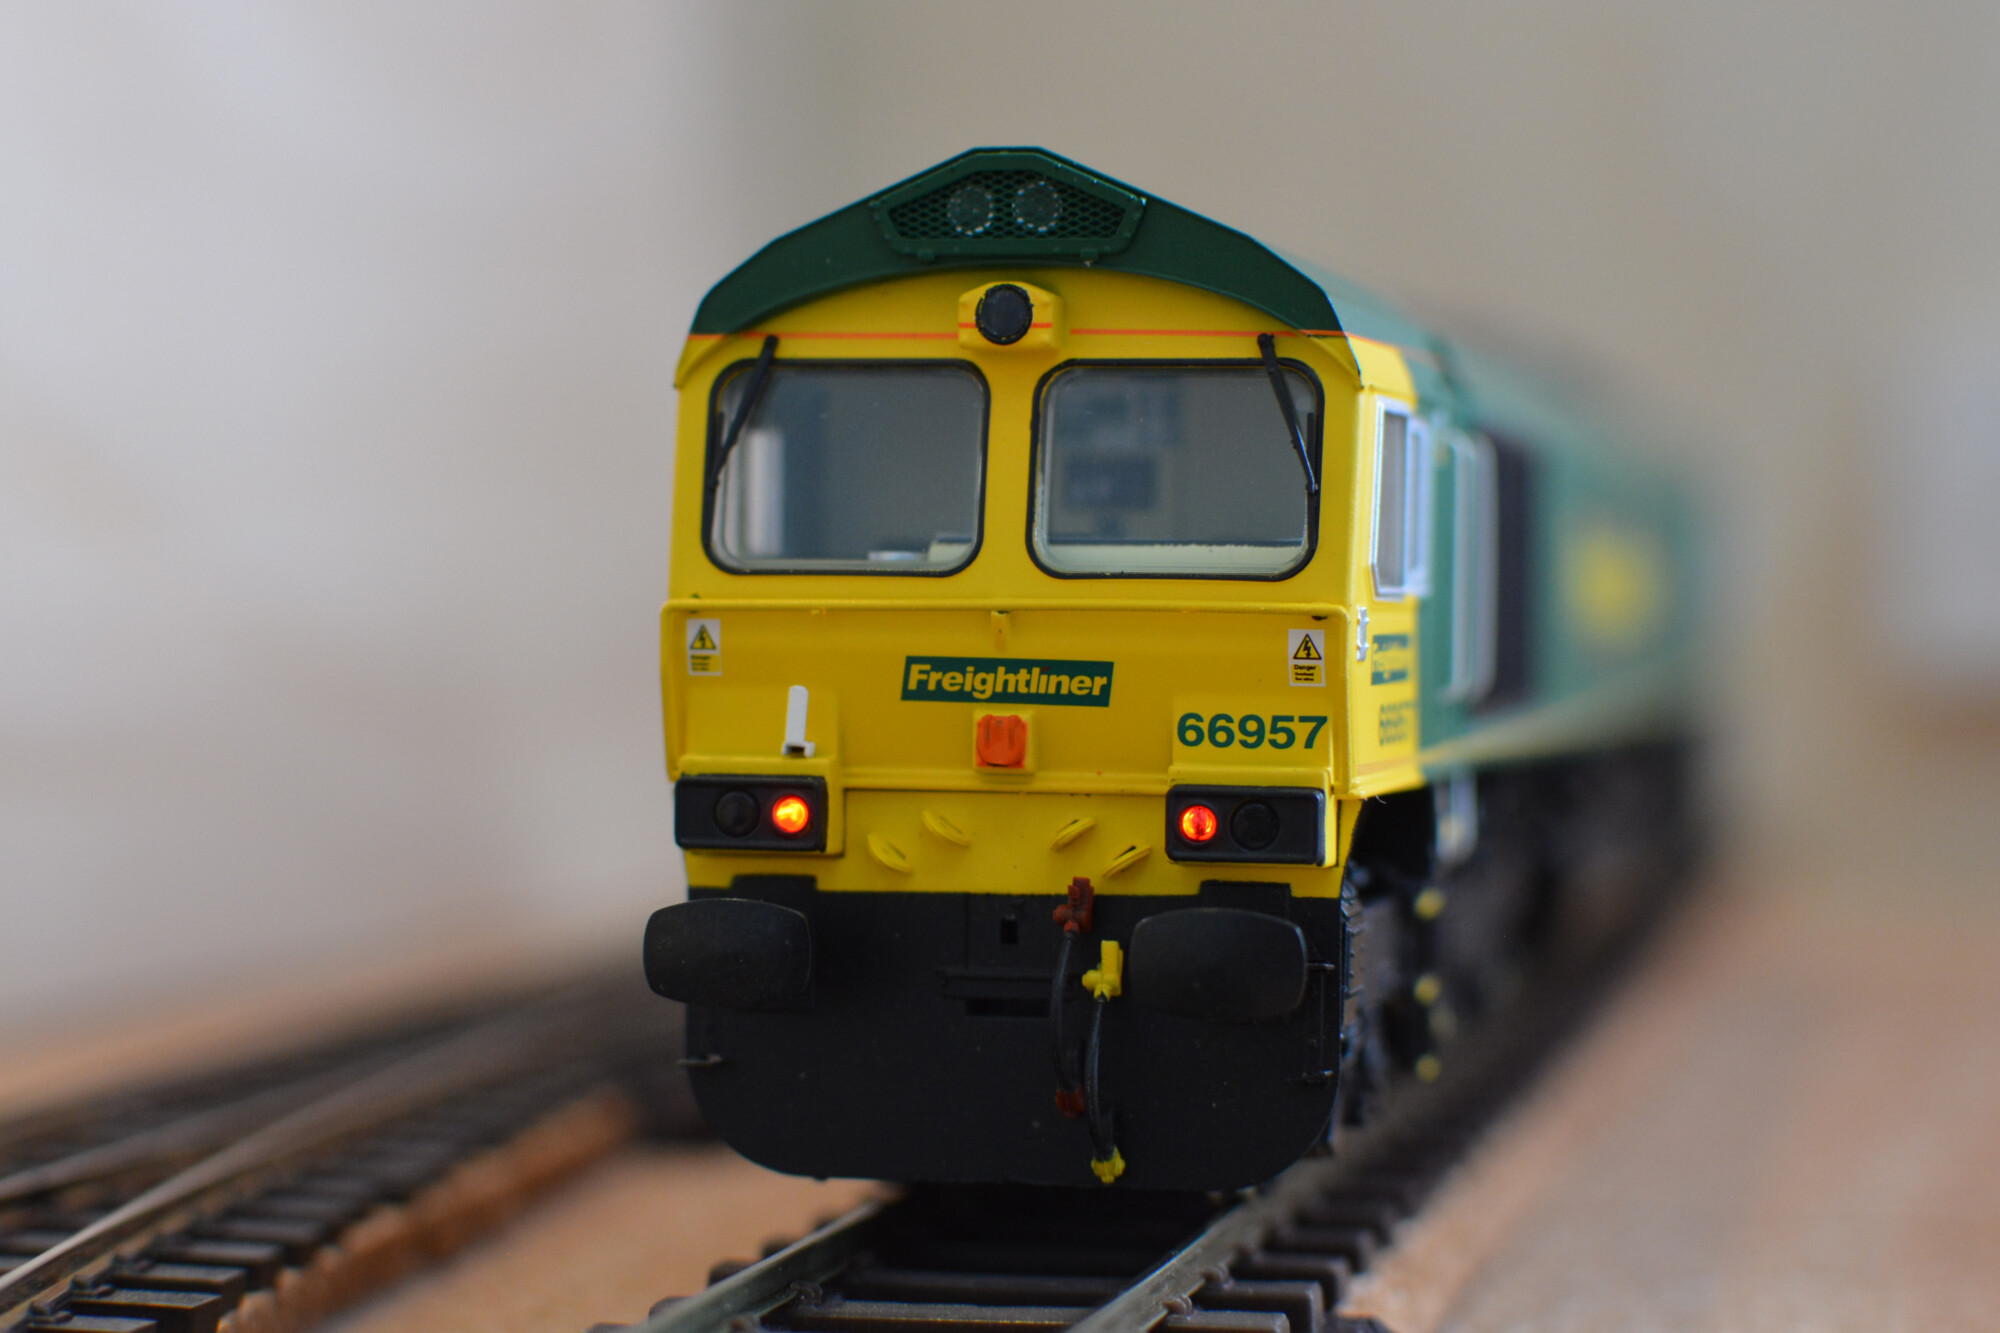
Cab and front
The detailing around the cab area is pretty good – the light clusters are correctly positioned and proportioned, the handrails are all separately-fitted parts and the air dams (even the functional one seen below on 66789) look right. The air dams are so important when modelling a 66 as they really do define the look of the prototype, and models without them just look wrong (I ended up modifying my Bachmann 66 to allow the supplied cosmetic air dams to be used with couplings). It’s also nice to see that the air dam component (the plastic piece itself) continues above the black line and stops at the point where the cab body starts to angle forwards. This means the join between the dam and the rest of the body is neatly hidden.
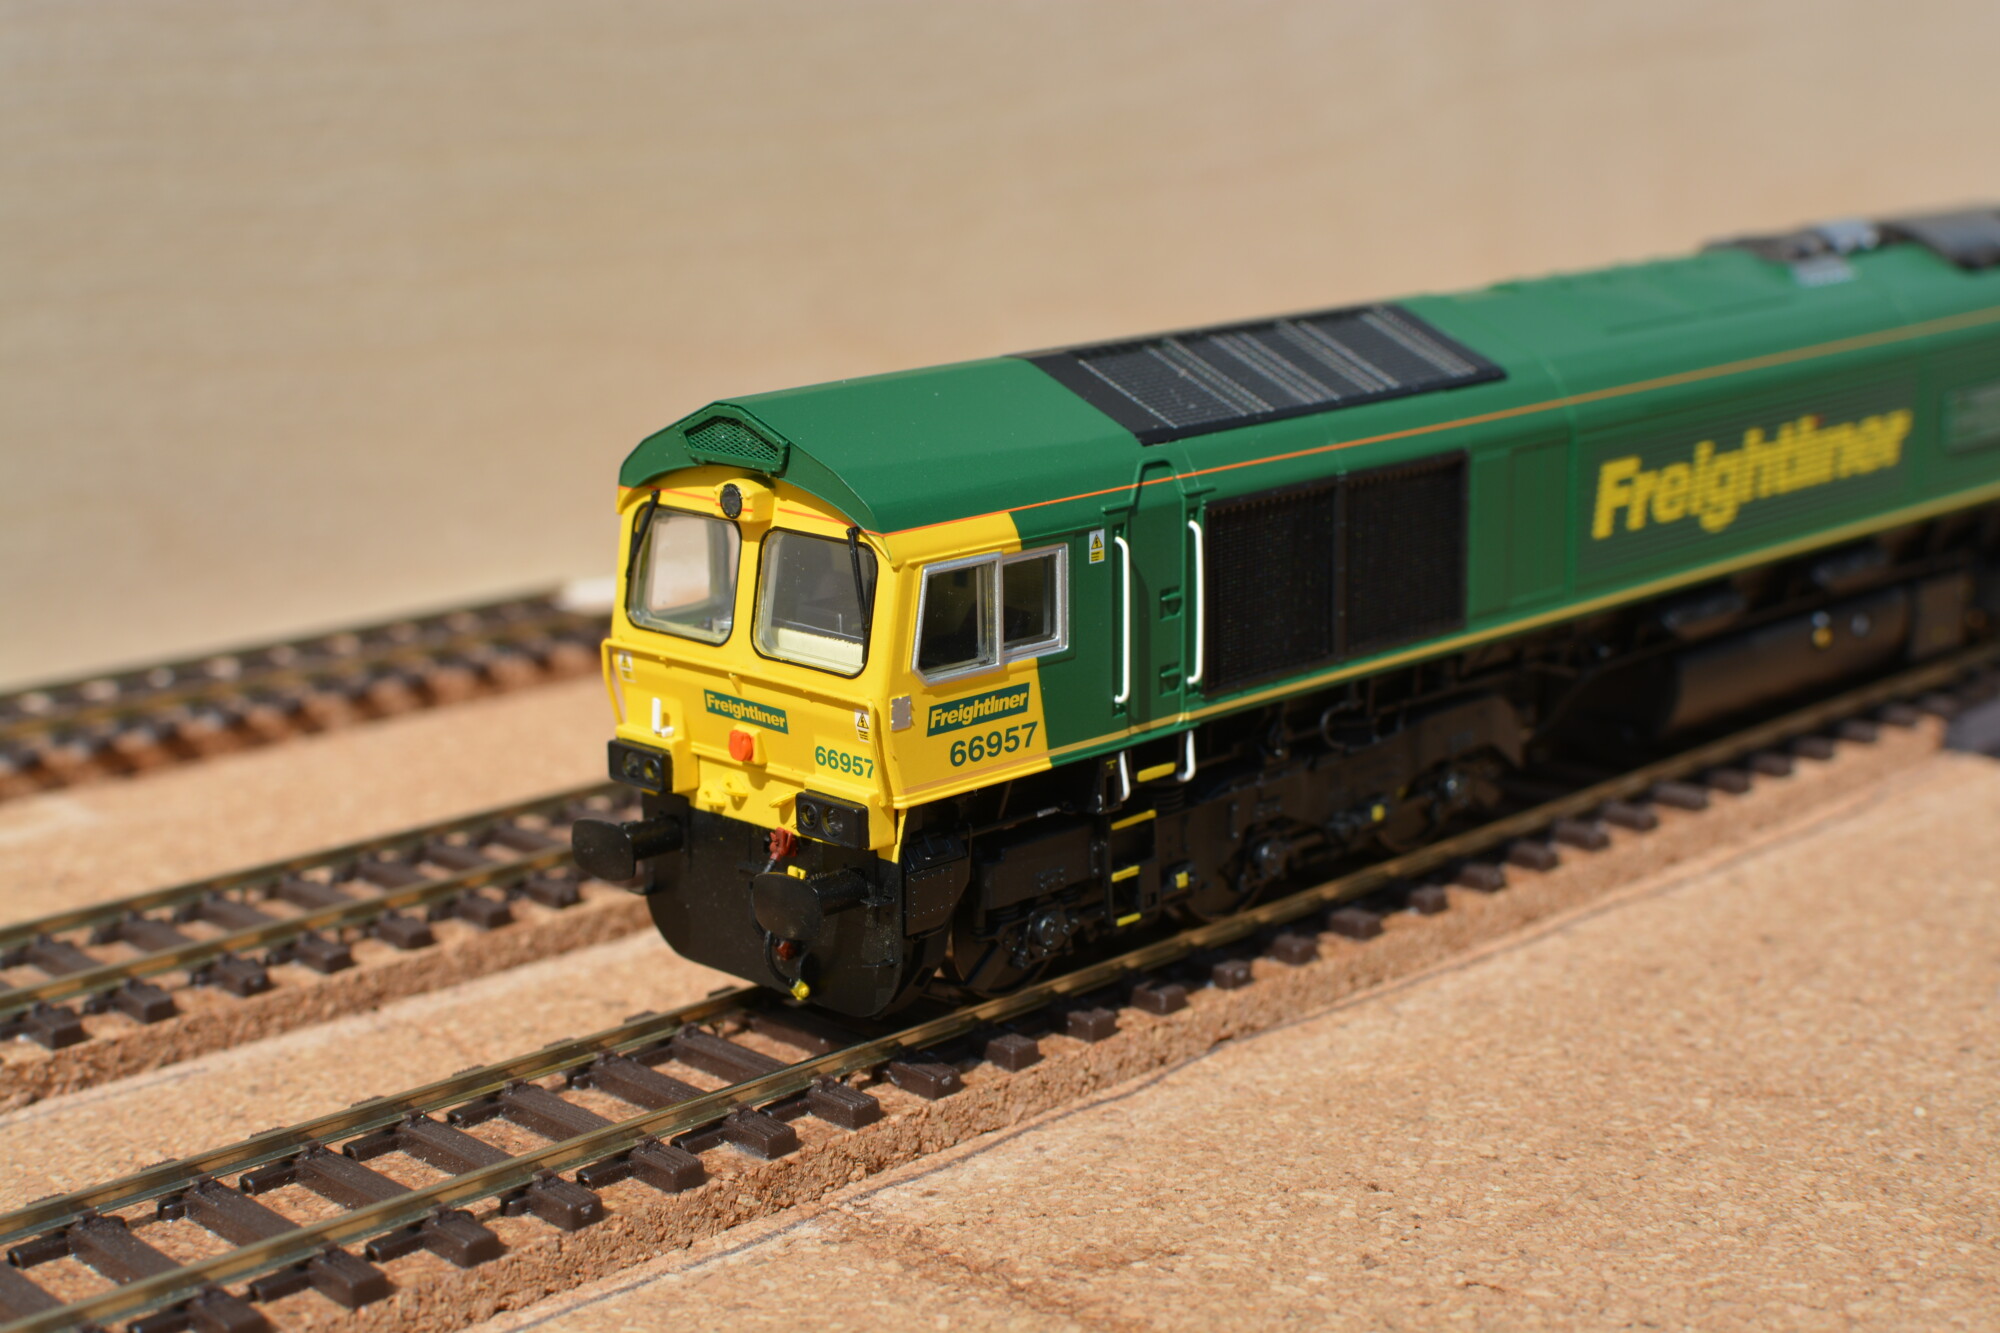
It’s hard to tell from these photos, but the horns (located behind the grille above the cab front windows) are modelled as separate parts, which is nice to see, but (being picky again), the grille mesh is a touch too thick when compared to the real thing, so they’re rather hard to spot if you’re not looking at them directly from the front. I imagine this may be a limitation of the etching process – it may not be possible to reliably etch smaller holes than this.
The orange cantrail stripe running around the roof is well applied, but it would have been nice to see it applied to the side of the upper headlight box, as on the real thing. I believe this stripe is tampo printed on, rather then being a transfer, so perhaps it’s tricky to get the printer head into this area.
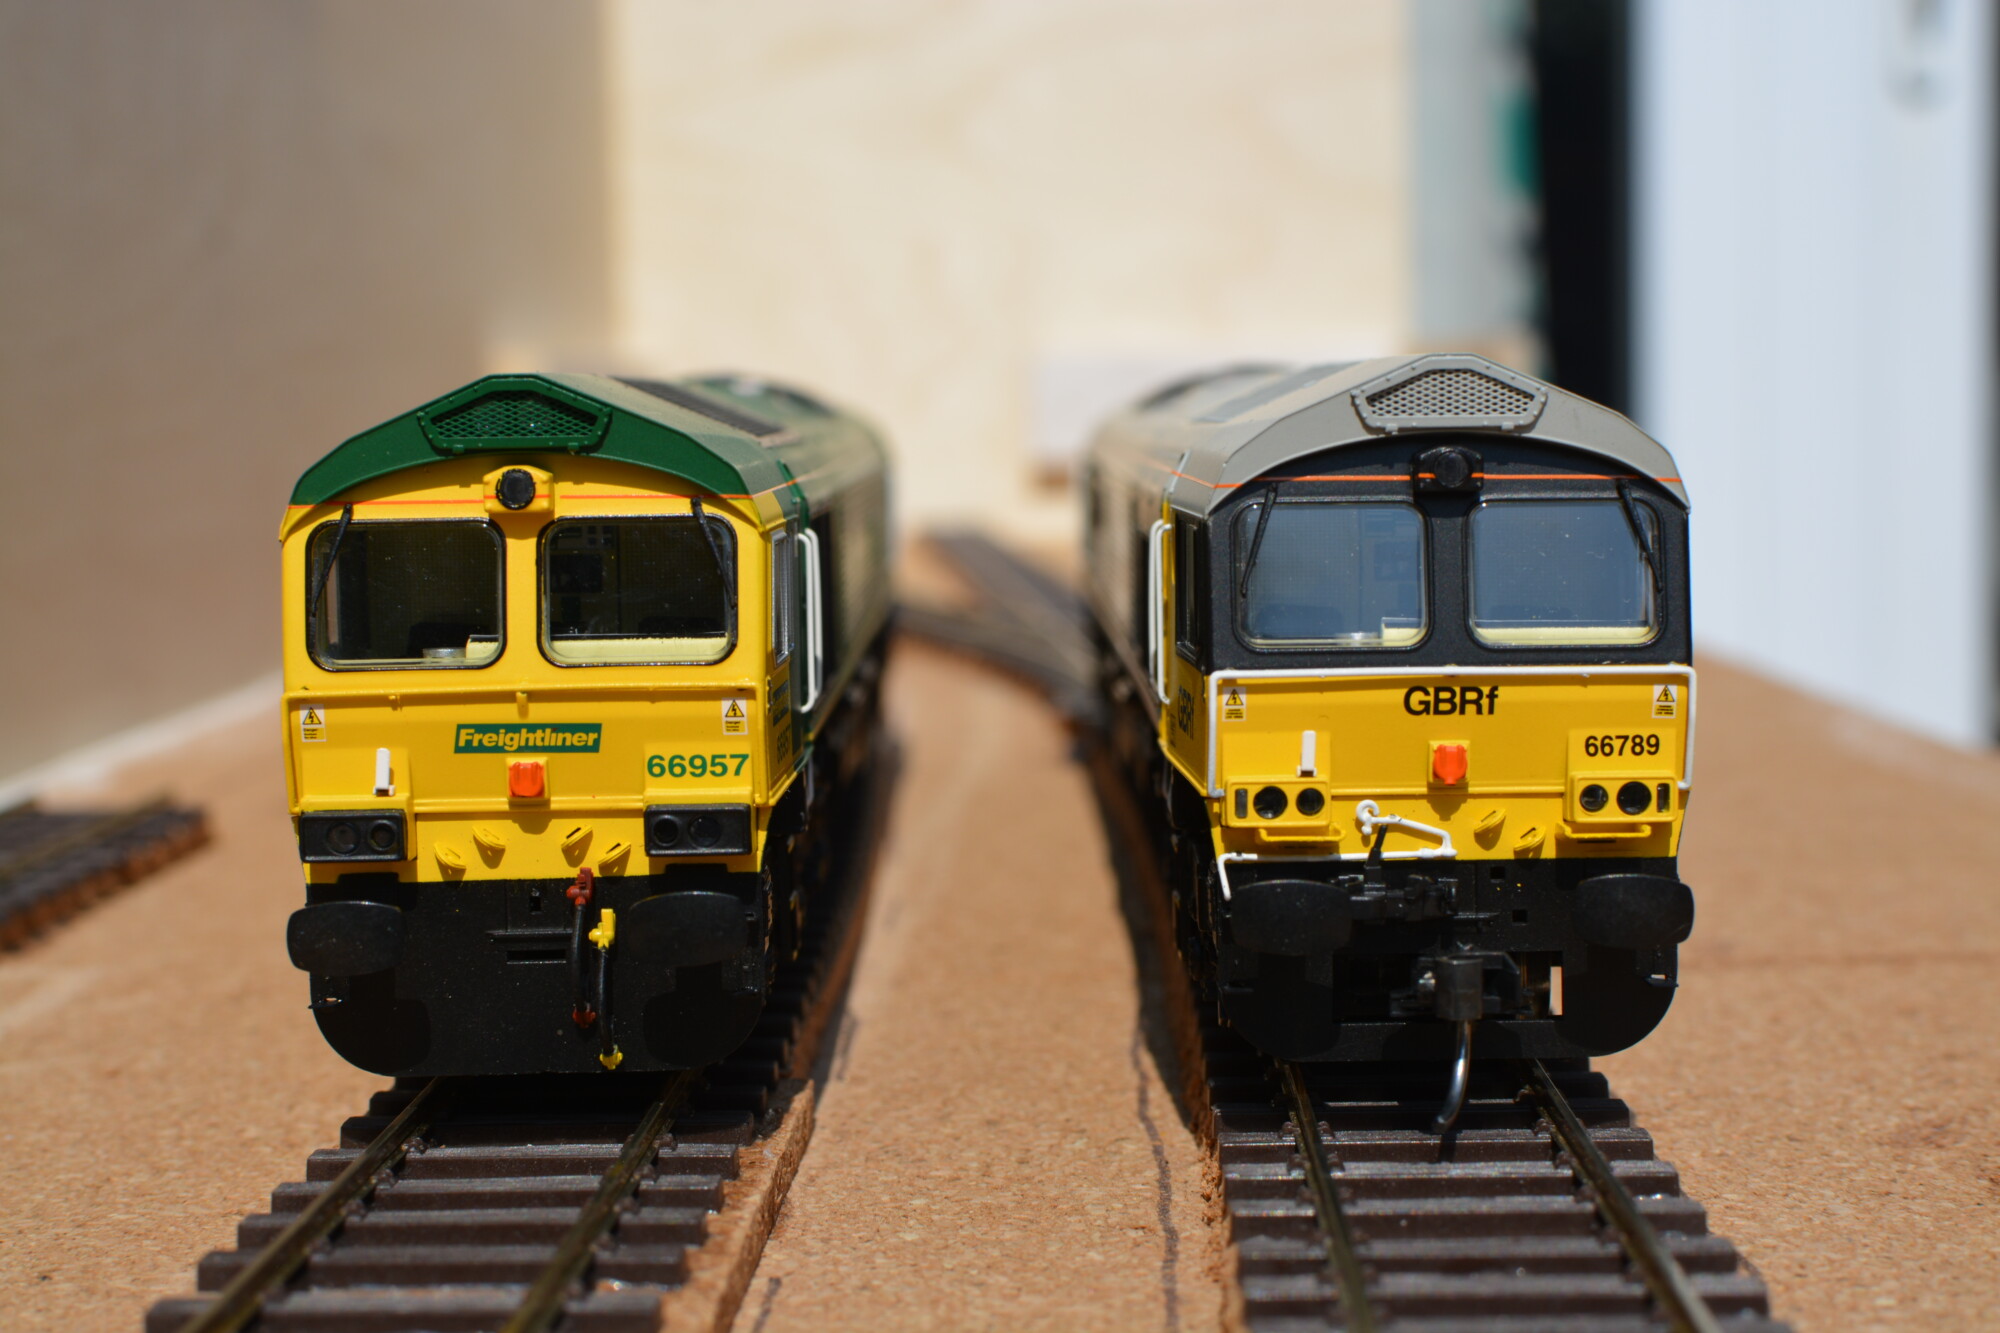
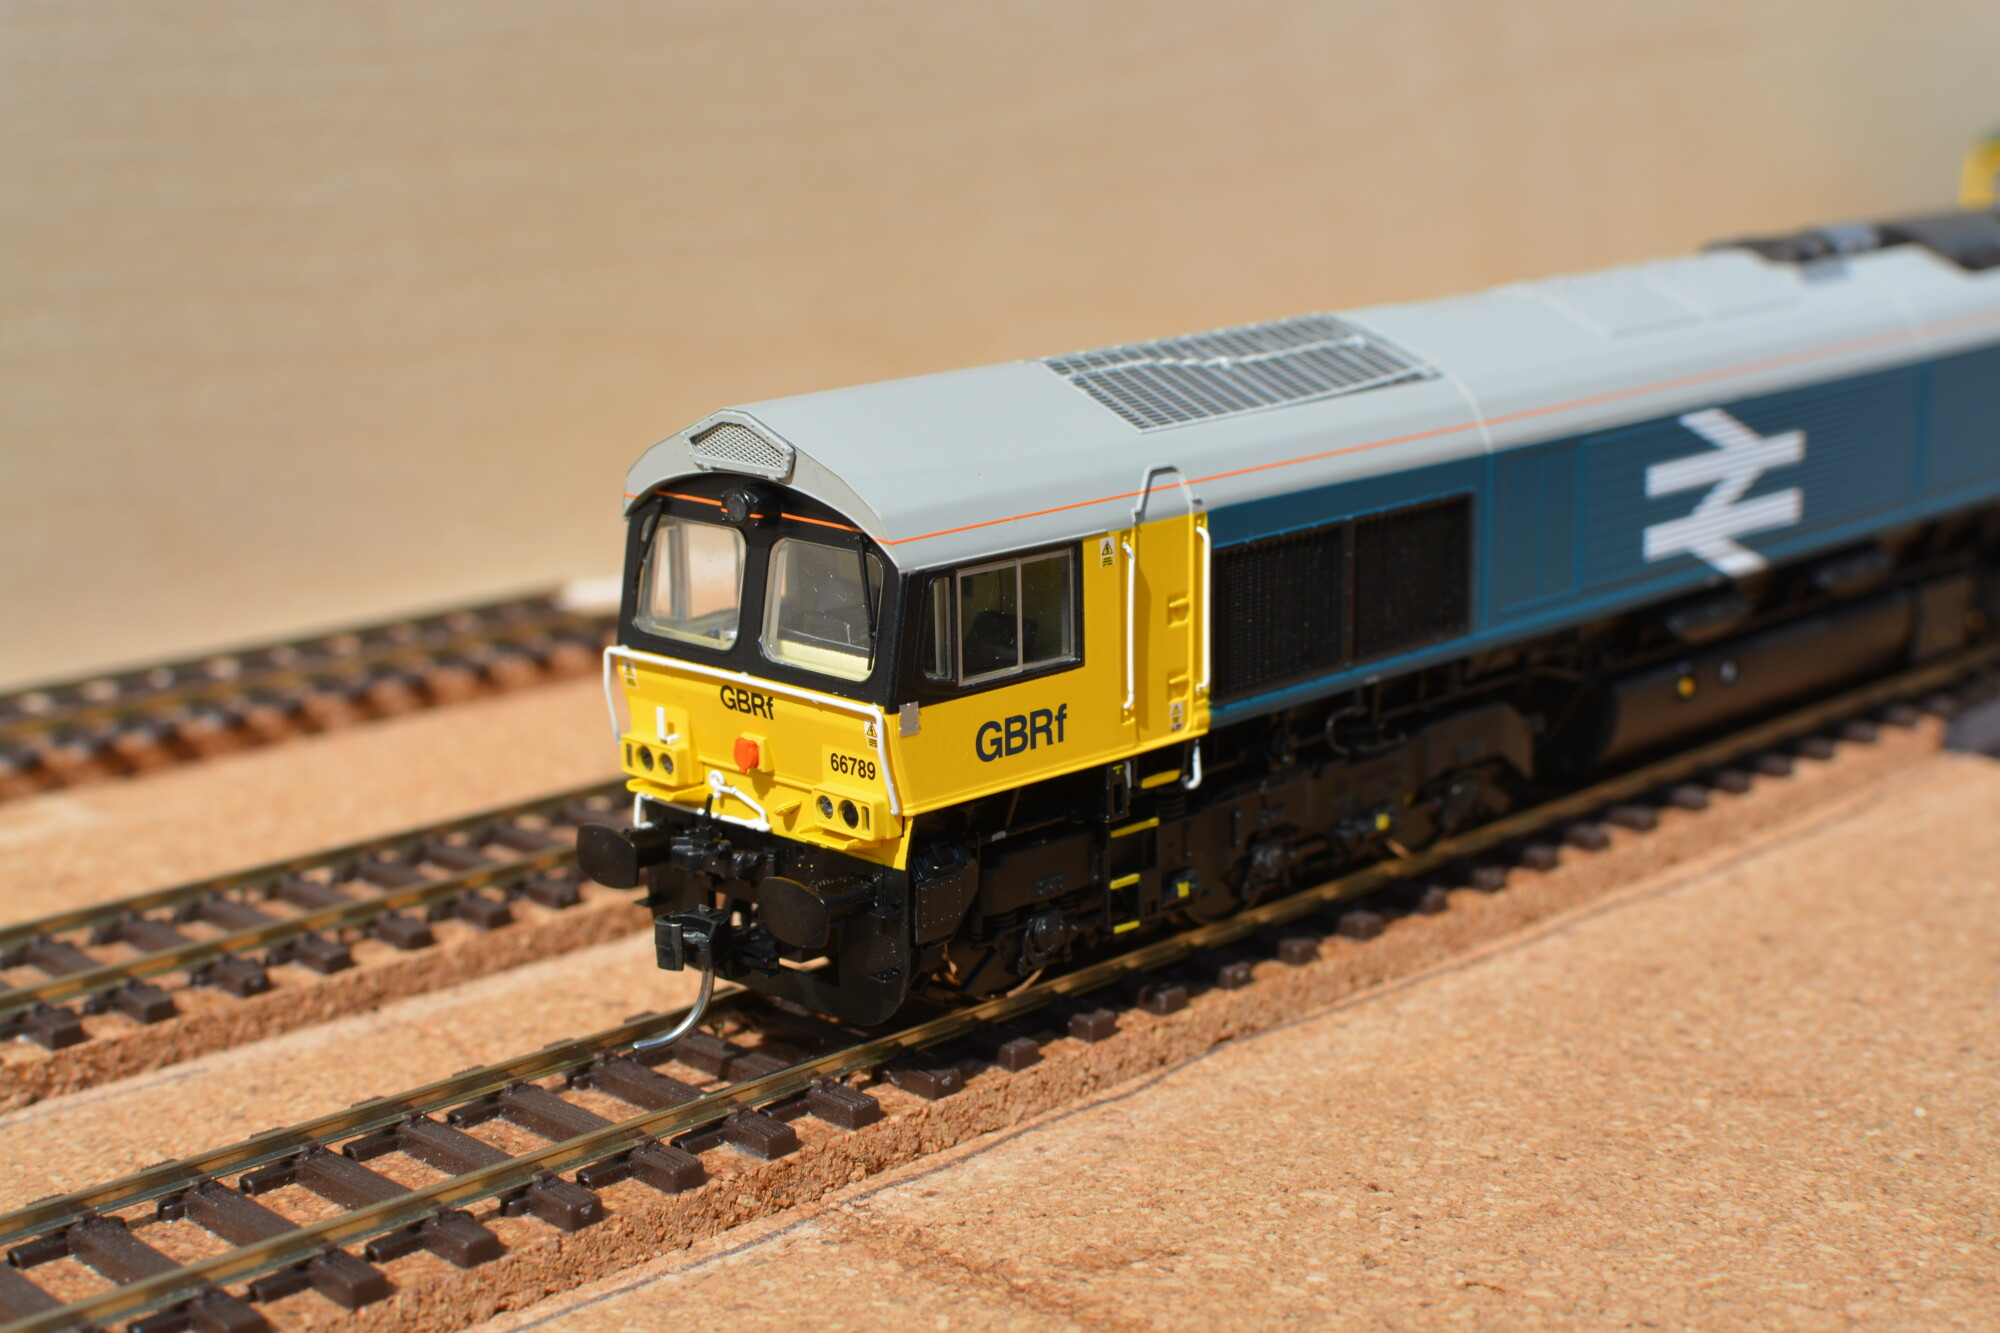
I’m impressed with the amount of variation between the different versions Hattons have managed to reproduce. For example, true to the prototype, 66789 has a swinging “Buckeye” coupling, whereas 66957 does not. 66957 lacks separate marker lights (the rectangular ones on the outermost edges of each cluster) that are present and functional) on 66789.
66789 unfortunately has the wrong colour lenses for the tail-lights – on the prototype they’re a dark red, even when not illuminated. It’s a shame this has not been modelled, as it would have been quite easy to fit red plastic lenses instead of clear ones. I may try to correct this with a drop of diluted red paint on each lens.
Roof
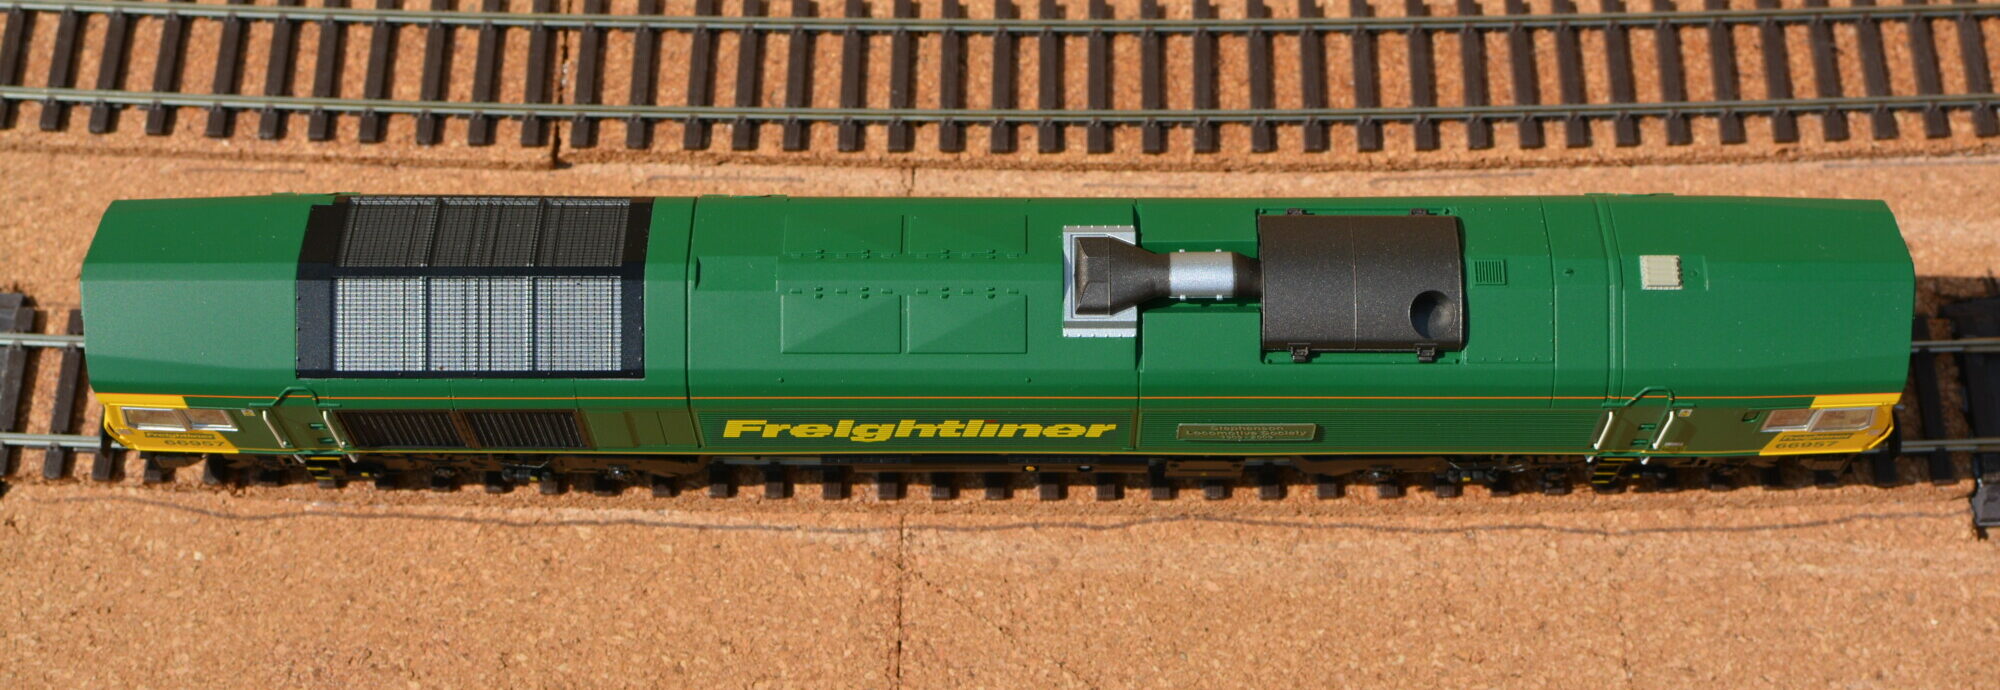
Moving on to the roof, here we see yet more differences between the two. 66789 has a smaller fan grille, and a larger centre section as a result.
Sides
66957 is part of the “low-emissions” 66/9 sub-class, and as such has a smaller fuel tank due to the weight of extra components inside the body. This is represented accurately on the model. The size and position of the side grilles matches the prototype – more evidence that Hattons really took care when studying the real locomotives. 66957 also has an extra door on one side which is not found on 66789. The corresponding steps are also present (and are extremely delicate – making body removal even more stressful!).
Both of these locos are named, and the nameplates are separately-fitted etched pieces, which is par for the course for high-end models these days.
In the photos below you’ll see that each loco is missing one axlebox – more on this later!
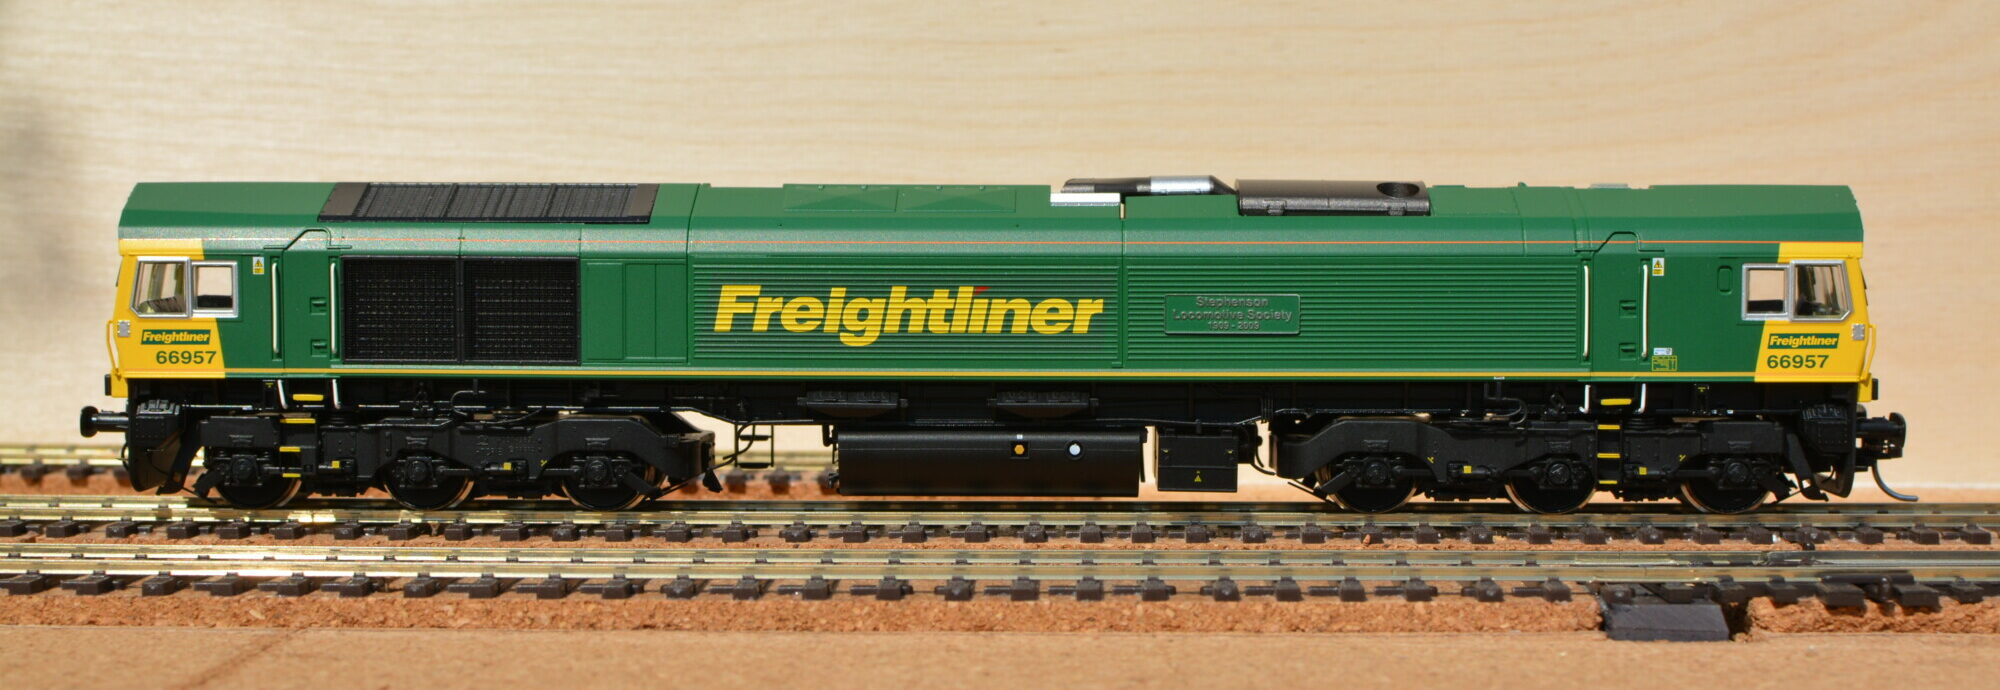
One let-down with 66957 is the application of the large “Freightliner” logo in the middle. There’s a clear difference between the green used for the background of the logo (presumably it’s a transfer) and the green on the rest of the body. This does slightly spoil the look of the model, as it’s something that now I’ve seen it I can’t unsee! It’s a bit of a miss to be honest, as I’m sure it’s possible to produce a transfer without a background, thus avoiding the issue altogether.

Cab interior
The cab interior has been reasonably well-detailed, with a moulded centre console, correct-looking seating and the hot-plate all fitted as separate components. The driver’s console is represented with a sticker, which looks OK but has started to peel away from the plastic undeneath on two of the four cabs on my models. It would have been better to have this detail printed on, but then again, for the amount of time you actually see it, it’s probably not worth it, so this is a fair compromise. I plan to add drivers to each cab, so when I do this, I will glue down the sticker and paint the edges to help it blend in a bit better.
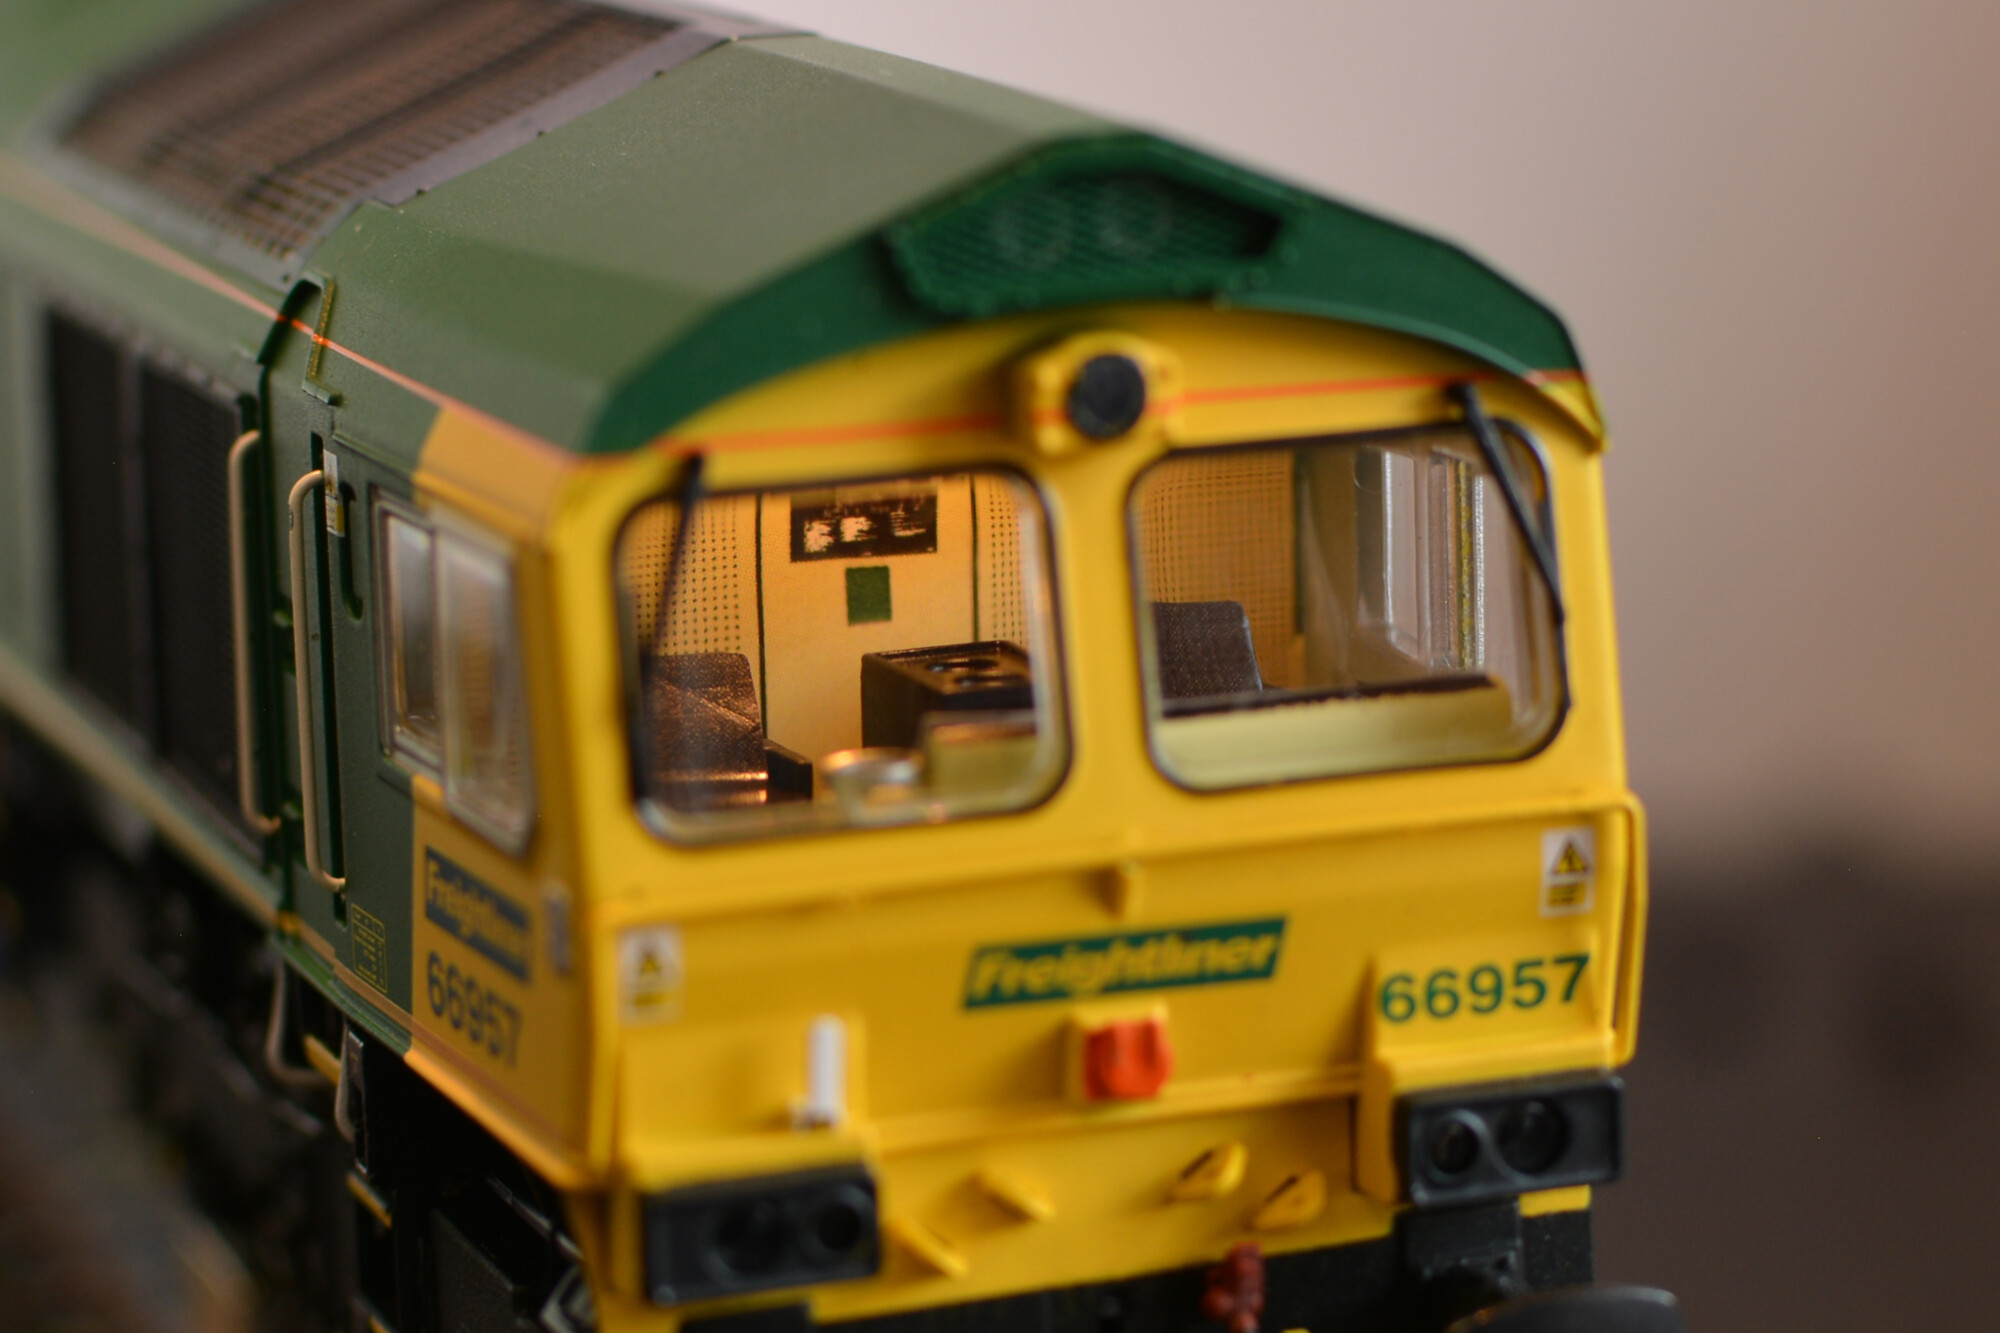
As with almost all 4mm scale models, if you examine the inside of the cab under a microscope you’ll find some missing detail, but on the whole I think the interior detailing is pretty good. One good thing is that they have not cheated in the area around the seats (i.e. there’s no false floor or other trickery), so I should be able to fit drivers and secondmen without any problem.
Bogies
For me this is the area where the Hattons model really distances itself from any other model of a 59 or 66 (or indeed any other RTR diesel model I’ve seen to date). The bogies really are outstandingly well modelled – pretty much every small pipe and detail from the real thing is included on the model. Each bogie has a set of separately-fitted pipes, with the rest of the details being moulded onto one of the larger pieces. I say pieces because each bogie actually comprises three components: the main frame, and two “inner” stretchers that link the axleboxes together. These stretchers are set inside the main frame which gives the bogie a real sense of depth when viewed up-close.
True to the prototype, there’s not much daylight between the bogie and the chassis. This, coupled with the fact that the pipes that run from the chassis to the bogie are modelled (albeit with a break in the middle to allow the bogie to rotate!) means that you really get a sense that the bogie and chassis are joined together.
Rotating axleboxes
Of course, you can’t talk about the bogies on this model without mentioning the rotating axleboxes. One of the headline features of this model when it was announced, they’re visually impressive (it’s not been done before on a UK model and it does definitely add something), but a real pain in the a*** to get working properly.
Out of the box, 66789’s axleboxes were in a sorry state – four of them were glued to the bogie rather than the wheel, none of them were attached perpendicular to the wheel, and one is in fact so badly damaged from fitting that I’ve been unable to rescue it, and am awaiting a set of replacements from Hattons. The photo above was taken after I’d spent about five hours fixing them – I’ve detailed the problems with them and the steps I took to fix them in this article. I go into more detail about the problem in the article, but the problem is basically caused by the combination of:
- An optimistic bogie design – several parts needs to sit in exactly the right place.
- Lack of a decent attachment between the wheel and the axlebox itself.
- Poor assembly and quality-control in the factory.
All-in-all, when they work, the rotating axleboxes really add something to the model. There’s been a lot of criticism of them on certain forums, but I think Hattons should be applauded for including them on the model – they are a genuine step forward in the UK market, and hopefully we start to see this offered on other models in the future. Their design isn’t terrible, just average, which leaves me optimistic that someone (Hattons, Bachmann, whoever) could really nail it in a future product.
One thing I’d like to see improved with the axlebox design is the compromise between looks and running – specifically how they’re designed to negotiate second-radius (438mm) train-set curves. Because of this rather tight constraint, the axleboxes are designed such that each one sits about 0.75 – 1mm outside of the inner bogie frame when the wheelset is centred. This is necessary as when on tight curves, the outer two axles on each bogie will be pulled to one side and the inner axle to the other. An improved design would keep the axlebox cover flush with the inner bogie frame whilst allowing the wheelset to move freely from side to side. This would of course increase the cost of the model. A compromise could be to supply two sets of axleboxes: from the factory the model could have the more tolerant, second-radius compatible, axleboxes fitted, but a set of slightly shorter (~0.5mm) ones could also be supplied should the modeller wish to run the loco on much larger-radius track. This would rely on there being a reliable mechanism for attaching and detaching the axleboxes, which would again increase the price.
I should also point out that Hattons were well aware of the issue when I contacted them about it, and were happy to arrange for two packs of spare axleboxes to be sent to me when they are available.
Lighting
Lighting on these models is impressive, with all lights operational as per the prototype, including differences between the sub-class variants. Day, night and parking modes are available, as well as directional cab lighting that is extinguished when the loco is moving.
The series of photos below will go through a typical startup and driving sequence that shows off all the various lighting options available on these models.


It’s hard to tell from the photographs, but the bottom marker lights are warm white in tone, whereas the top marker light and both headlights are a much more neutral shade of white. I am unable to tell from photographs of the real thing whether this is accurate or not, since cameras do funny things when it comes to the colour of light sources. What I can see in photographs is that on the prototype, all three marker lights are actually clusters of LEDs, whereas the headlights are a single source of light (presumably a high-intensity bulb of some description), so I’ll assume that this different shade of white is intentional until proven otherwise 🙂 . If this is the case, it is odd that the top marker light is a different colour to the bottom two, so one of them is technically wrong!
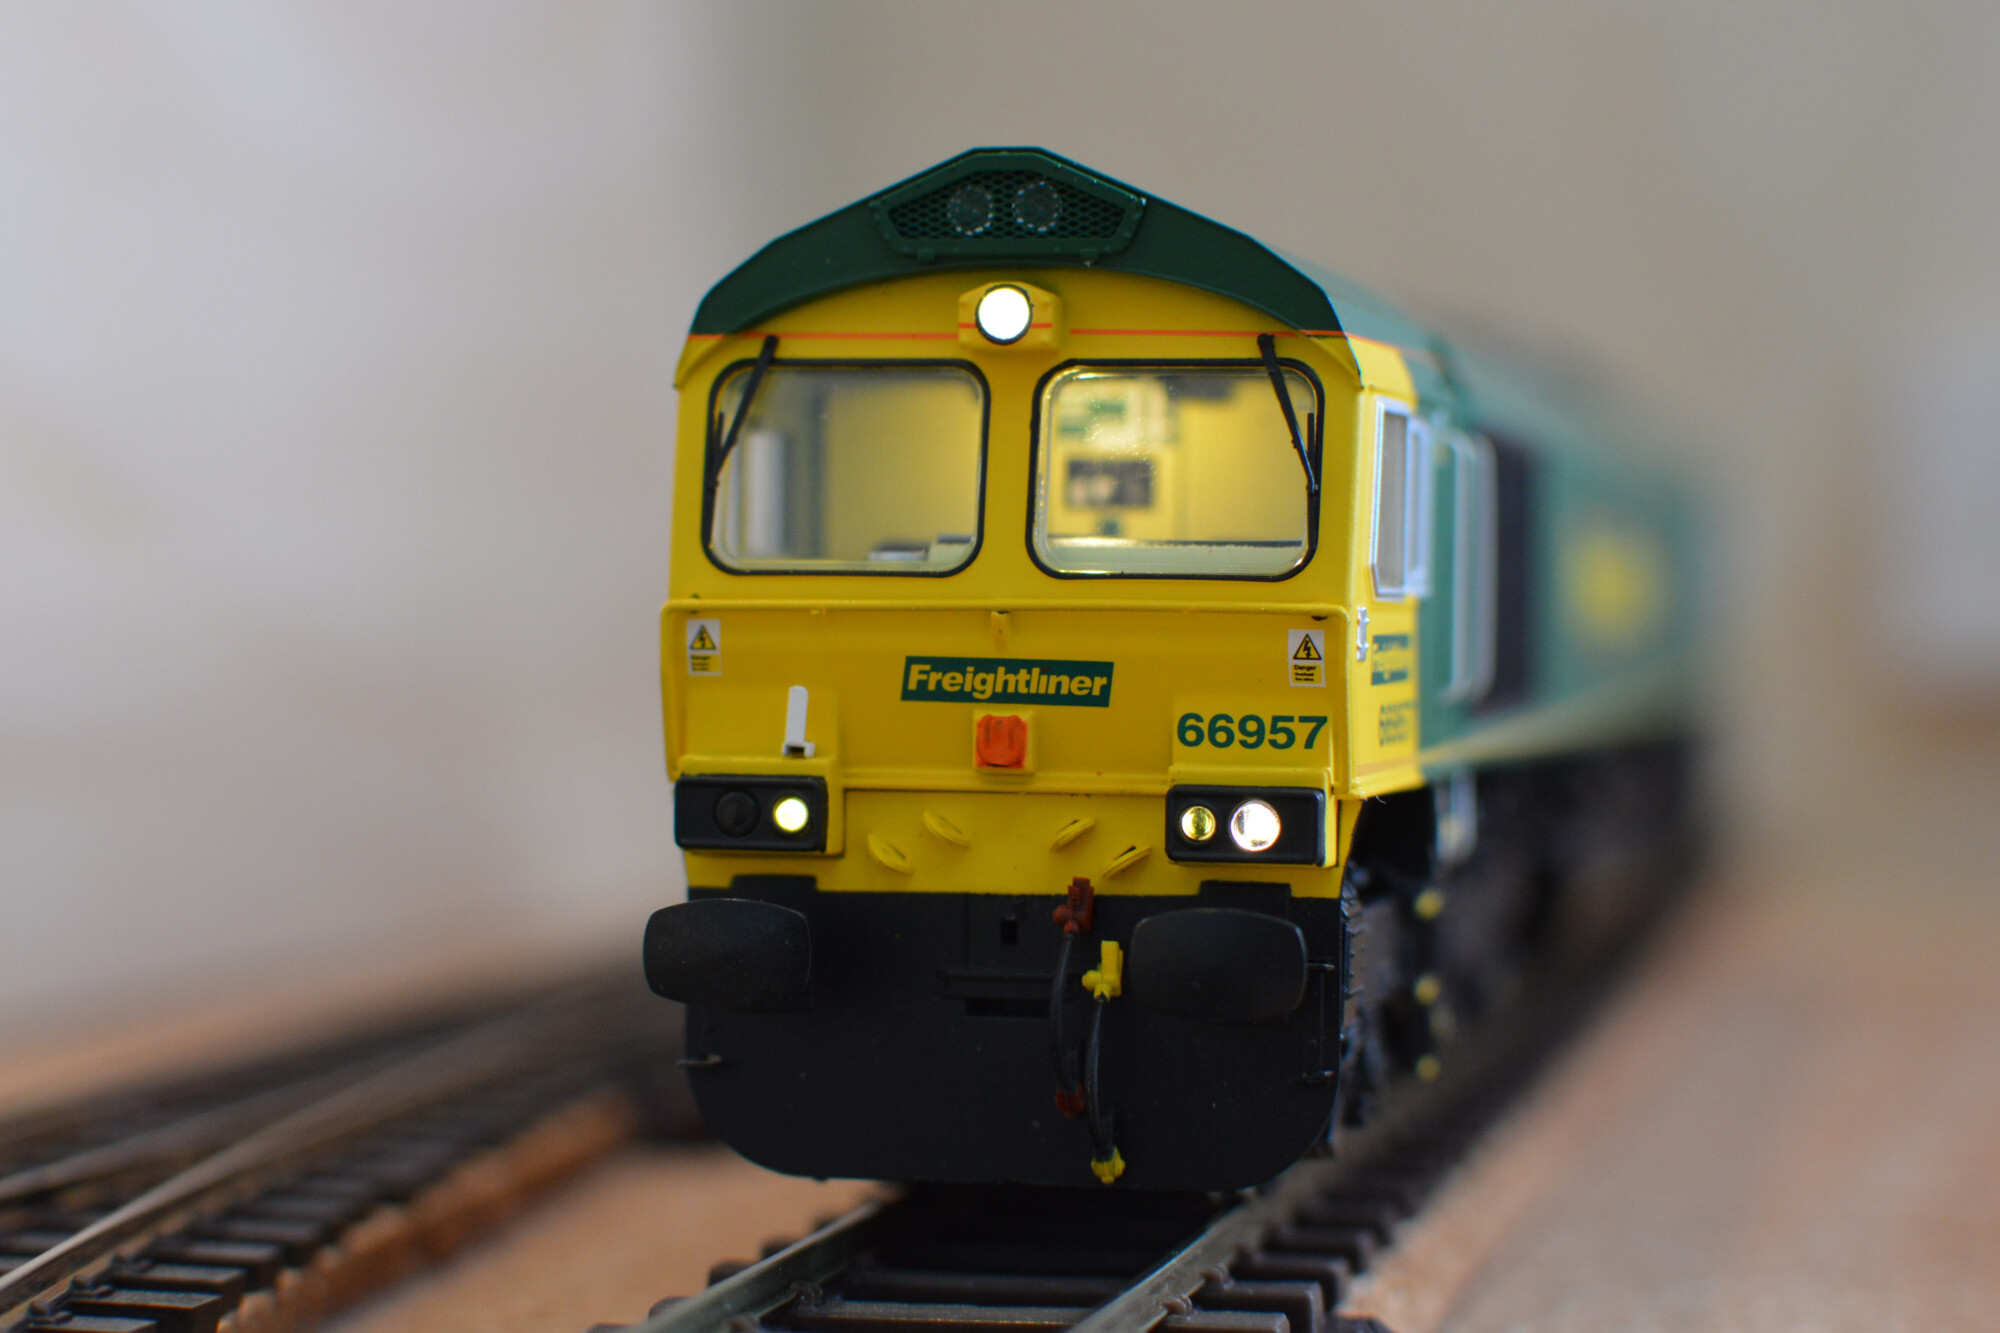
F20 enables “train” mode, which keeps the headlights and marker lights on as they would be in “light engine” mode, but extinguishes the tail lights. This is correct for when the loco is pulling a train.
When switching direction to reverse, the headlights and marker lights are of course switched off, and if running in “light engine” mode, the tail lamps are switched on.
The lighting for 66789 behaves in pretty much the same way, with the only difference being that the marker lights are actually separate bulbs on the outside of each cluster, whereas on 66957 they occupy the same position in the cluster as the tail lights.
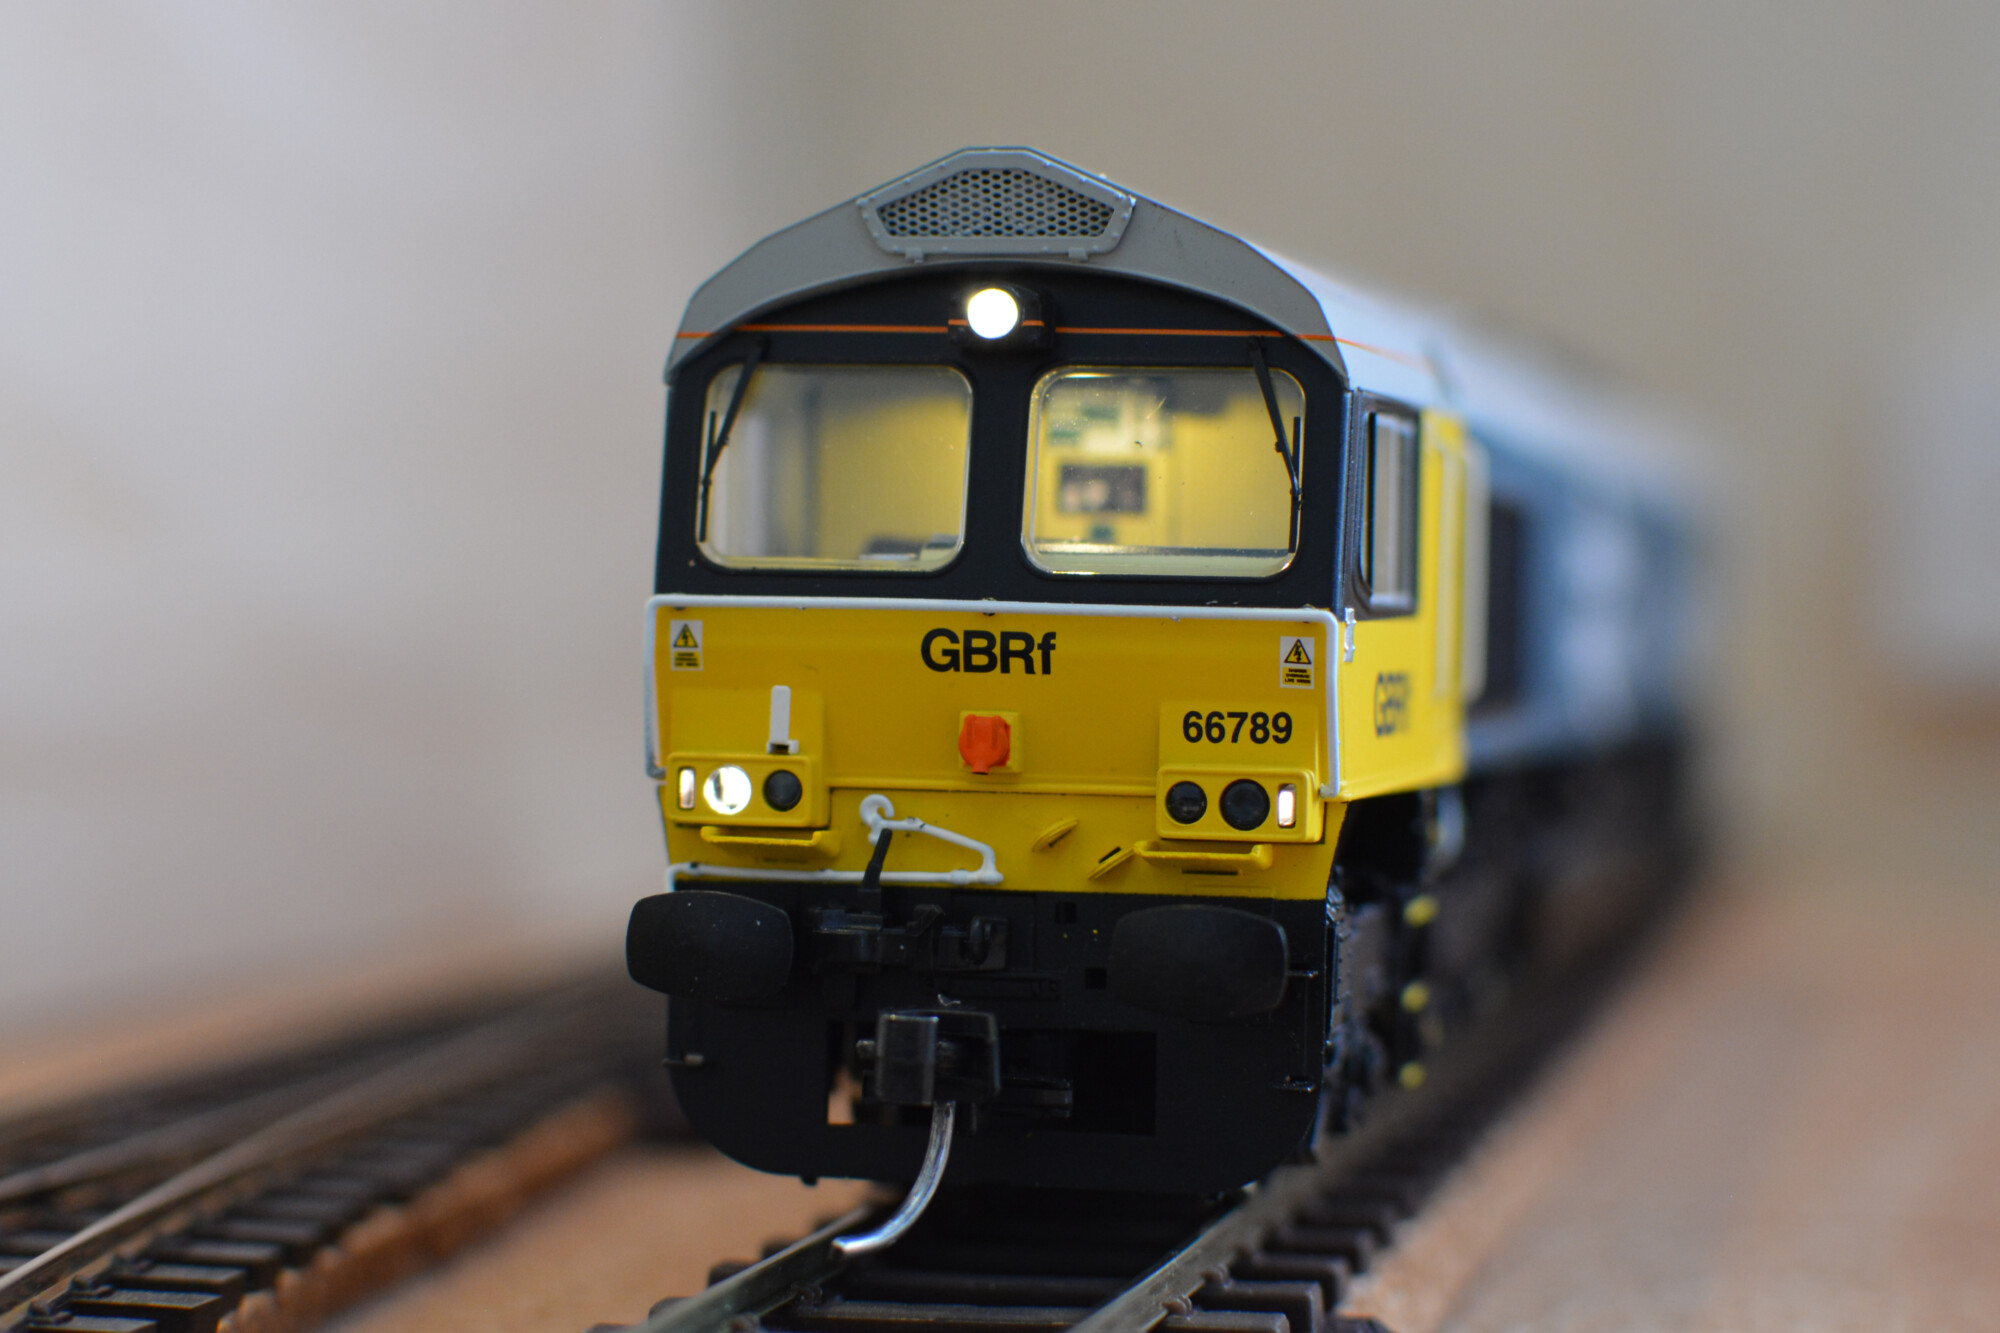
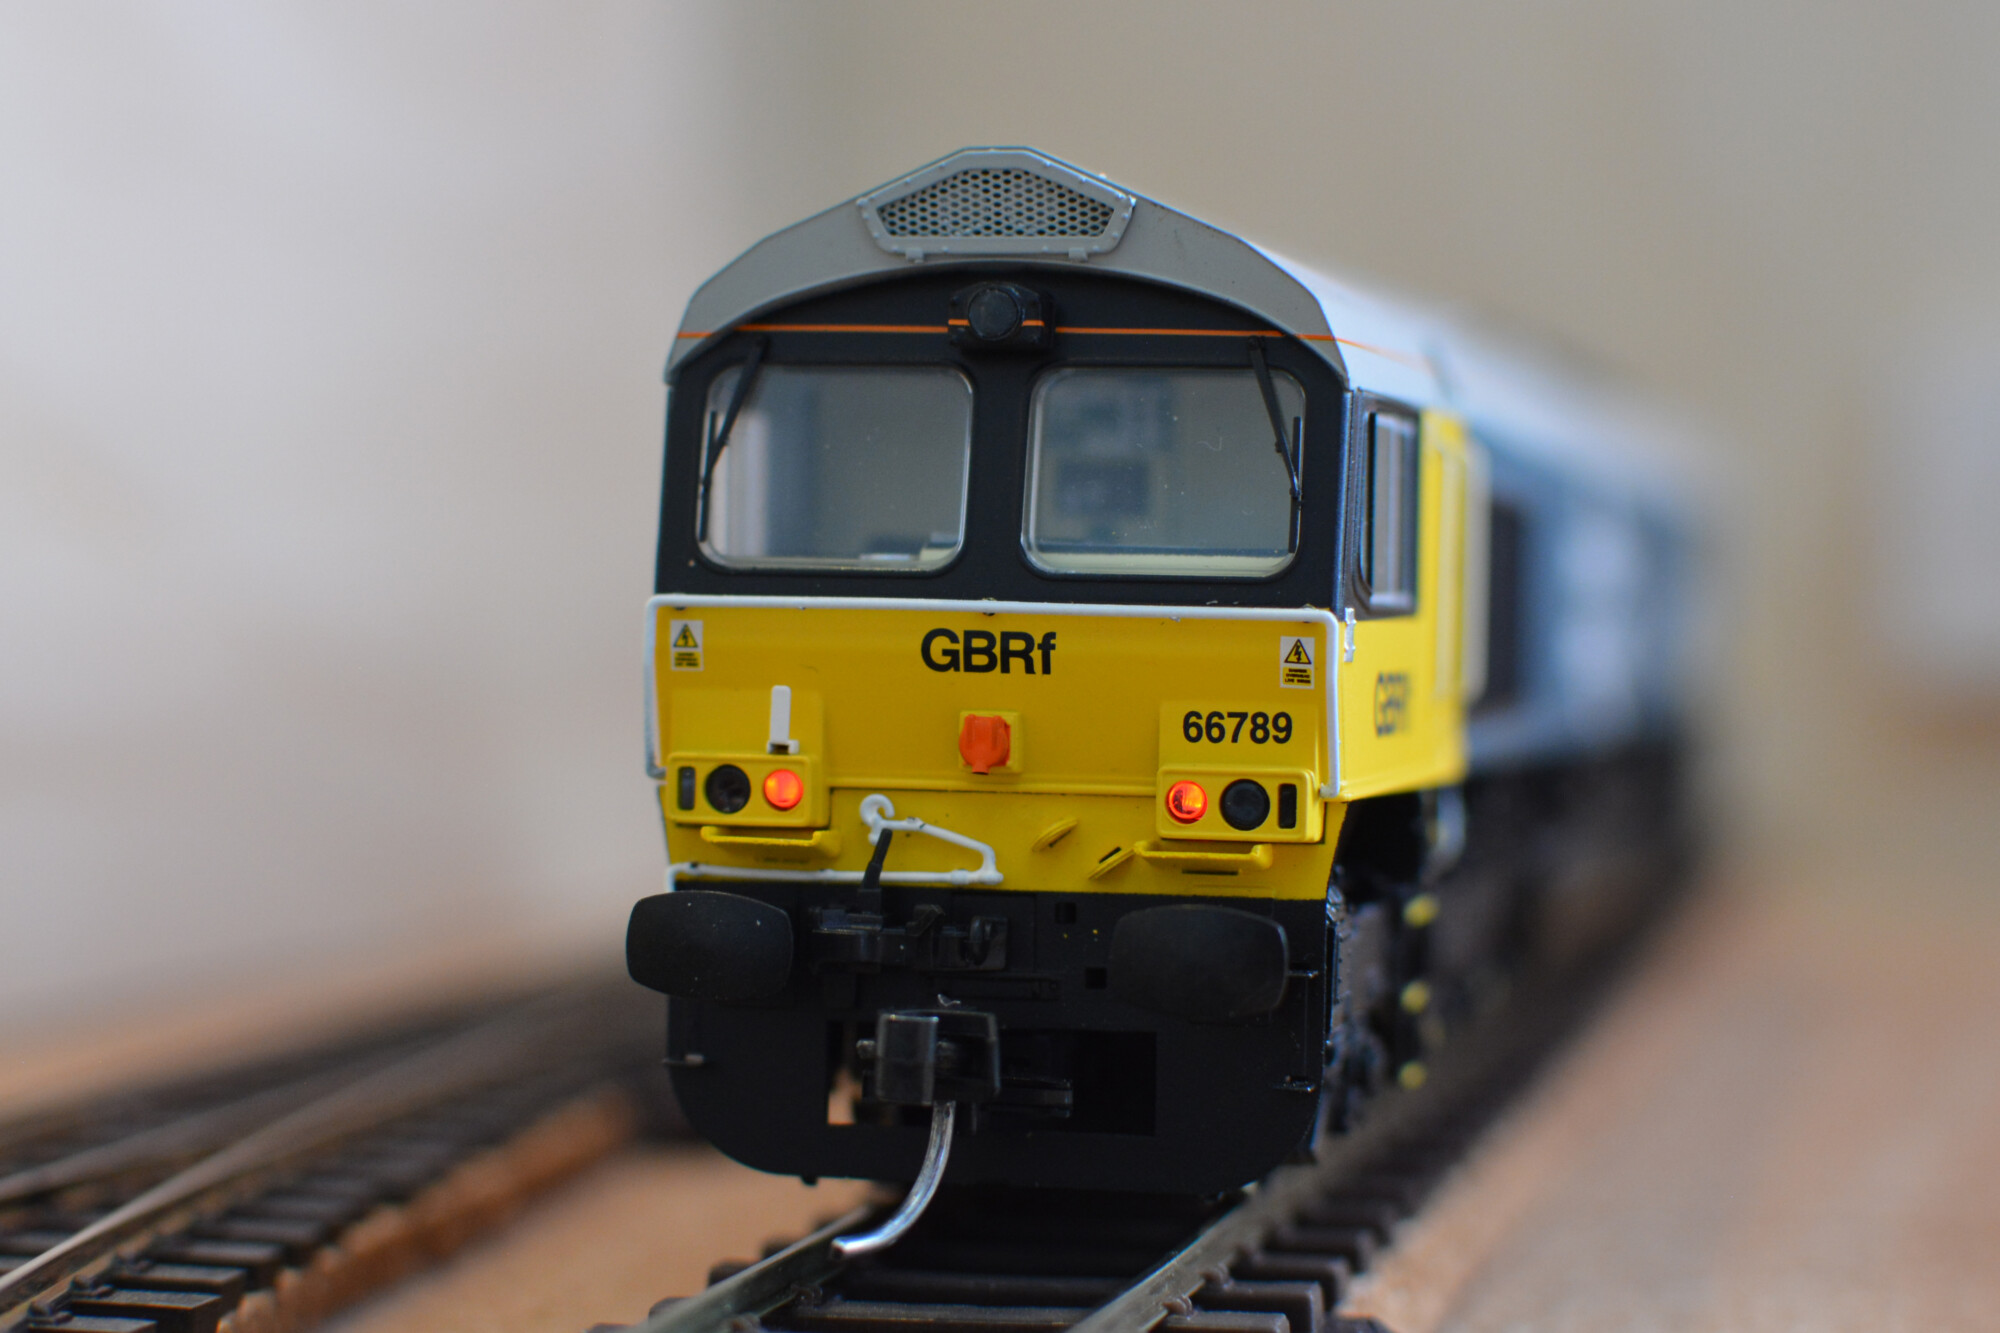
The colour of the lights on 66789 seems to be accurate when compared with the prototype, as all the lights are of the bulb rather than LED cluster variety. The only issue with the lighting on this version is the aforementioned incorrect lens colour used for the tail lights. This is a slightly frustrating mistake since these lights aren’t a shared tail / marker (as found on 66957), so a red lens would have been easy to add.
Overall, the lighting is excellent on this model, with a couple of slight niggles, but still impressive that they’ve taken gone to the effort of modelling all the lights found on these loco in real life, and made them operate in prototypical fashion with only four decoder functions required for complete control of all head and tail lights. I really like this mode-based approach (i.e. select light engine / train mode) to lighting, as opposed to the more traditional output-based approach of having to control the lights yourself, as it takes care of the logic of switching on and off lights based on the scenario. I will be copying this approach on all my other locos where possible.
One thing to bear in mind is if you purchase the a digital (non-sound) fitted Hattons 66, not all lights will be controllable. In this case, the cab lights will not be controllable at all, plus tail lights and day / night mode are set using switches on the underside of the loco. The only way to have full control of all lighting outputs without using switches is to install a decoder with ten outputs (which the Loksound 5 that Hattons use for the sound-fitted models has).
For a complete overview of what lighting options are available for a given type of DCC decoder, it’s best to have a look at the operating instructions.
Inside the model
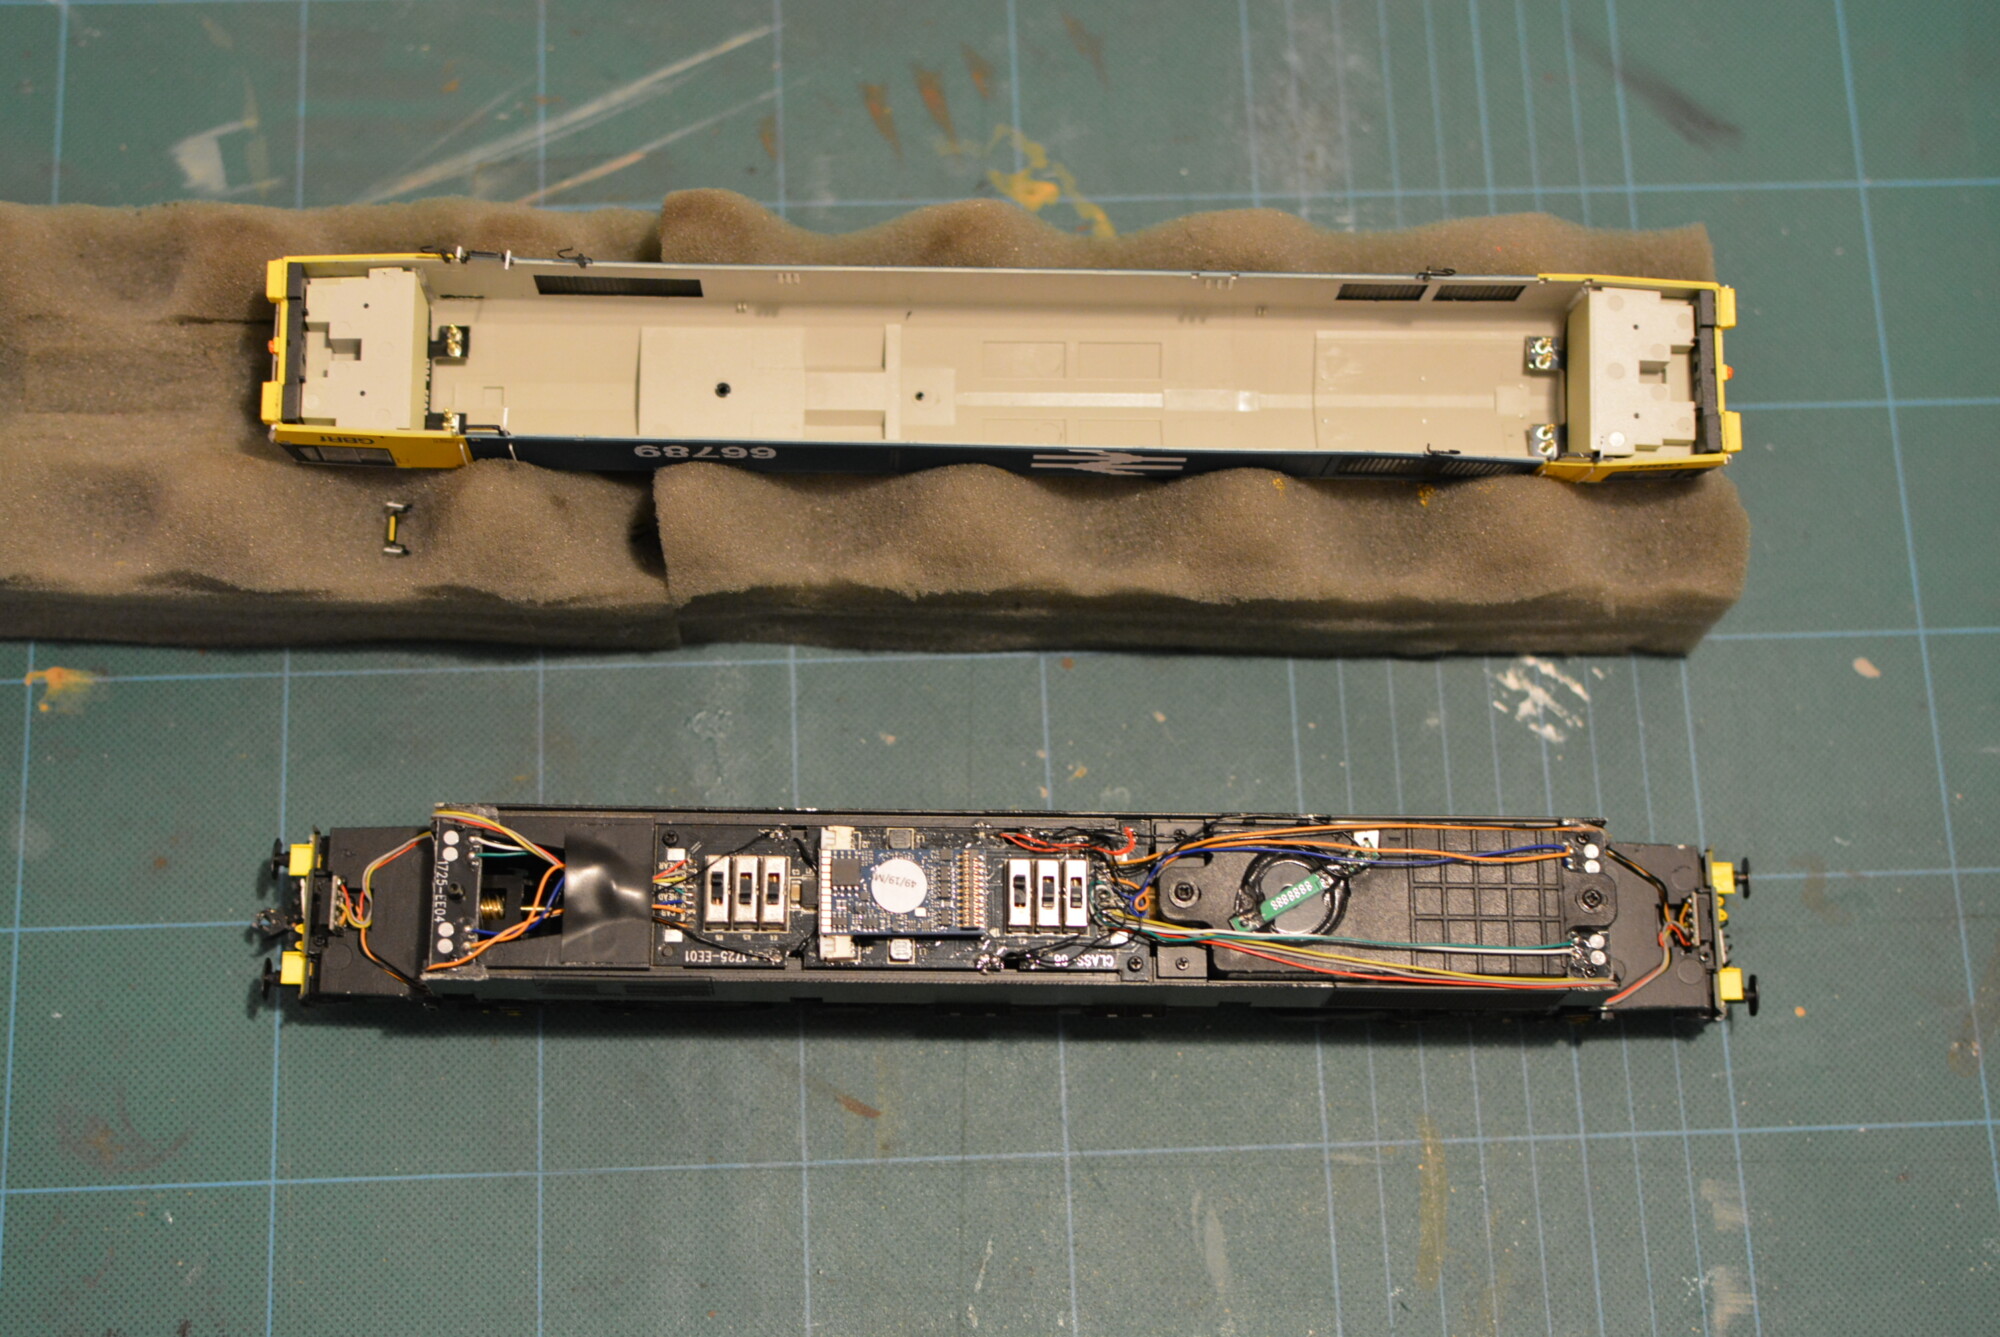
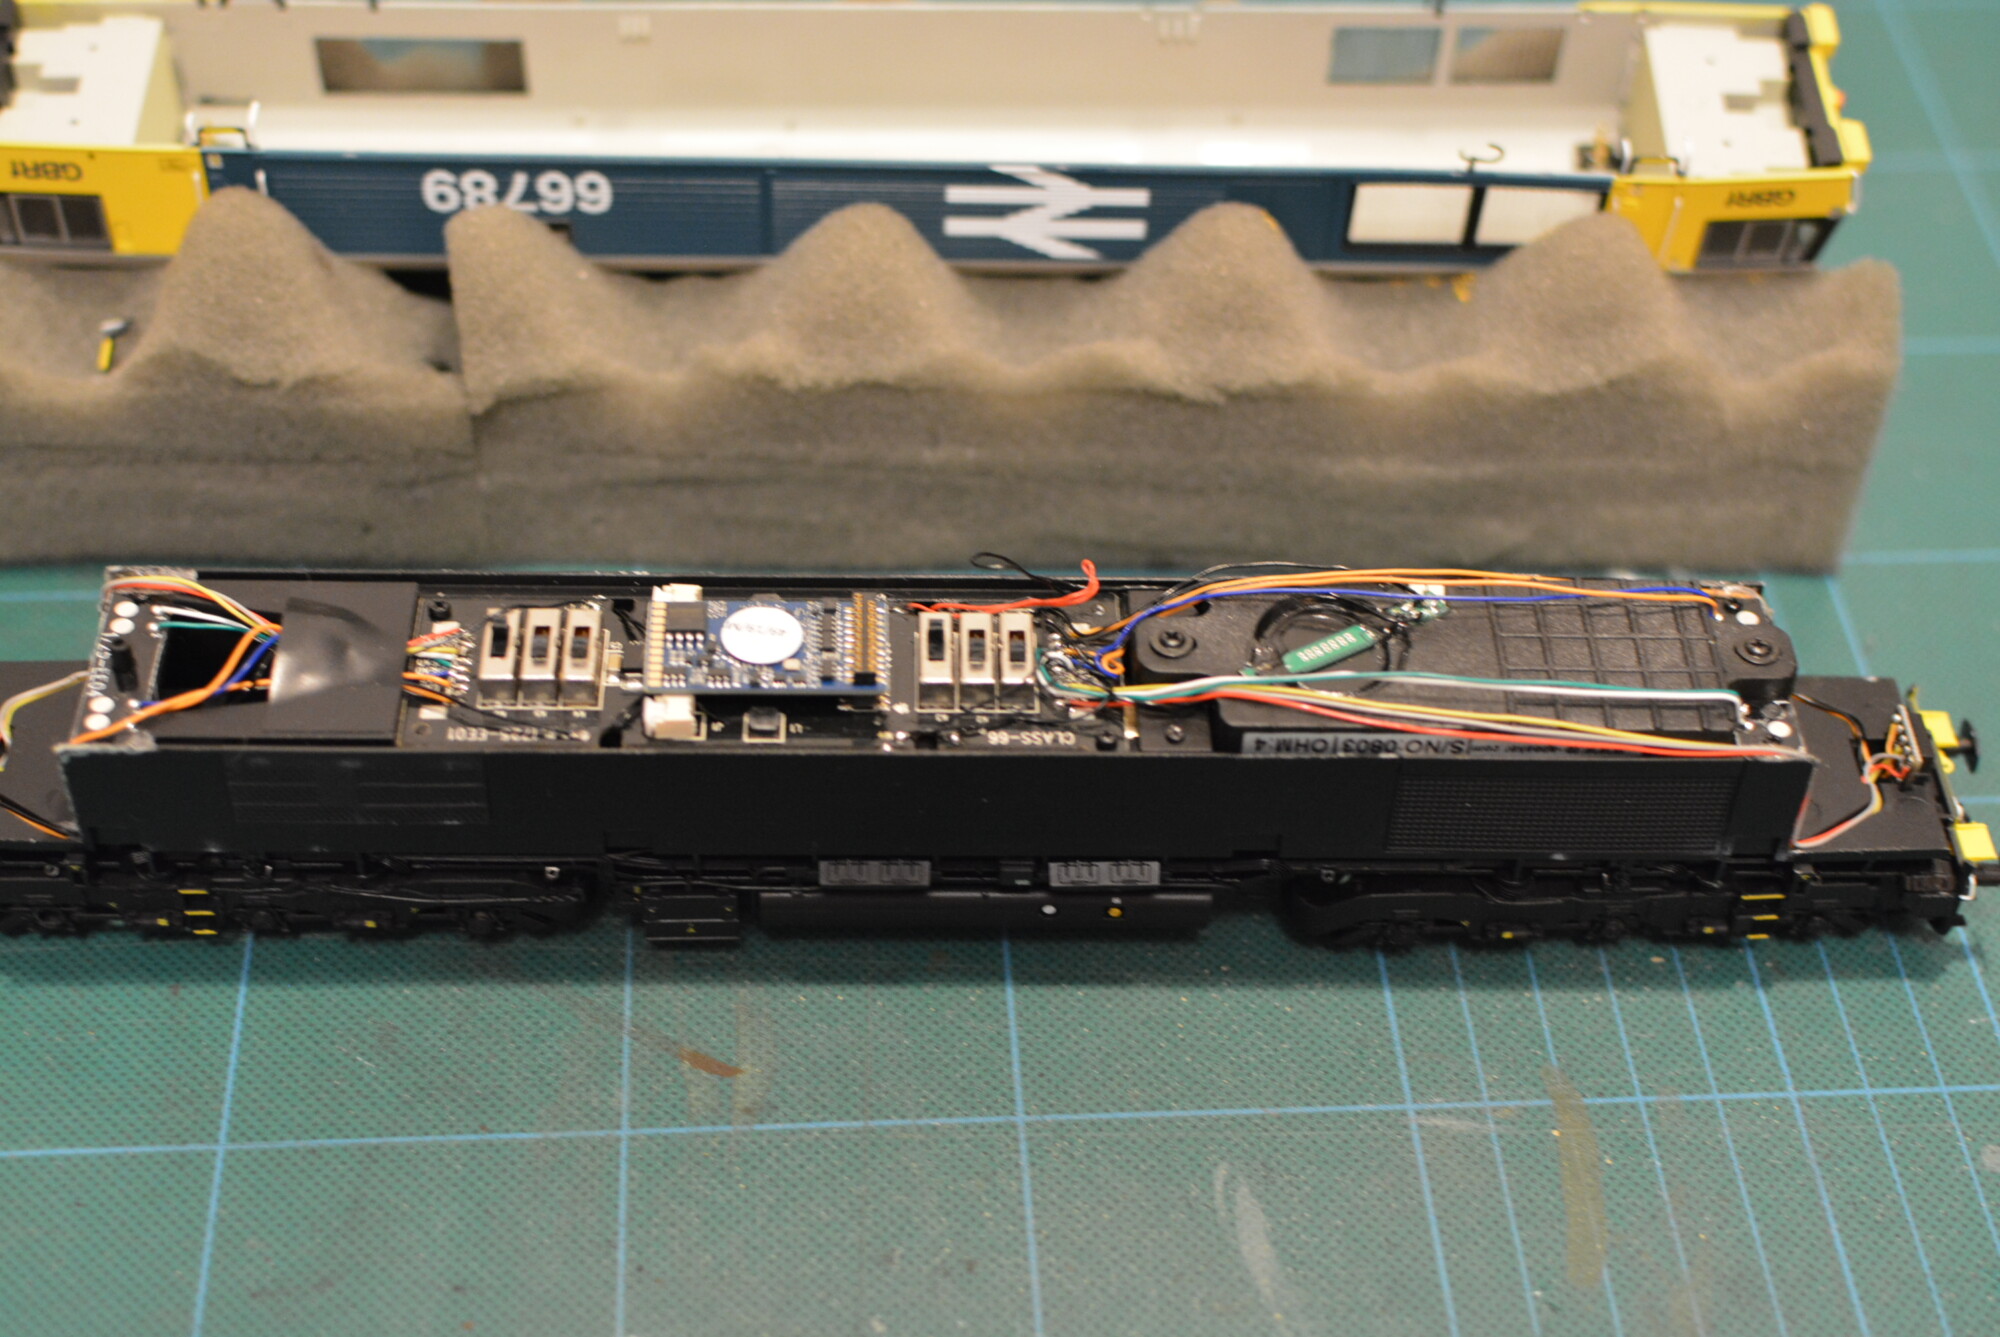
Even though the two locomotives I’ve bought are pre-fitted with DCC sound, I’ll still need to open them up in order to swap out the prototypical air dam for a coupling-friendly one, since all my locos need to be able to couple to rolling stock at both ends. As I’m going to the trouble of removing the body (and believe me it is trouble!), I thought I’d take some photos of the internals for reference. I’ll also be fitting a keep-alive capacitor to each loco, as I like to do this to all my models, no matter how good their pickups may be.
All I can say about removing the body is take your time and follow the guide in the operating instructions. The basic principle is simple enough – detach four clips simultaneously and ease the body off the chassis, but the detailing parts that extend downwards from the body (namely the steps underneath each door and five air hoses) make this a tricky task. The steps are the ones to watch out for – because they extend down and then inwards towards the chassis, they can very easily get caught on the top of the chassis and ping out. I had one set of steps fly off when removing the body on 66789, but they are quite resilient, being made from the same flexible plastic as hoses and other detailing parts, so no damage was done. I’m torn about Hattons decision to model these parts as they have done: on one hand, they make the model look less toy-like, but on the other, it’s hard to open up the model without the risk of either losing or breaking parts. I think on balance I’d rather have this level of extra detail, but some modellers might find it annoying.
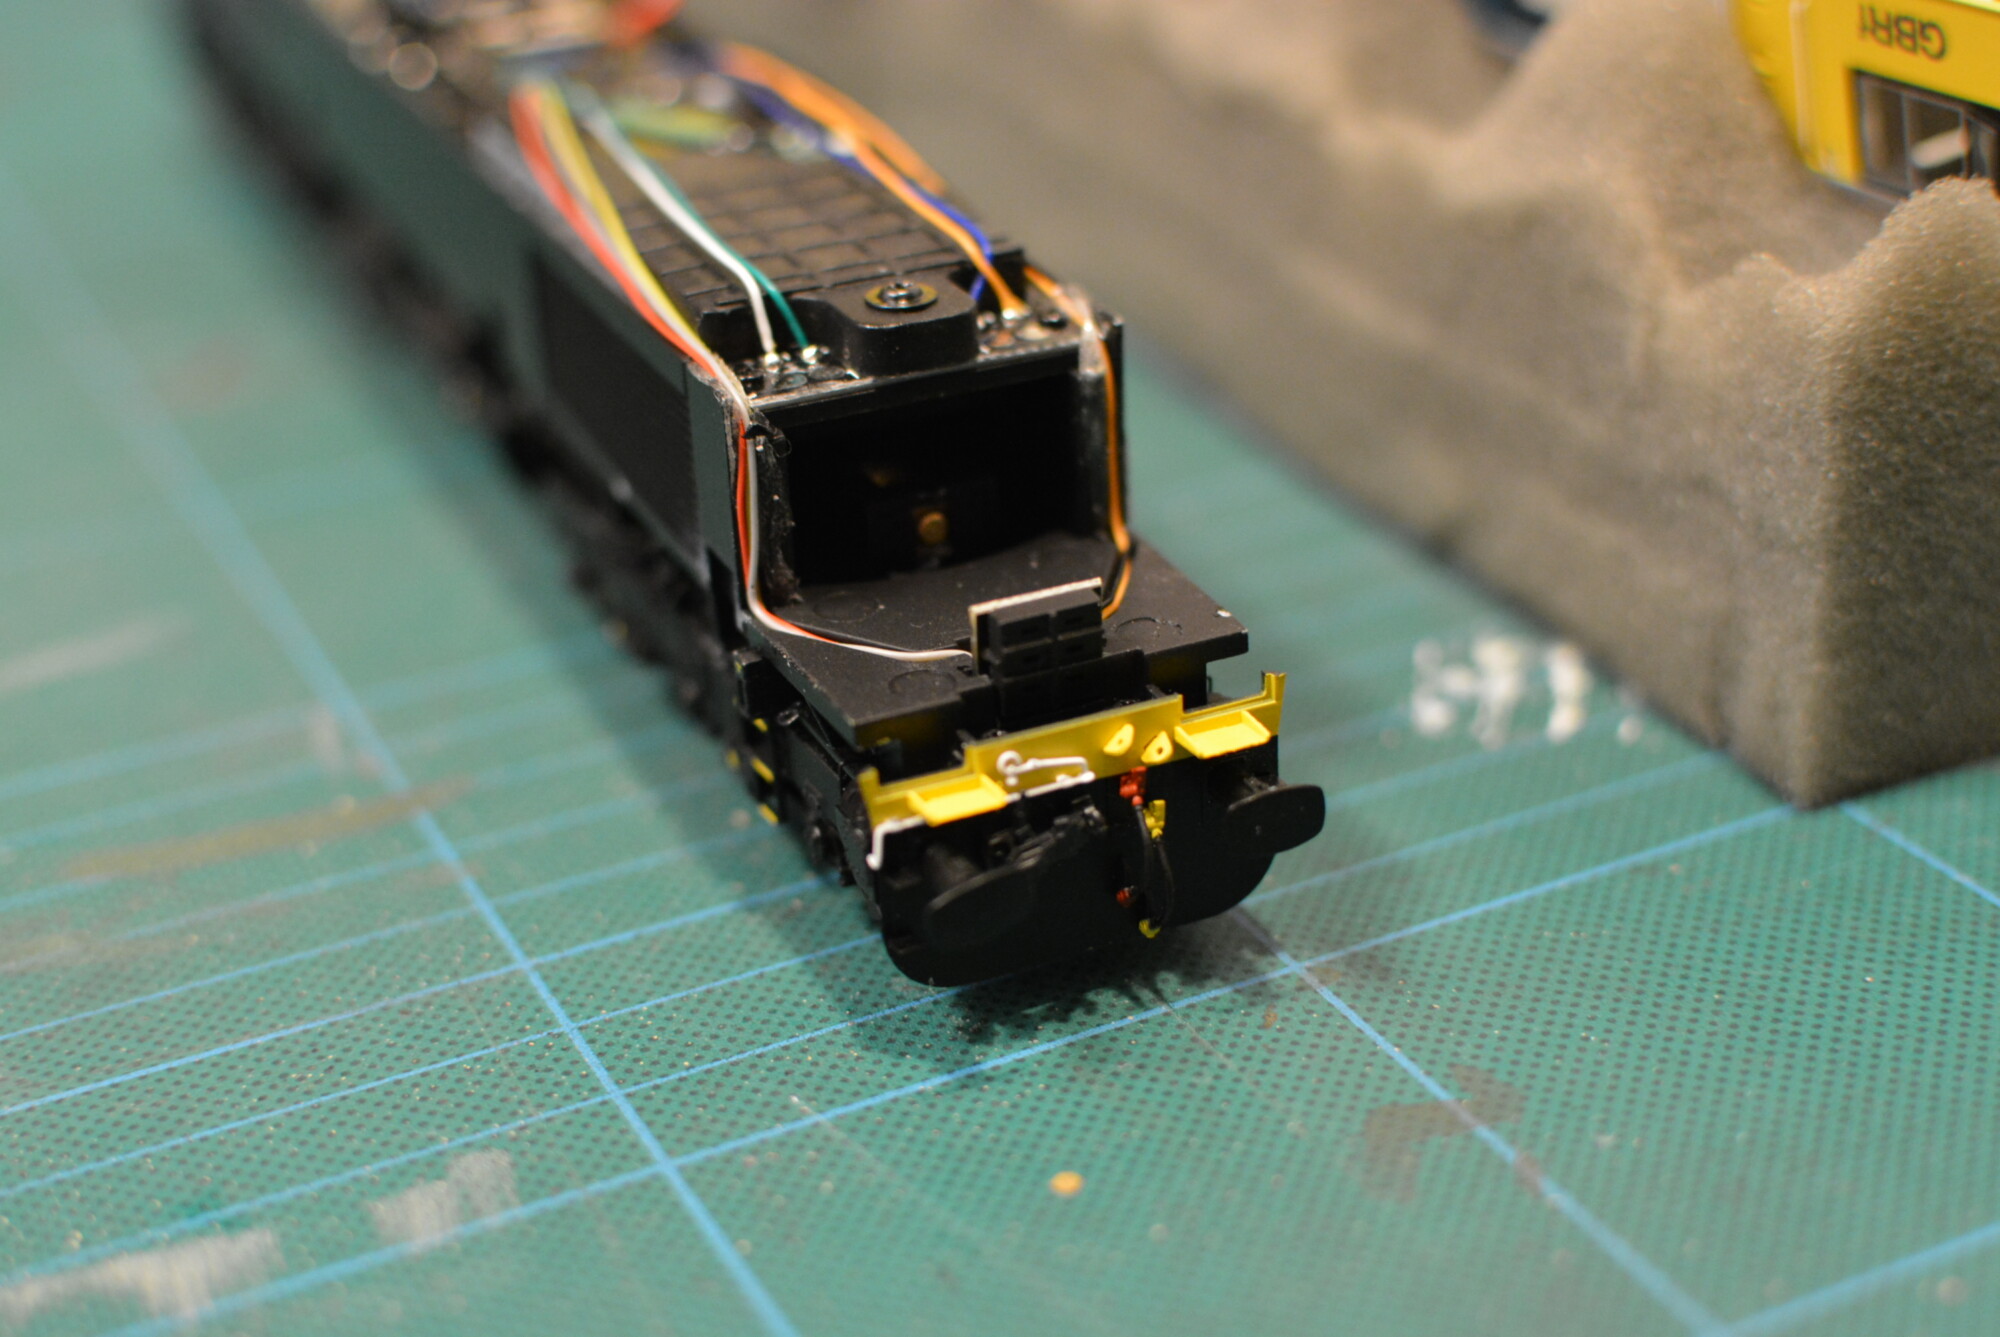
With the body off, removing the prototypical air dam was pretty straightforward – just a matter of removing two screws and easing it away from the body. The Operating Instructions explain how to do this.
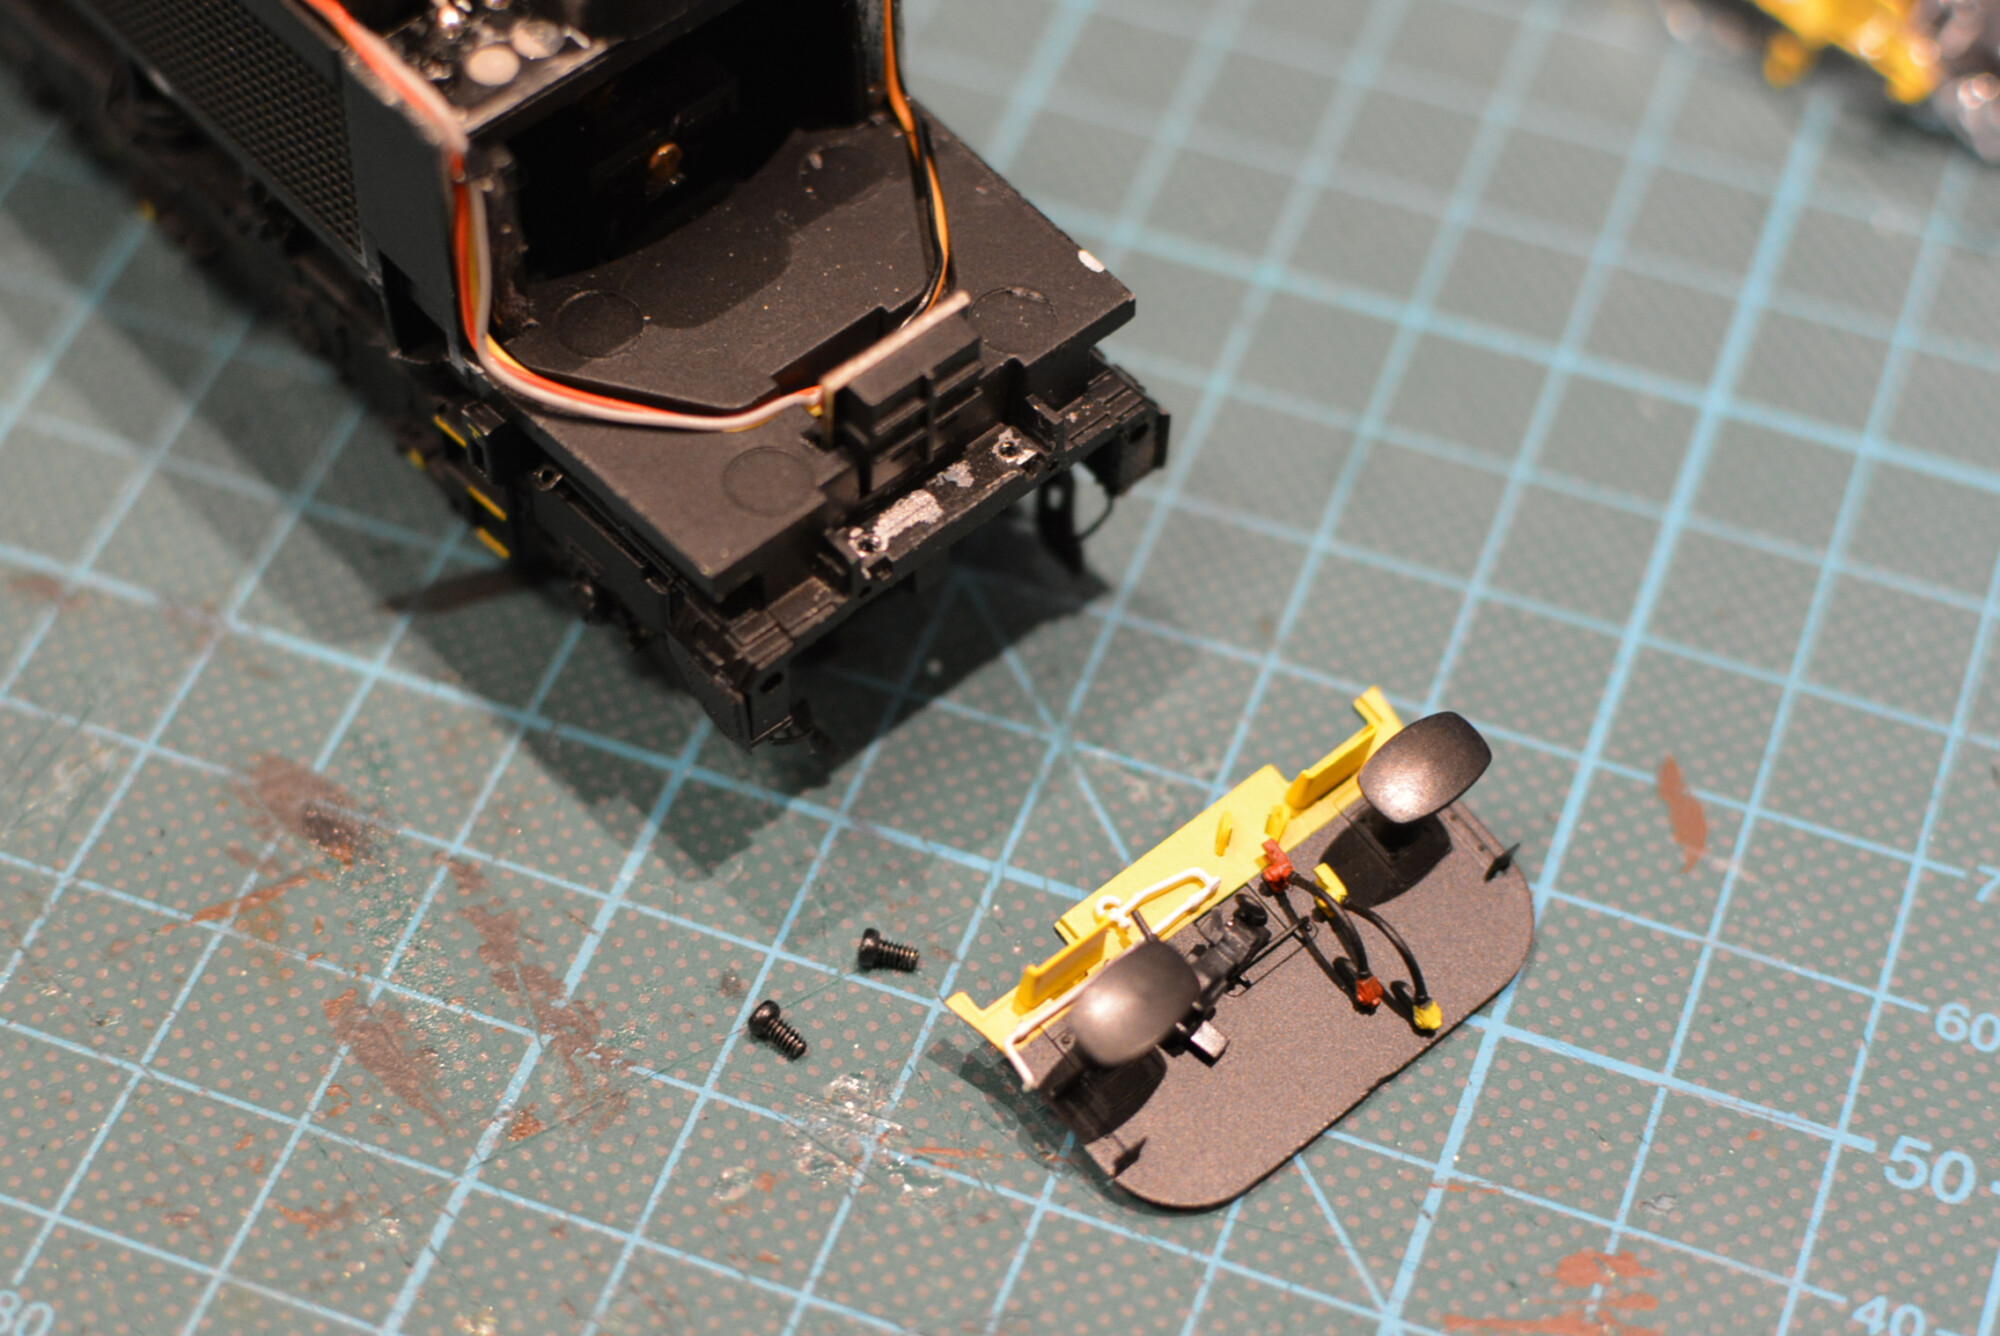
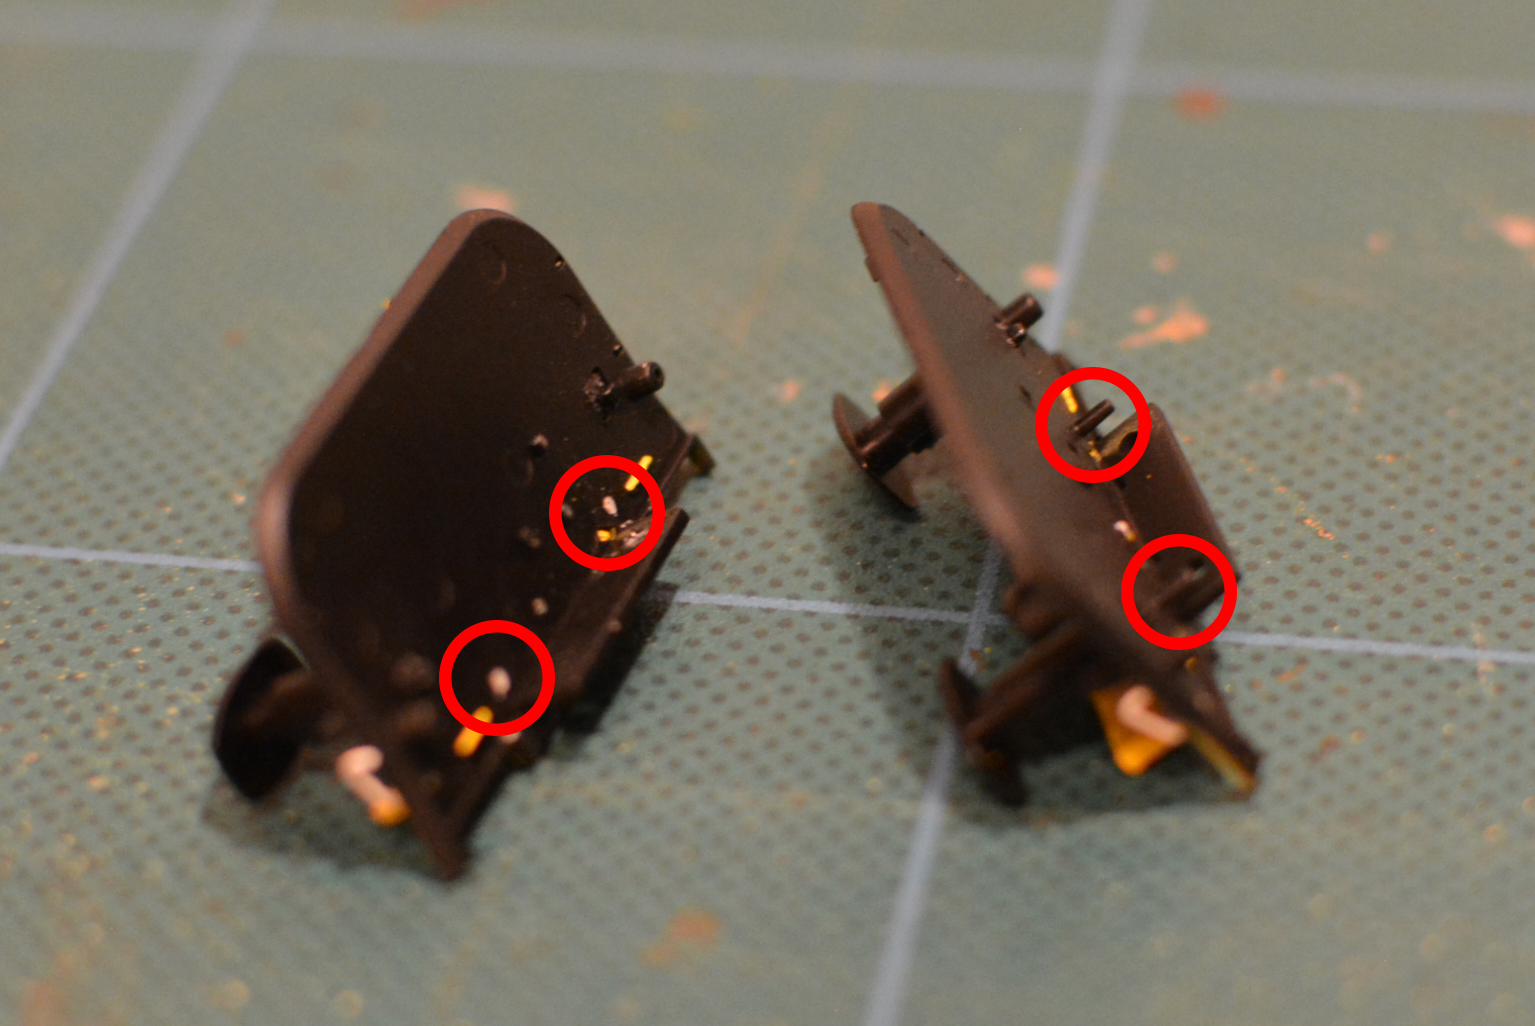
One issue I did find is that the coupling-compatible air dam I wanted to fit (shown on the right in the photo below) didn’t slot in properly and didn’t sit flush. On closer inspection, I discovered that the reason for this is the two small spigots (highlighted in the red circles). On the air dam I removed (fitted at the factory), these spigots had been cut off, which suggests to me that they were intended to help locate the air dam, but for some reason (perhaps the alignment of the holes between the chassis and the air dam wasn’t quite right), the people assembling the models found it easier just to remove them. It makes no difference to the model, as the two screws on top secure and align the air dam very reliably, but I thought it was an interesting example of when a piece of industrial design doesn’t quite work out when it comes to production.
Once I’d removed the superfluous spigots the new air dam was a piece of cake to fit. Now 66789 can couple up at both ends!
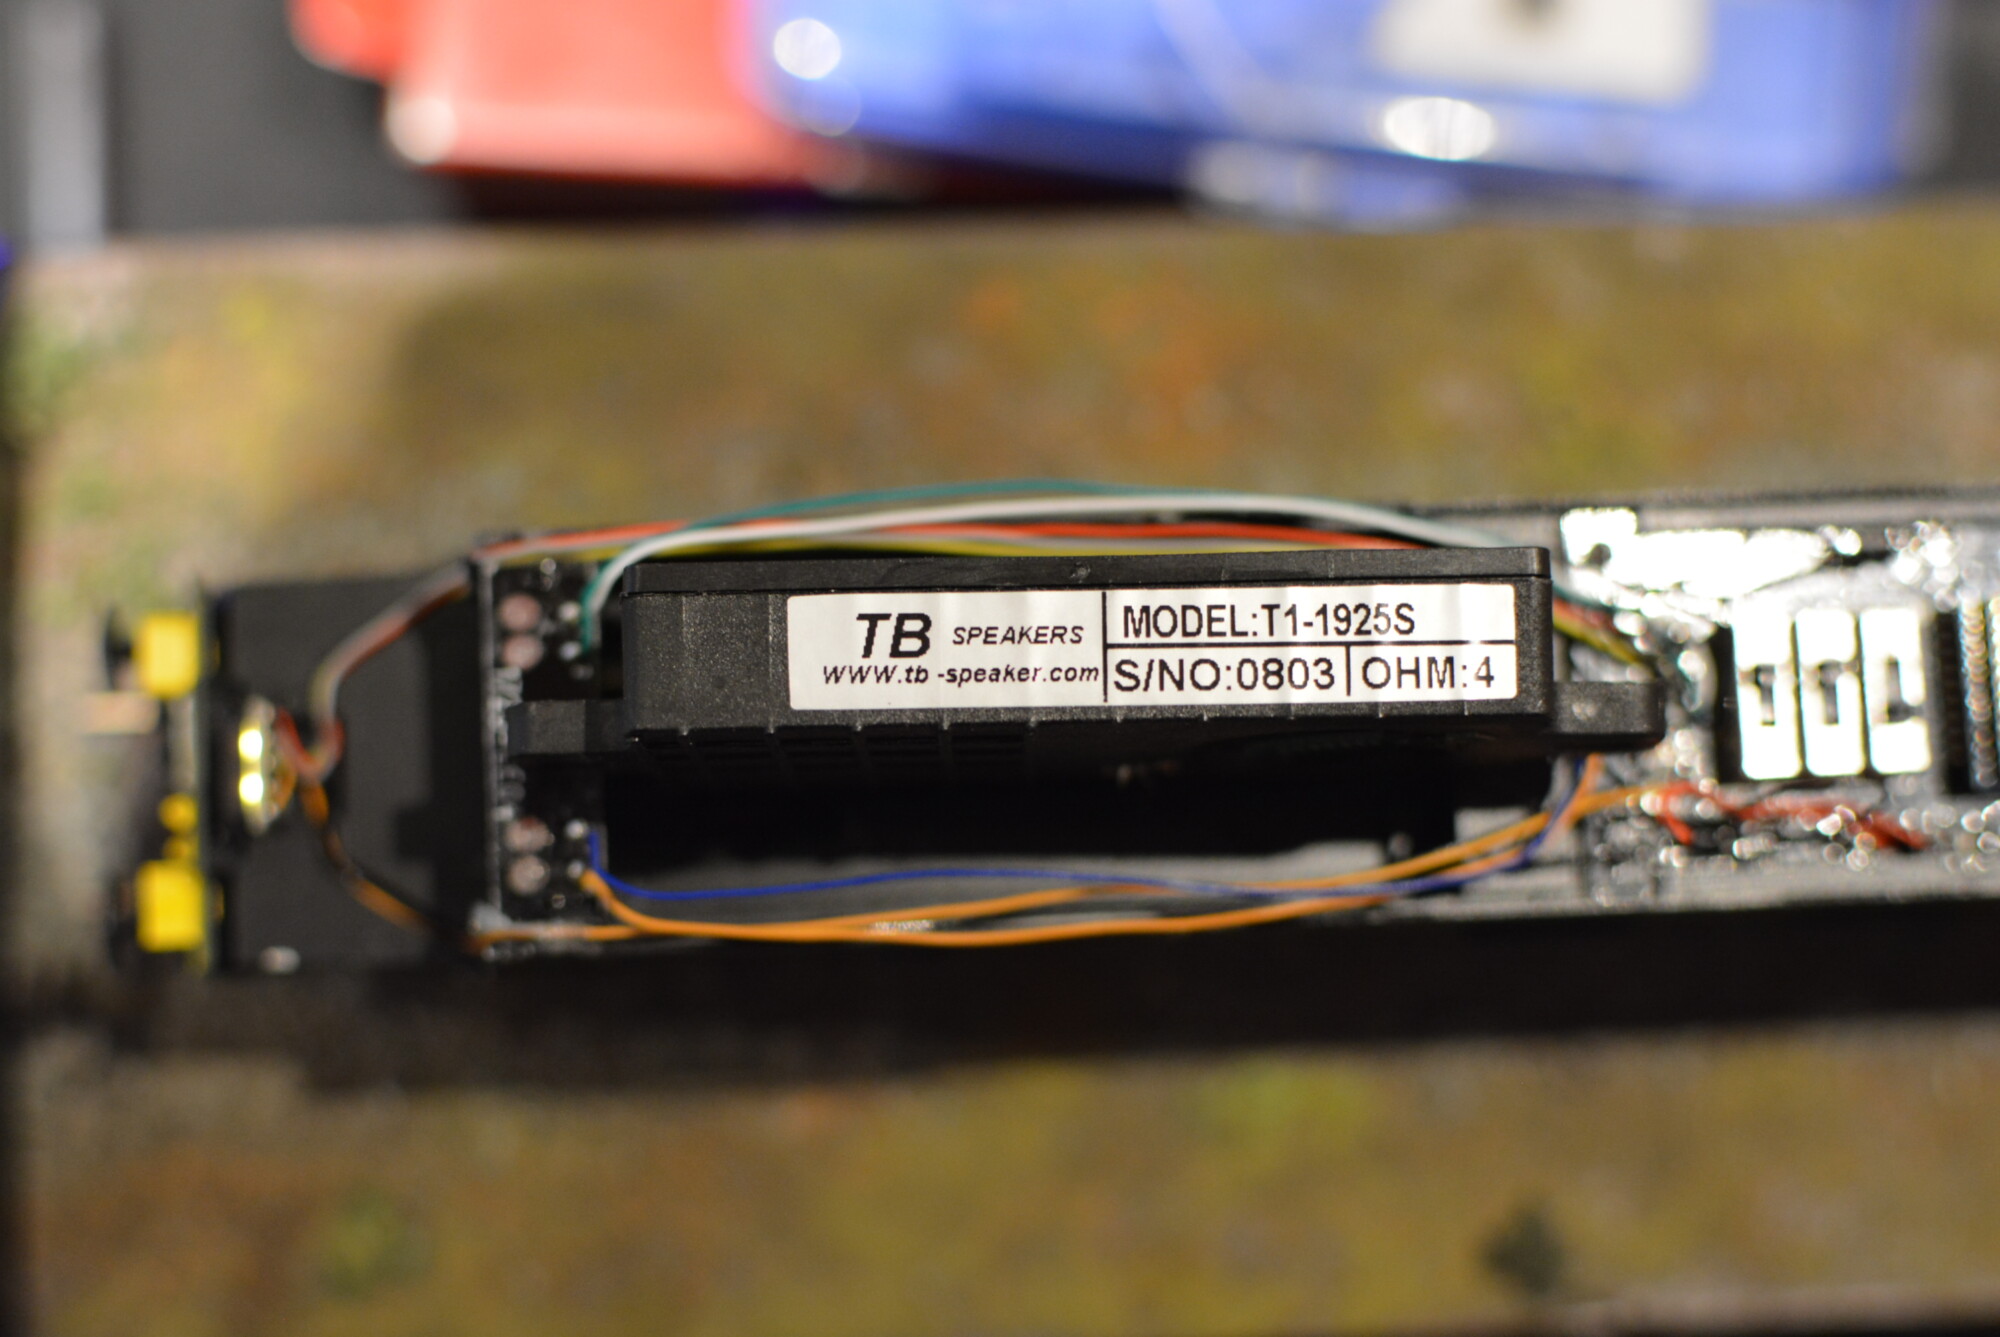
Whilst I had the body off, I took the opportunity to have a look at the speaker that Hattons have fitted to the model. Marketed as the “EarthMover (EM) 2” by DC Kits and Legomanbiffo, it is in fact produced by a company called Tang Band, and is available from a few American and European websites for around £15 each.
The speaker is impressively sized, taking up about one third of the available space inside the locomotive. In fact it’s hard to imagine how a larger speaker than this could have been fitted. Well done to Hattons for not skimping out on this, because a big noisy diesel like a 66 really needs a nice deep bassy speaker to do it justice.
Sound
Now let’s listen to how that speaker actually sounds! I’ve put together a sound demo that takes the loco through type a startup sequence, followed by short runs in both “light engine” and “train” modes, before shutting the loco down again.
I’m thrilled with the sound these locos produce – the sound project is nicely put together, with transitions between notches nice and smooth, and no looping or continuity errors that I could discern. The T1-1925S speaker isn’t tinny at all, and the overall sound has more bass than any other sound-fitted loco I’ve heard to date. Higher-pitched sounds like the horn tones sound just right too.
One small gripe I have with the sound project is there seems to be some distortion at certain times. I’ve noticed this consistently happening when the engine just starts to settle down after starting up, and when throttling up from idle to notch 1. You can hear this distortion at 1:04 and 1:53 in the video above. Initially I thought it might be the body or chassis rattling at certain frequencies, but it still occurred when I removed the speaker from the chassis, so I believe it’s an issue with either the sound project or the amplifier in the decoder.
Having heard the rich deep sound these locos produce, I am very tempted to buy a few of these T1-1925S speakers and fit them in any locos that have space for them. Admittedly, space will be an issue in most of my diesels, but one candidate for this upgrade is my pair of HST power cars, as there’s plenty of space inside the bodies, and the HST is another model that would really benefit from a louder, deeper sound.
Running
Having had my 66s for a few months now, I’m happy to say that they are now both excellent runners, even at very low speeds. The motors are quiet enough that you’ll easily hear the rail noise before the motor whine, which is as good as can be expected.
I said “now” above for a reason – as I mentioned earlier, out of the box both my models needed a fair amount of work in order to get them running properly. This is one area that both my examples (particularly 66789) fall down, and this should simply not be happening with models costing £265.
The model weighs around 800 grams, making it easily the heaviest I own. With this kind of weight and twelve driving wheels, it should be able to pull prototypical length trains with no problems at all.
Conclusions
In many ways the Hattons class 66 sets a new standard for UK Ready-to-Run diesel models. Best-in-class lighting and excellent bogie and body detailing (with an amazing number of separately-fitted parts) are the stand-out points for me, along with sound that’s deeper and richer than any 4mm-scale sound-fitted loco I’ve heard before. It’s worth mentioning that all the detail is pre-fitted, which is nice to see (and not always the case!).
Hattons should also be commended for modelling the variations between the various sub-classes, with differences in cab windows, roof detailing and underframe components faithfully represented. This can often be skipped when manufacturers are trying to save money on mouldings and the like, so its great to see on these models.
The inclusion of both prototypical and functional air dams is very welcome, as it gives modellers the choice of what to do, which is always a good thing. Although I’ve chosen to go with functional at both ends, because they are the correct shape with a slot cut out the middle, it still looks like a 66, unlike on some other 66 models where you can have either full air dam or nothing!
Since I’ve sorted the running issues out, my models have both been excellent runners, but they do lose marks for the axlebox and bogie problems mentioned earlier. Hopefully if Hattons produce further batches, these issues might be resolved, so if there’s demand for future batches this may yet be fixed. Fingers crossed!
There are a couple of small niggles with the livery and finish that, in my opinion, should not have happened (namely the mismatched green behind the “Freightliner” logo on 66957 and the incorrect colour lenses used on the tail lamps on 66789. Apart from these issues the livery application and printing is excellent however.
Out of the box I give the Hattons’s class 66 a score of 8.5 / 10, which rises to 9.5 / 10 once the axlebox problem is fixed. If you model the privatisation era and beyond (or indeed if you just want to run trains that you like!) then I’d recommend this model over the Bachmann alternative, as I feel the extra detailing and pulling power is worth the £50-60 difference in price. If you want a sound-fitted one, another £110 for this option is a pretty typical price when you look at the cost of a sound decoder and decent speaker these days.