
I’m pretty happy with my new Hattons Class 66s (review here), but there’s one thing missing from them – drivers! I’m generally a bit lax about fitting crew to my locomotives – it seems to be a job that gets pushed to the back of the queue (after sound installation, weathering, repairs, etc etc.), but this time I thought it was worth it, so I’ve bought four drivers, one for each end of each 66.
The figures I’ve gone for are from ModelU, who have a selection of 3D-printed figures specific to particular locos. I’ve not come across them before, but I thought I’d give them a try. At £4.50 per figure (in 4mm scale), they’re not cheap, but they look rather detailed on their website, and I liked the range of poses they offer.
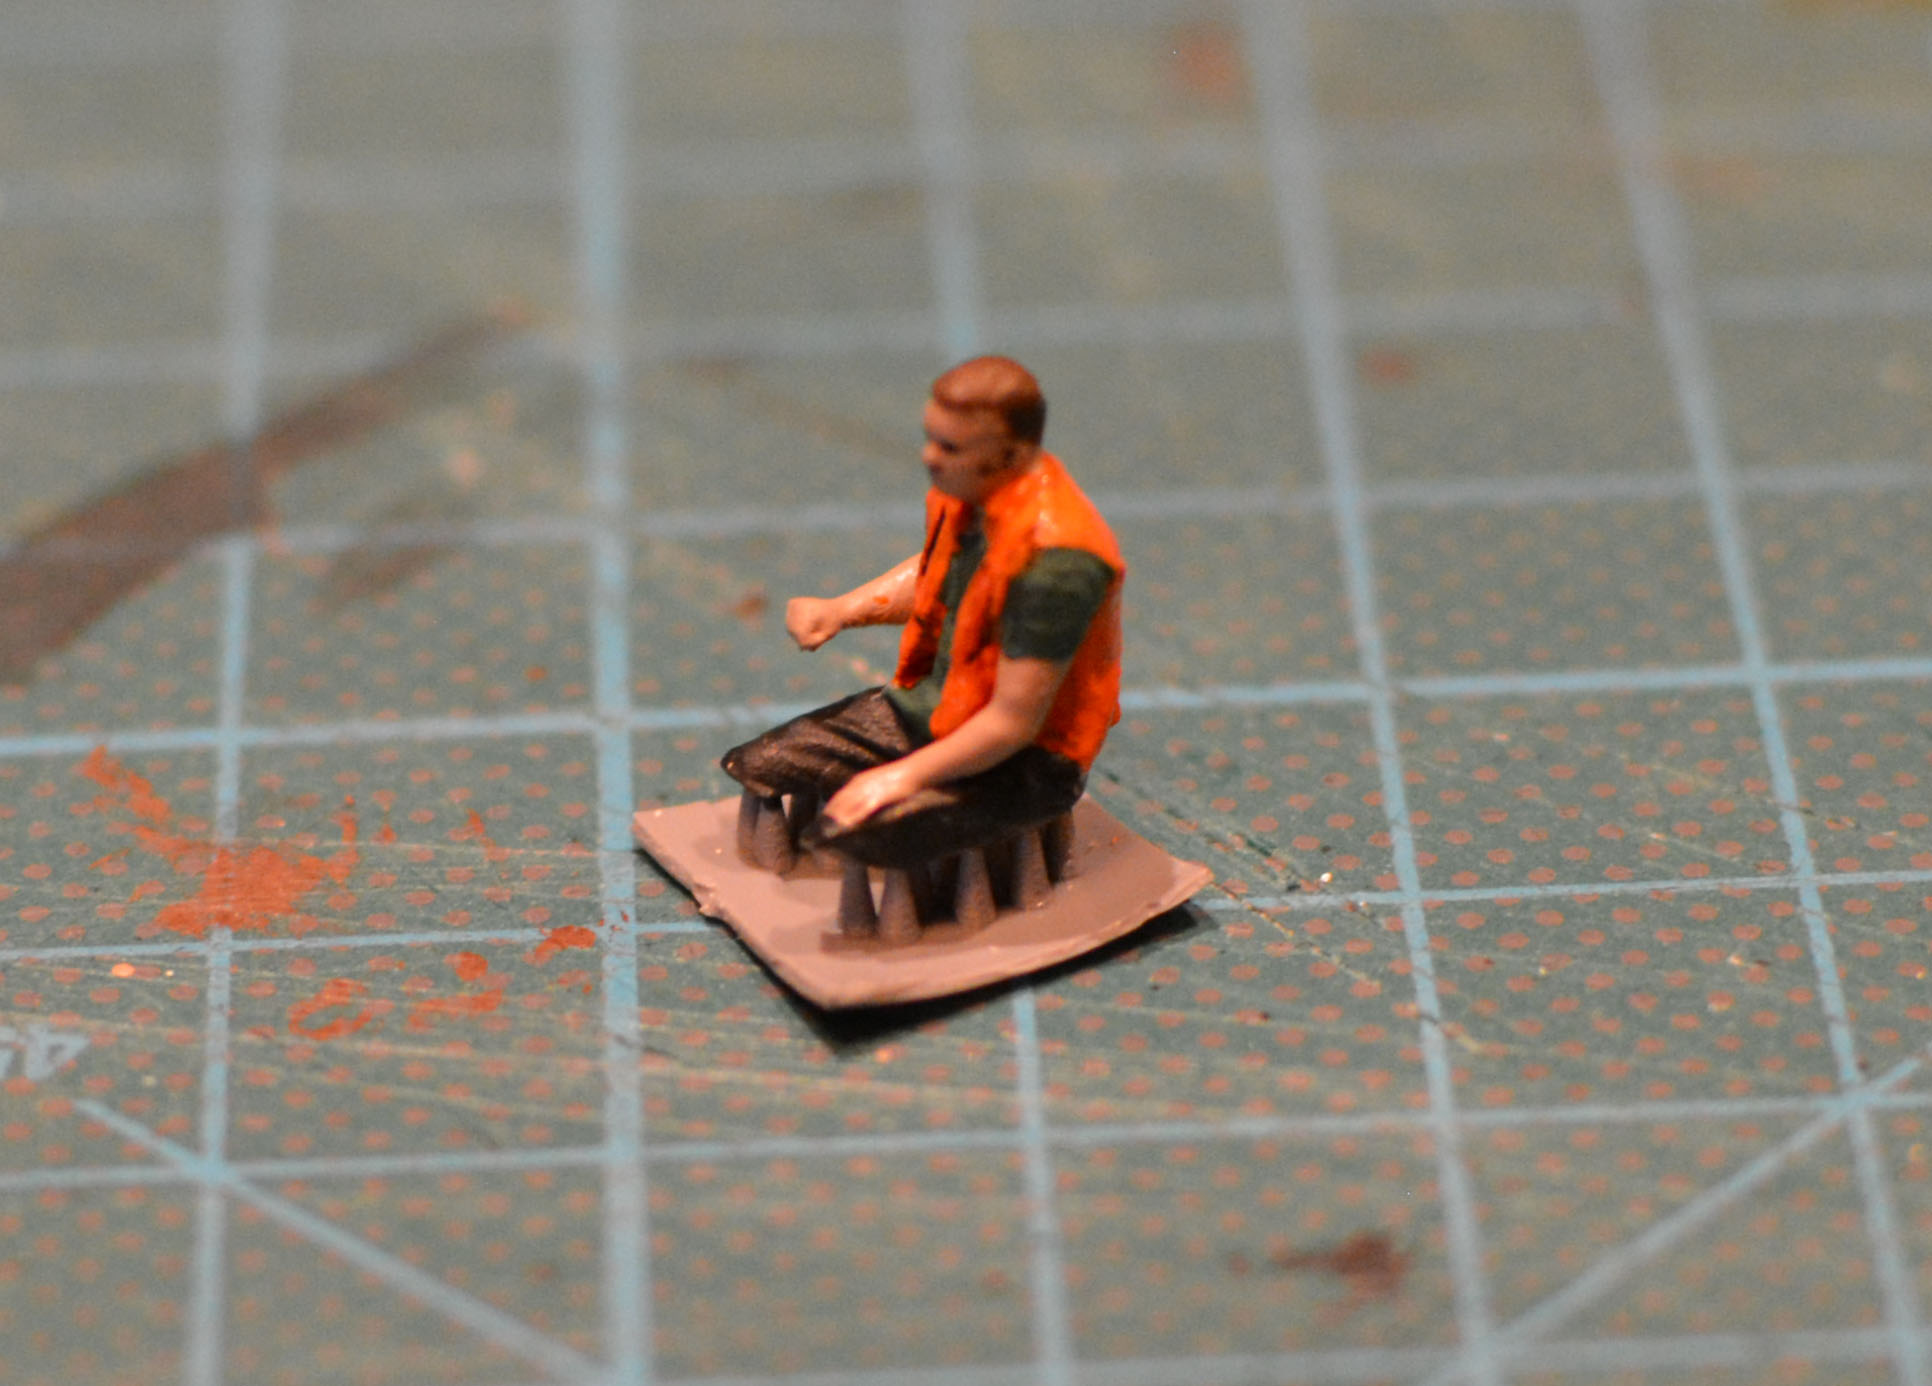
The figures come un-painted (I forgot to take a photo of them before painting them), and it took about two hours to paint the four of them. The plastic they’re printed in is quite delicate, so care is needed to avoid damaging them when removing them from the supports that they’re attached to.
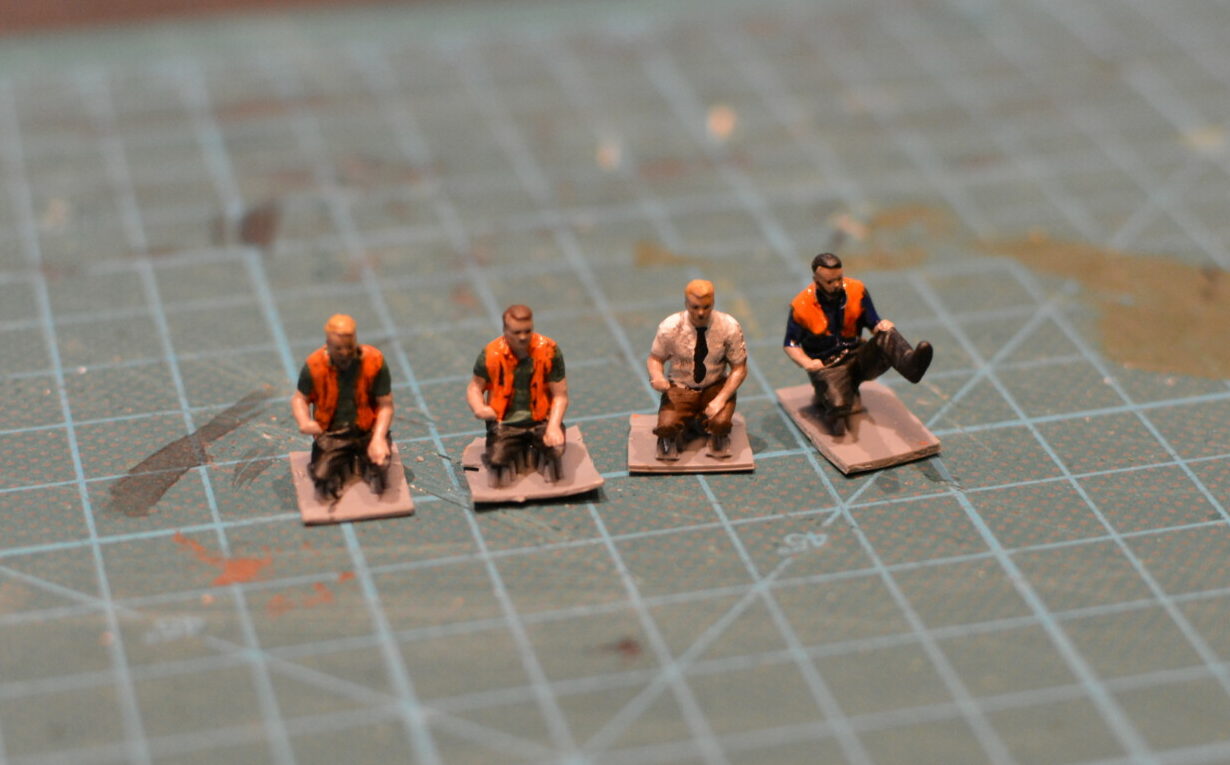
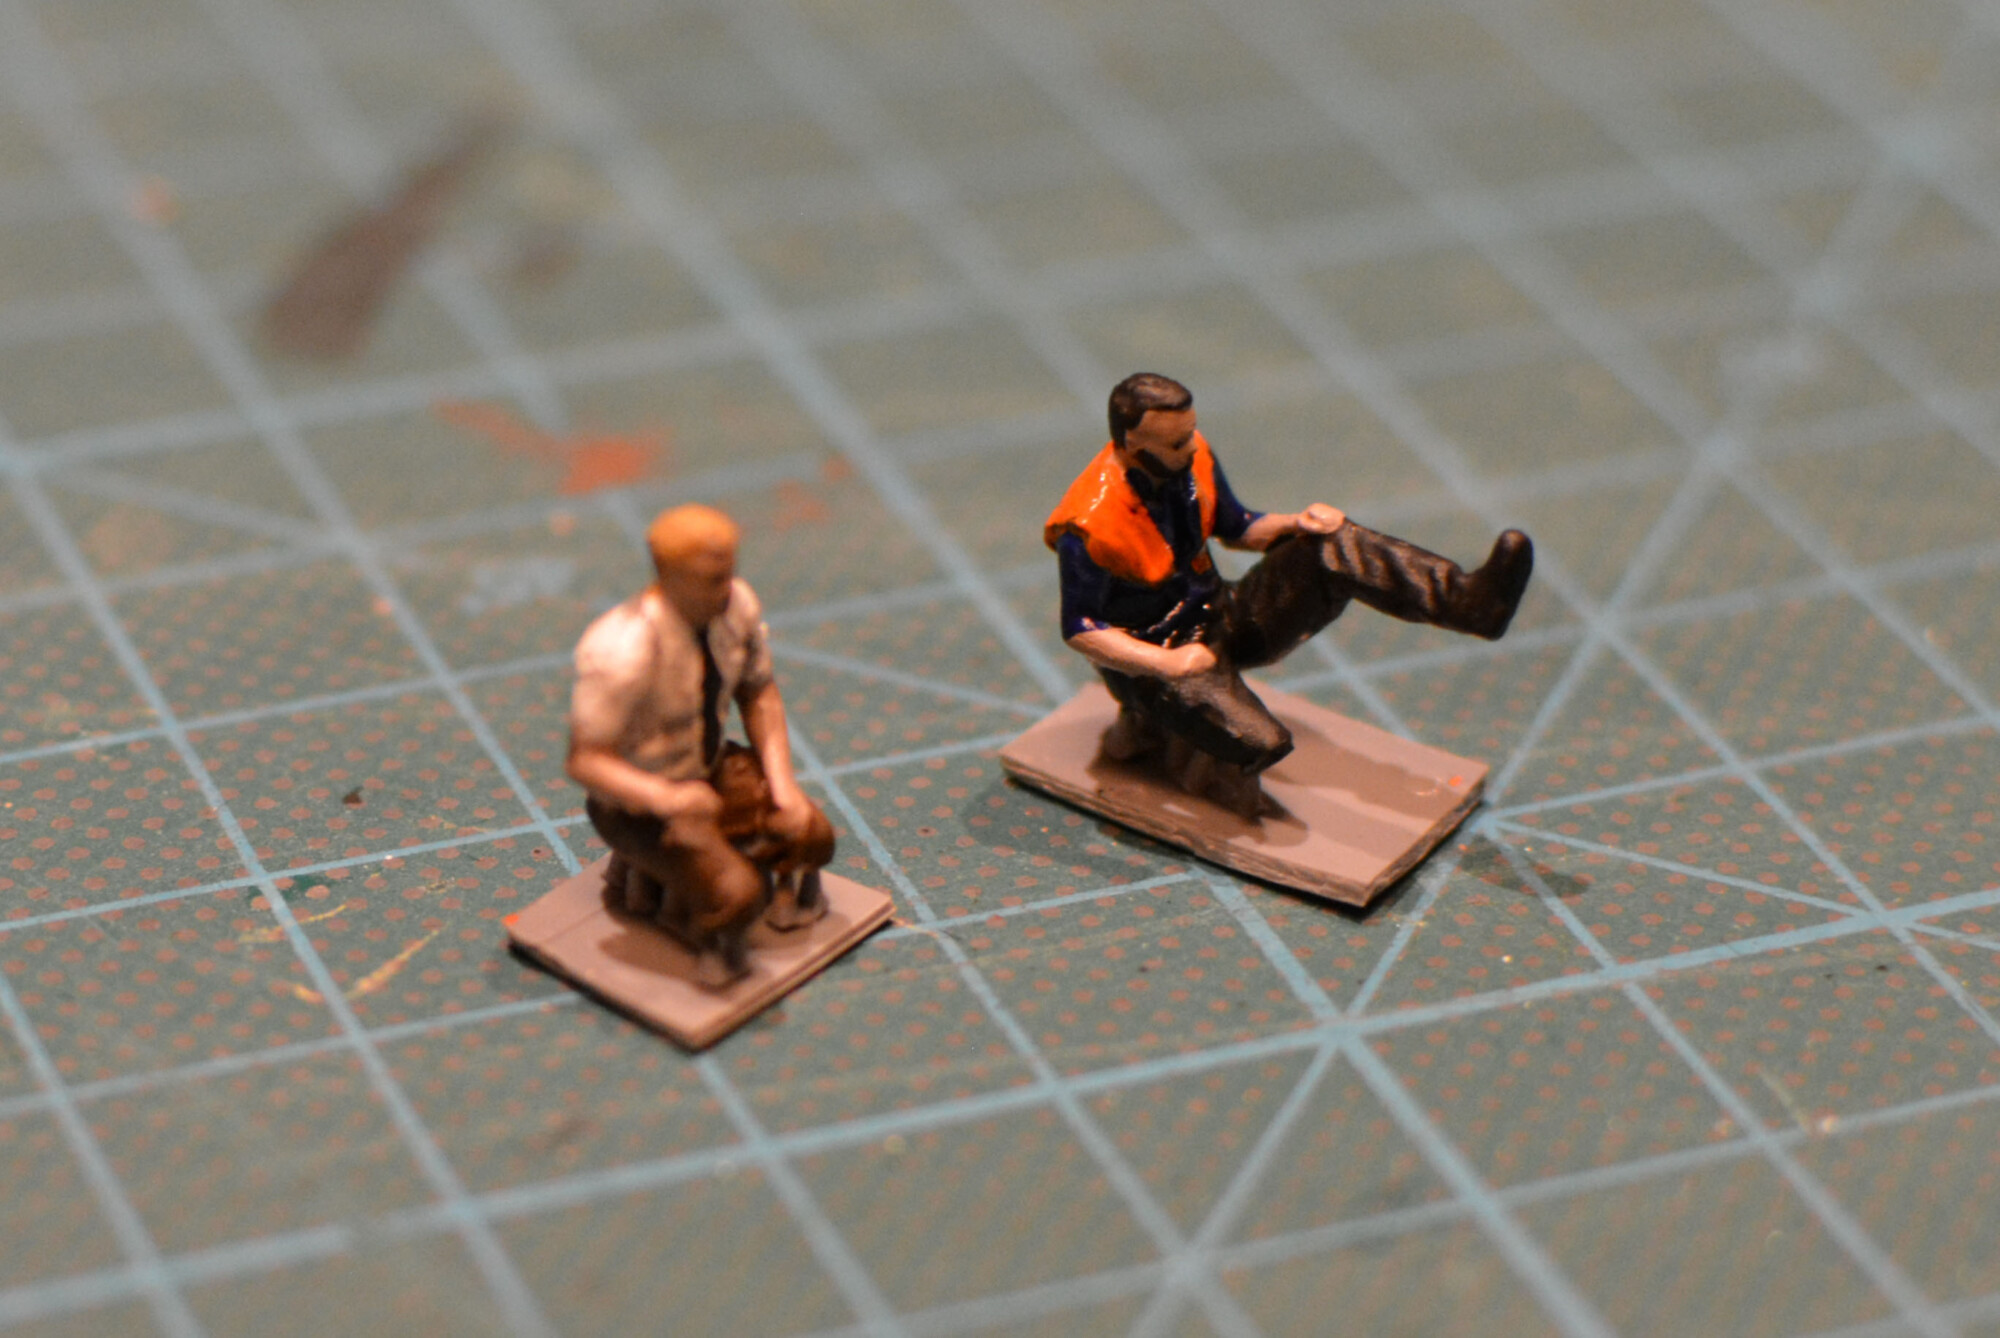
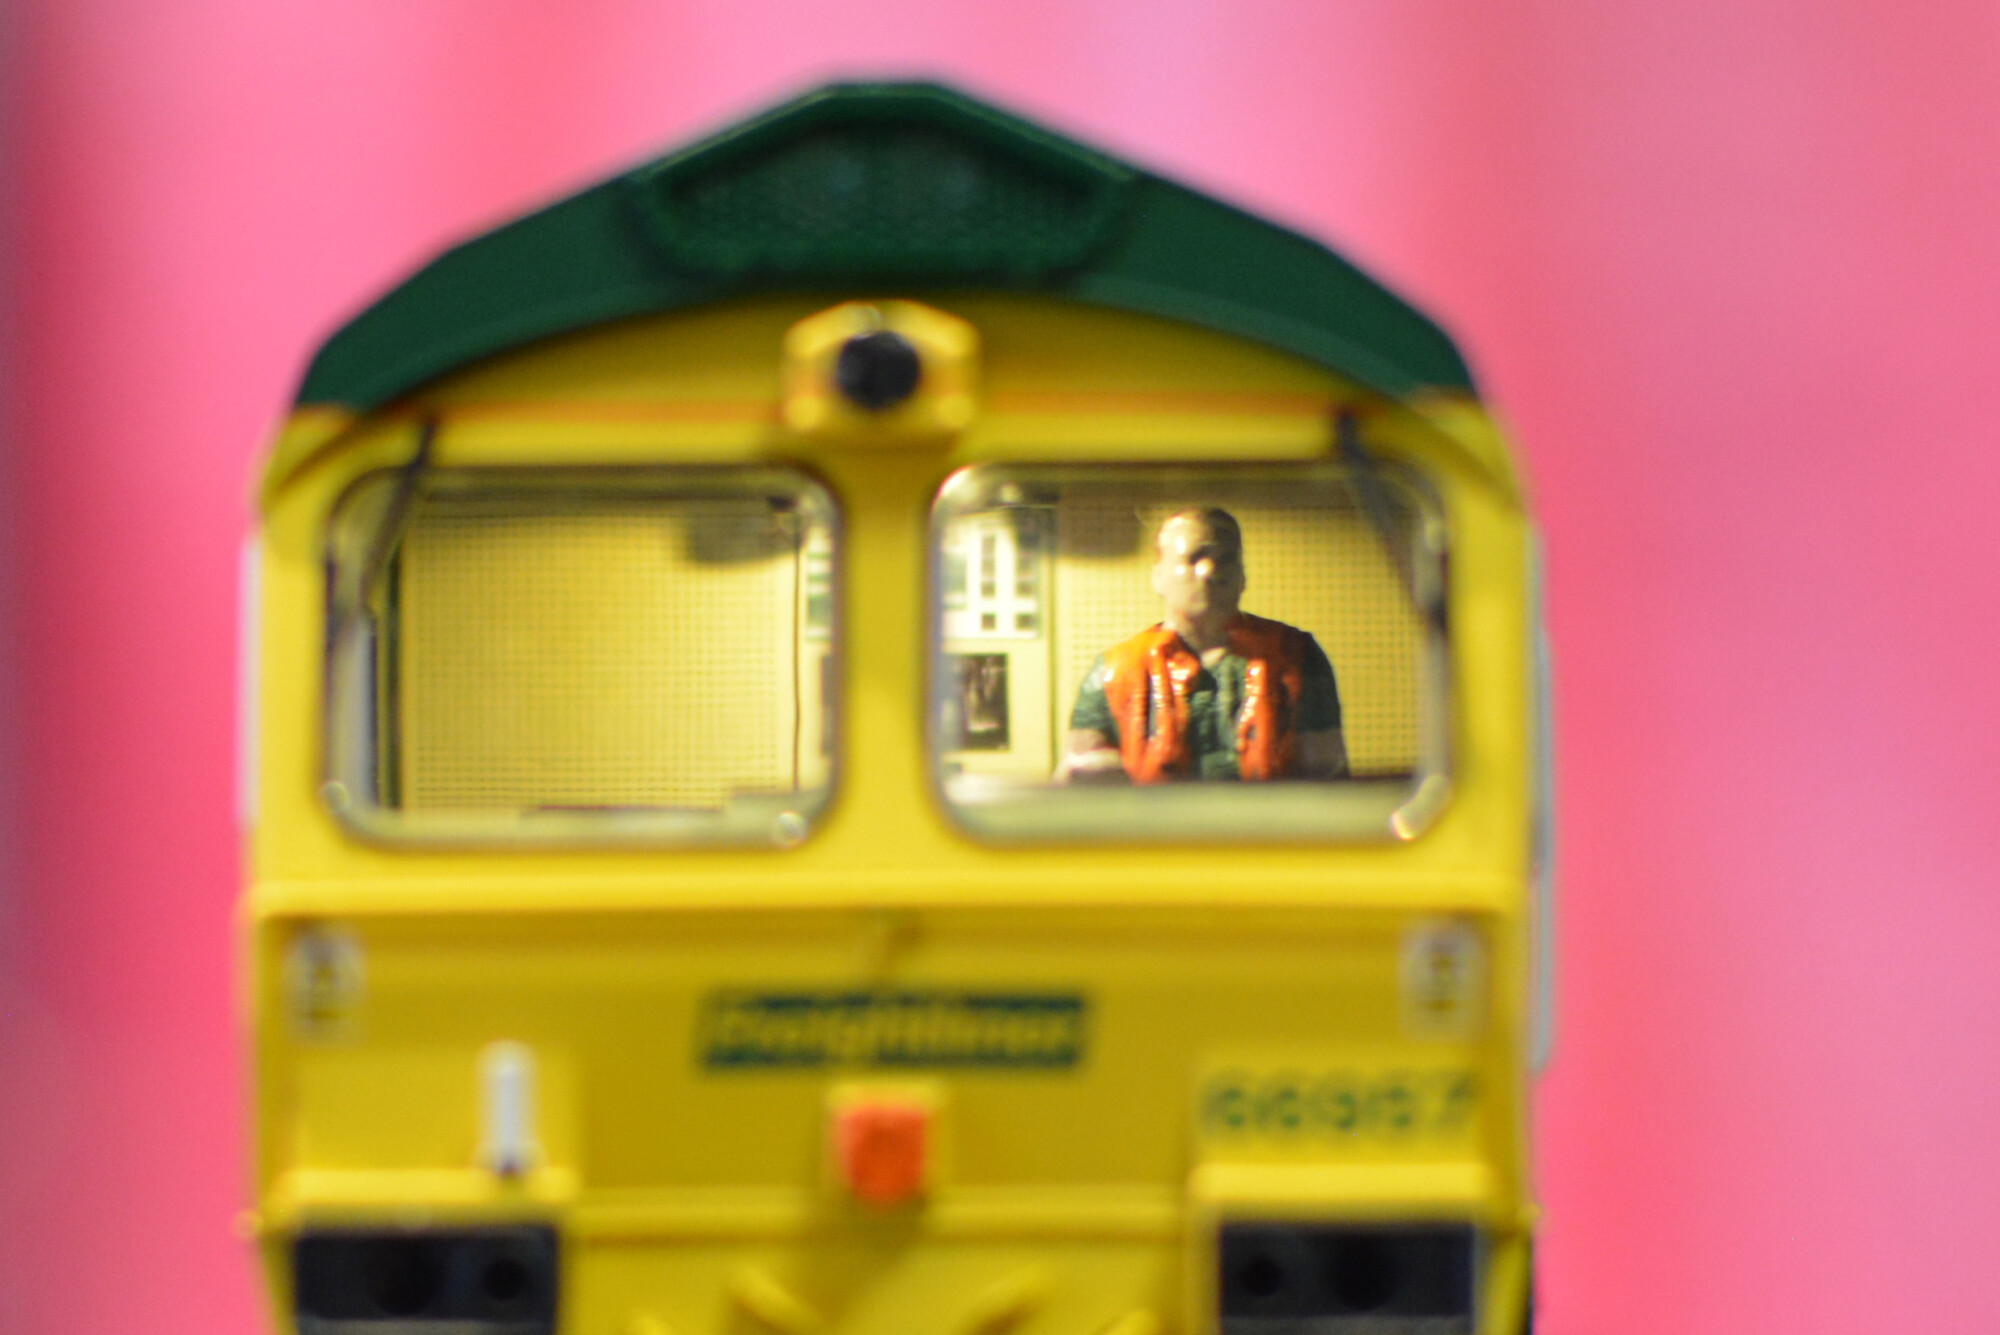
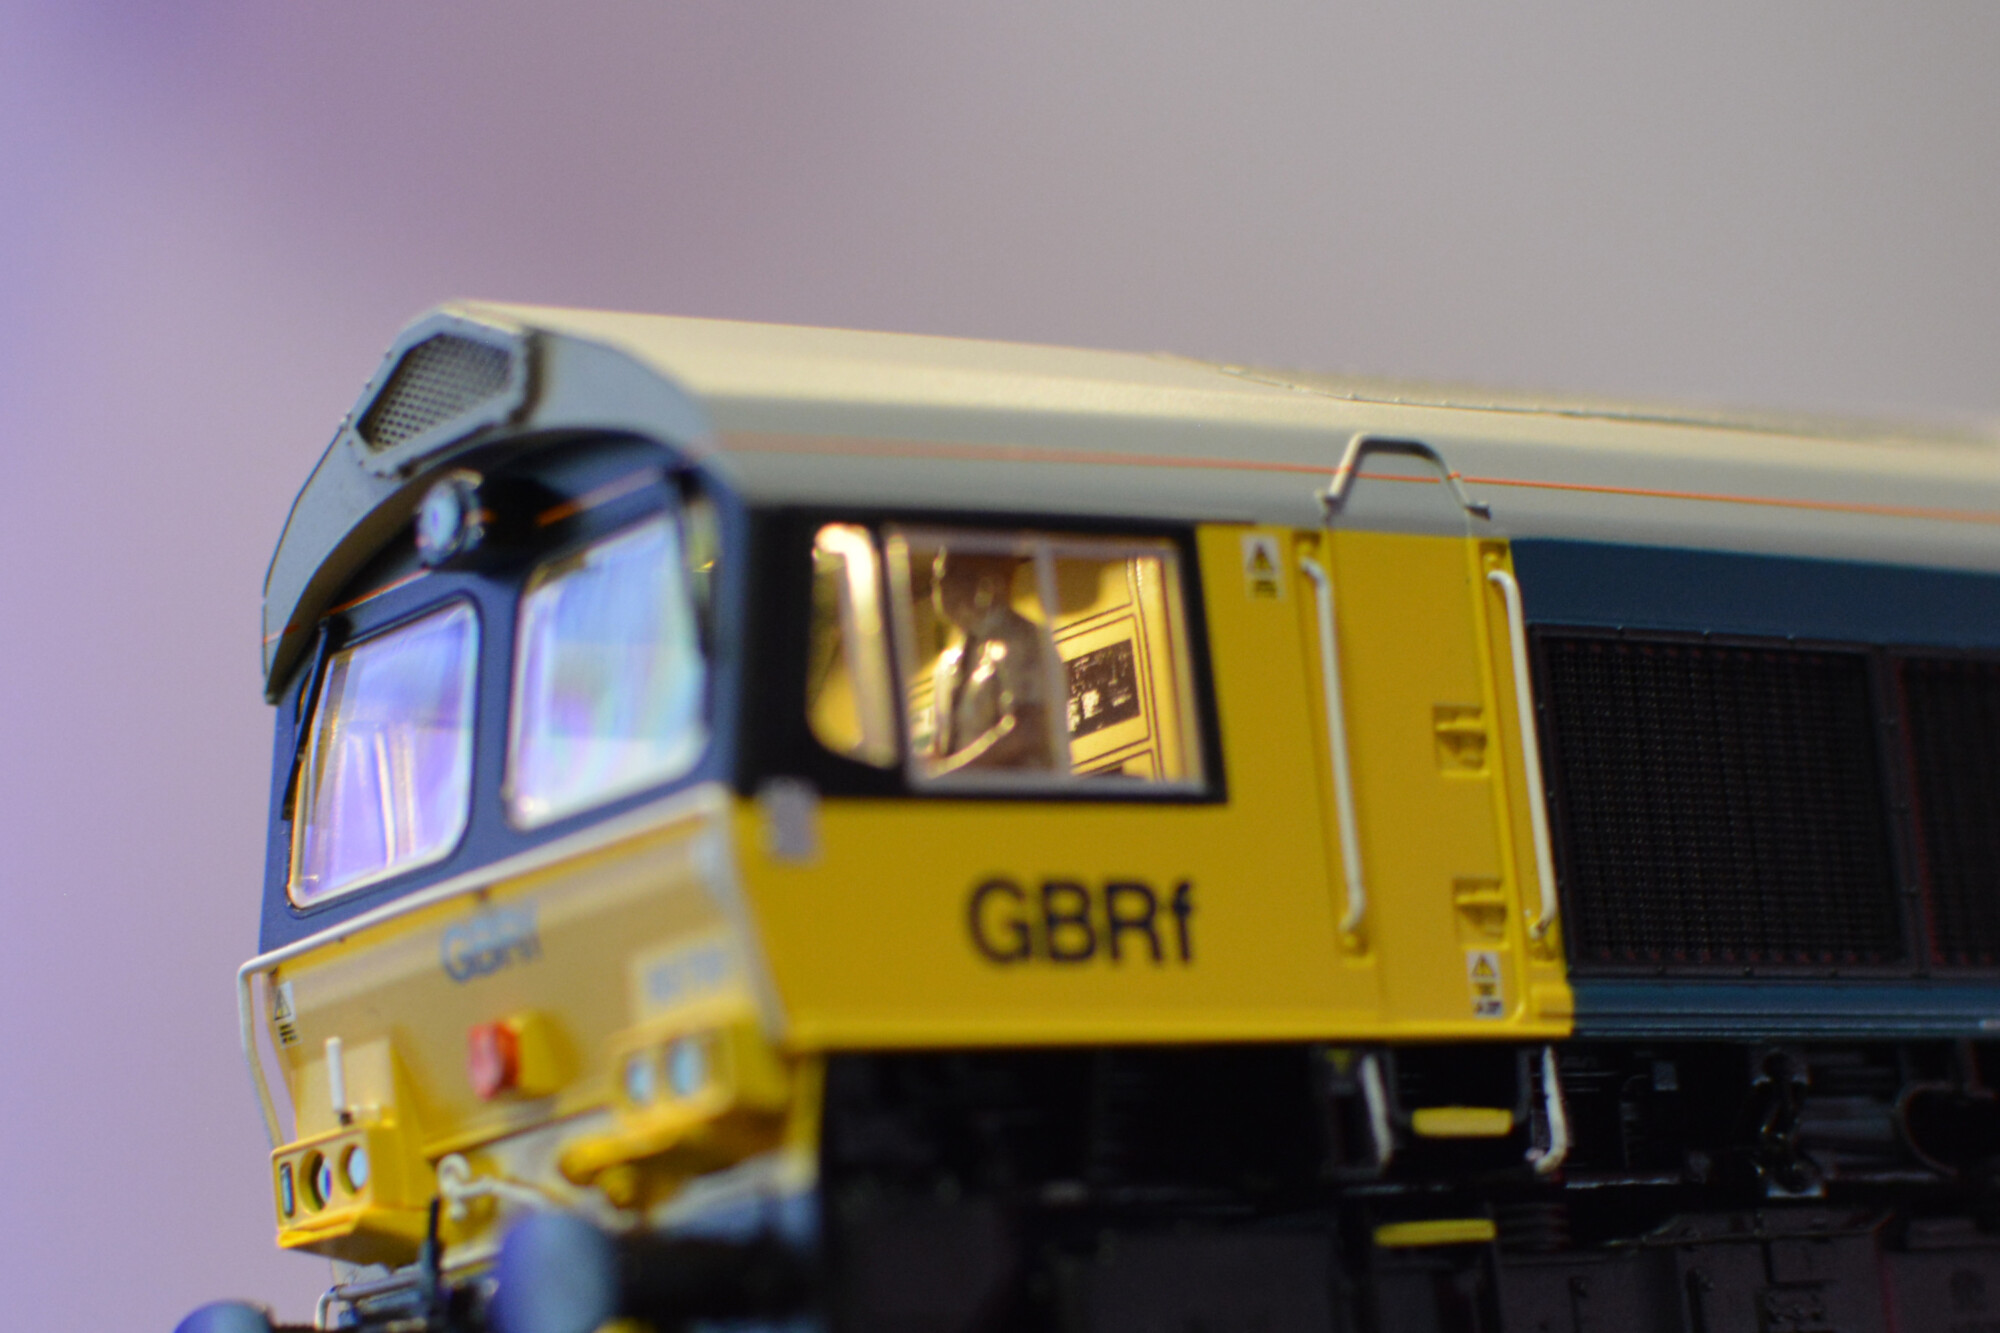
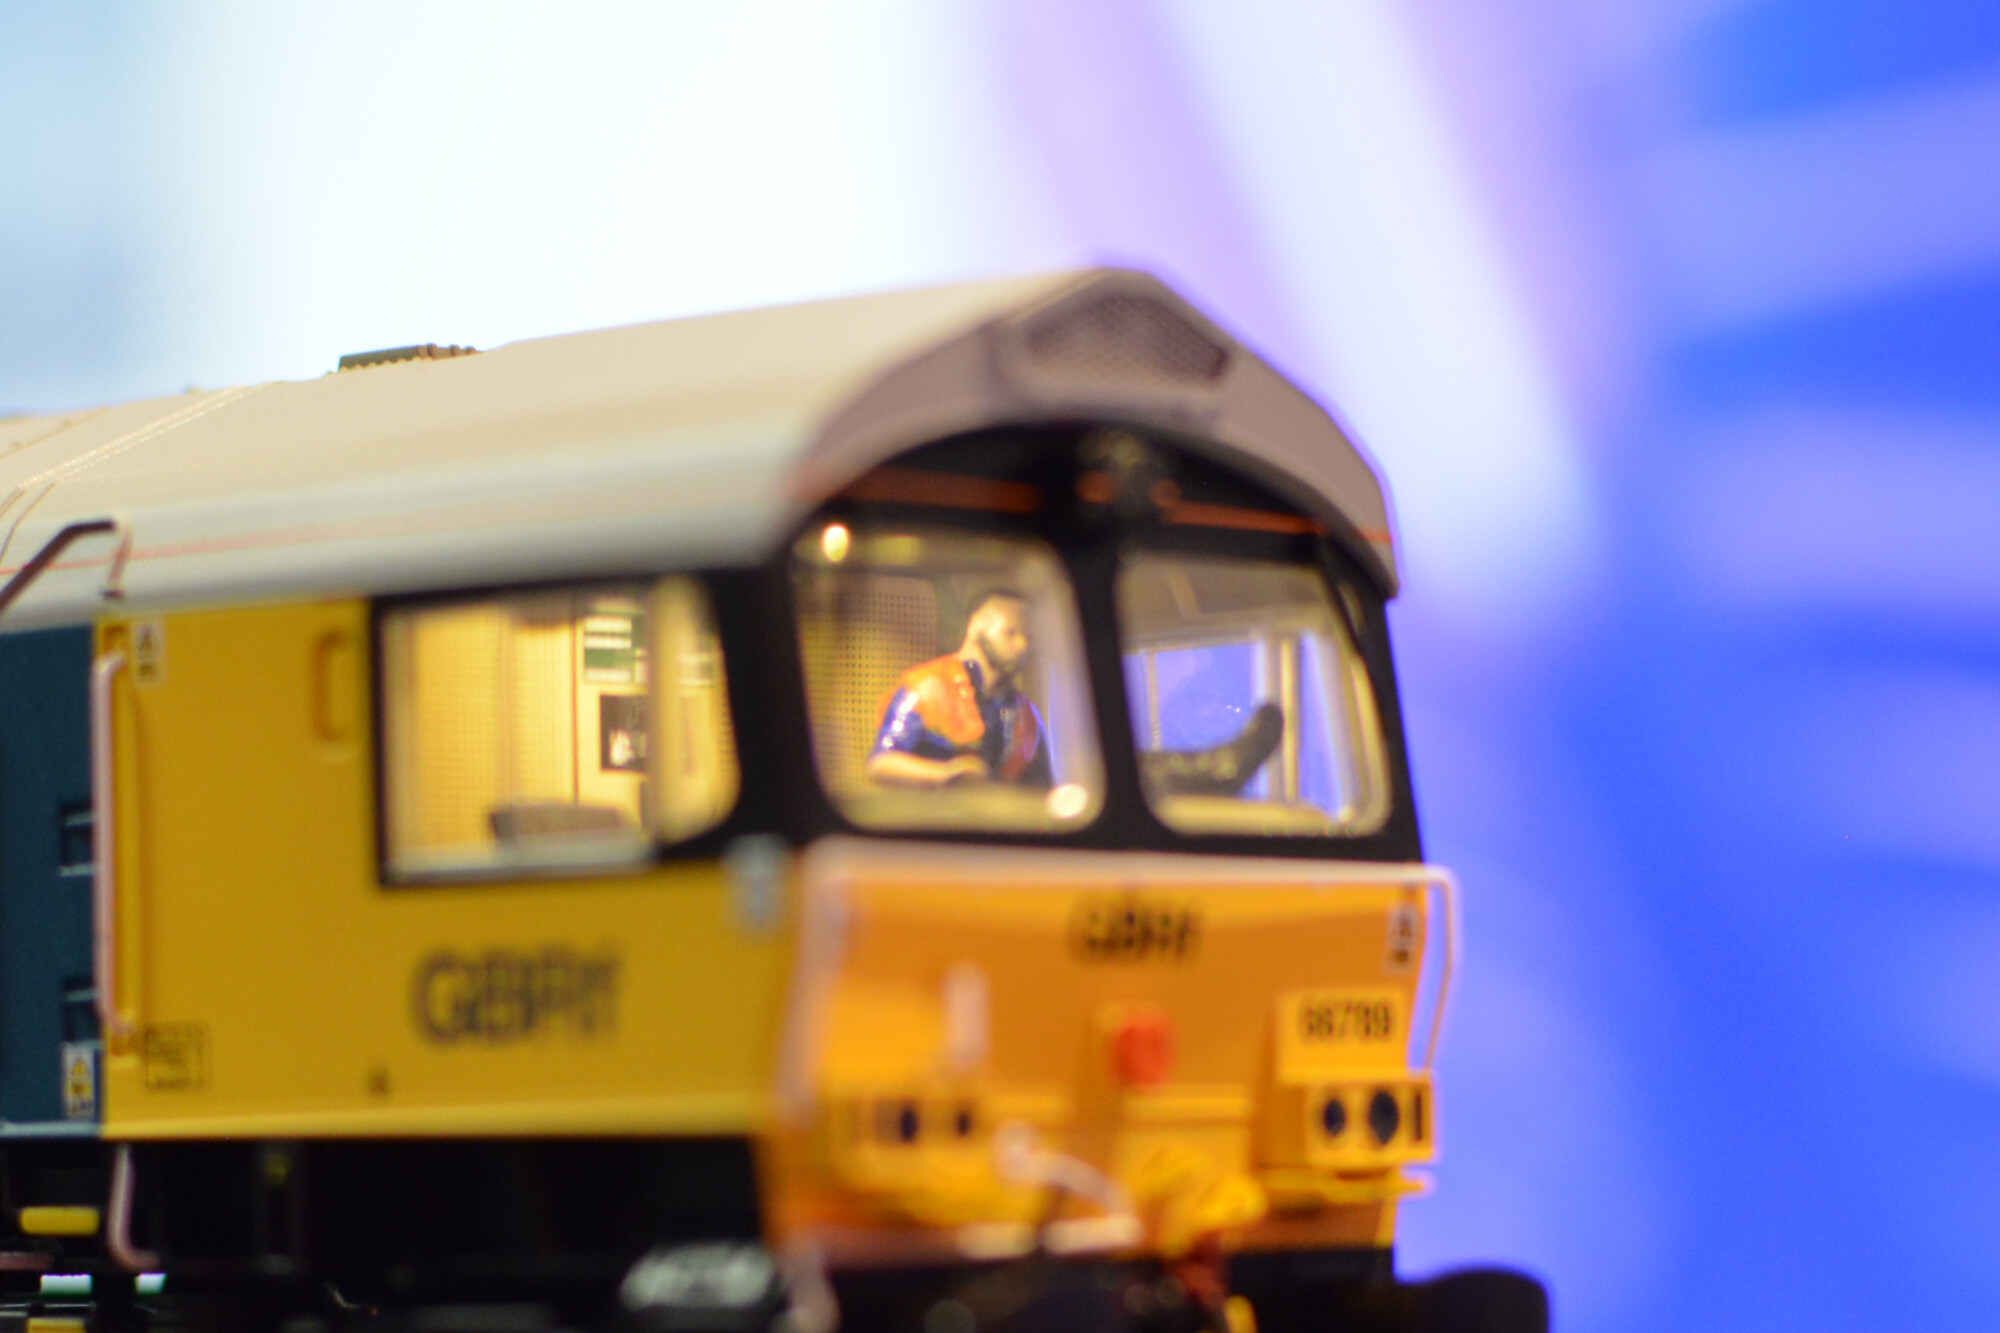
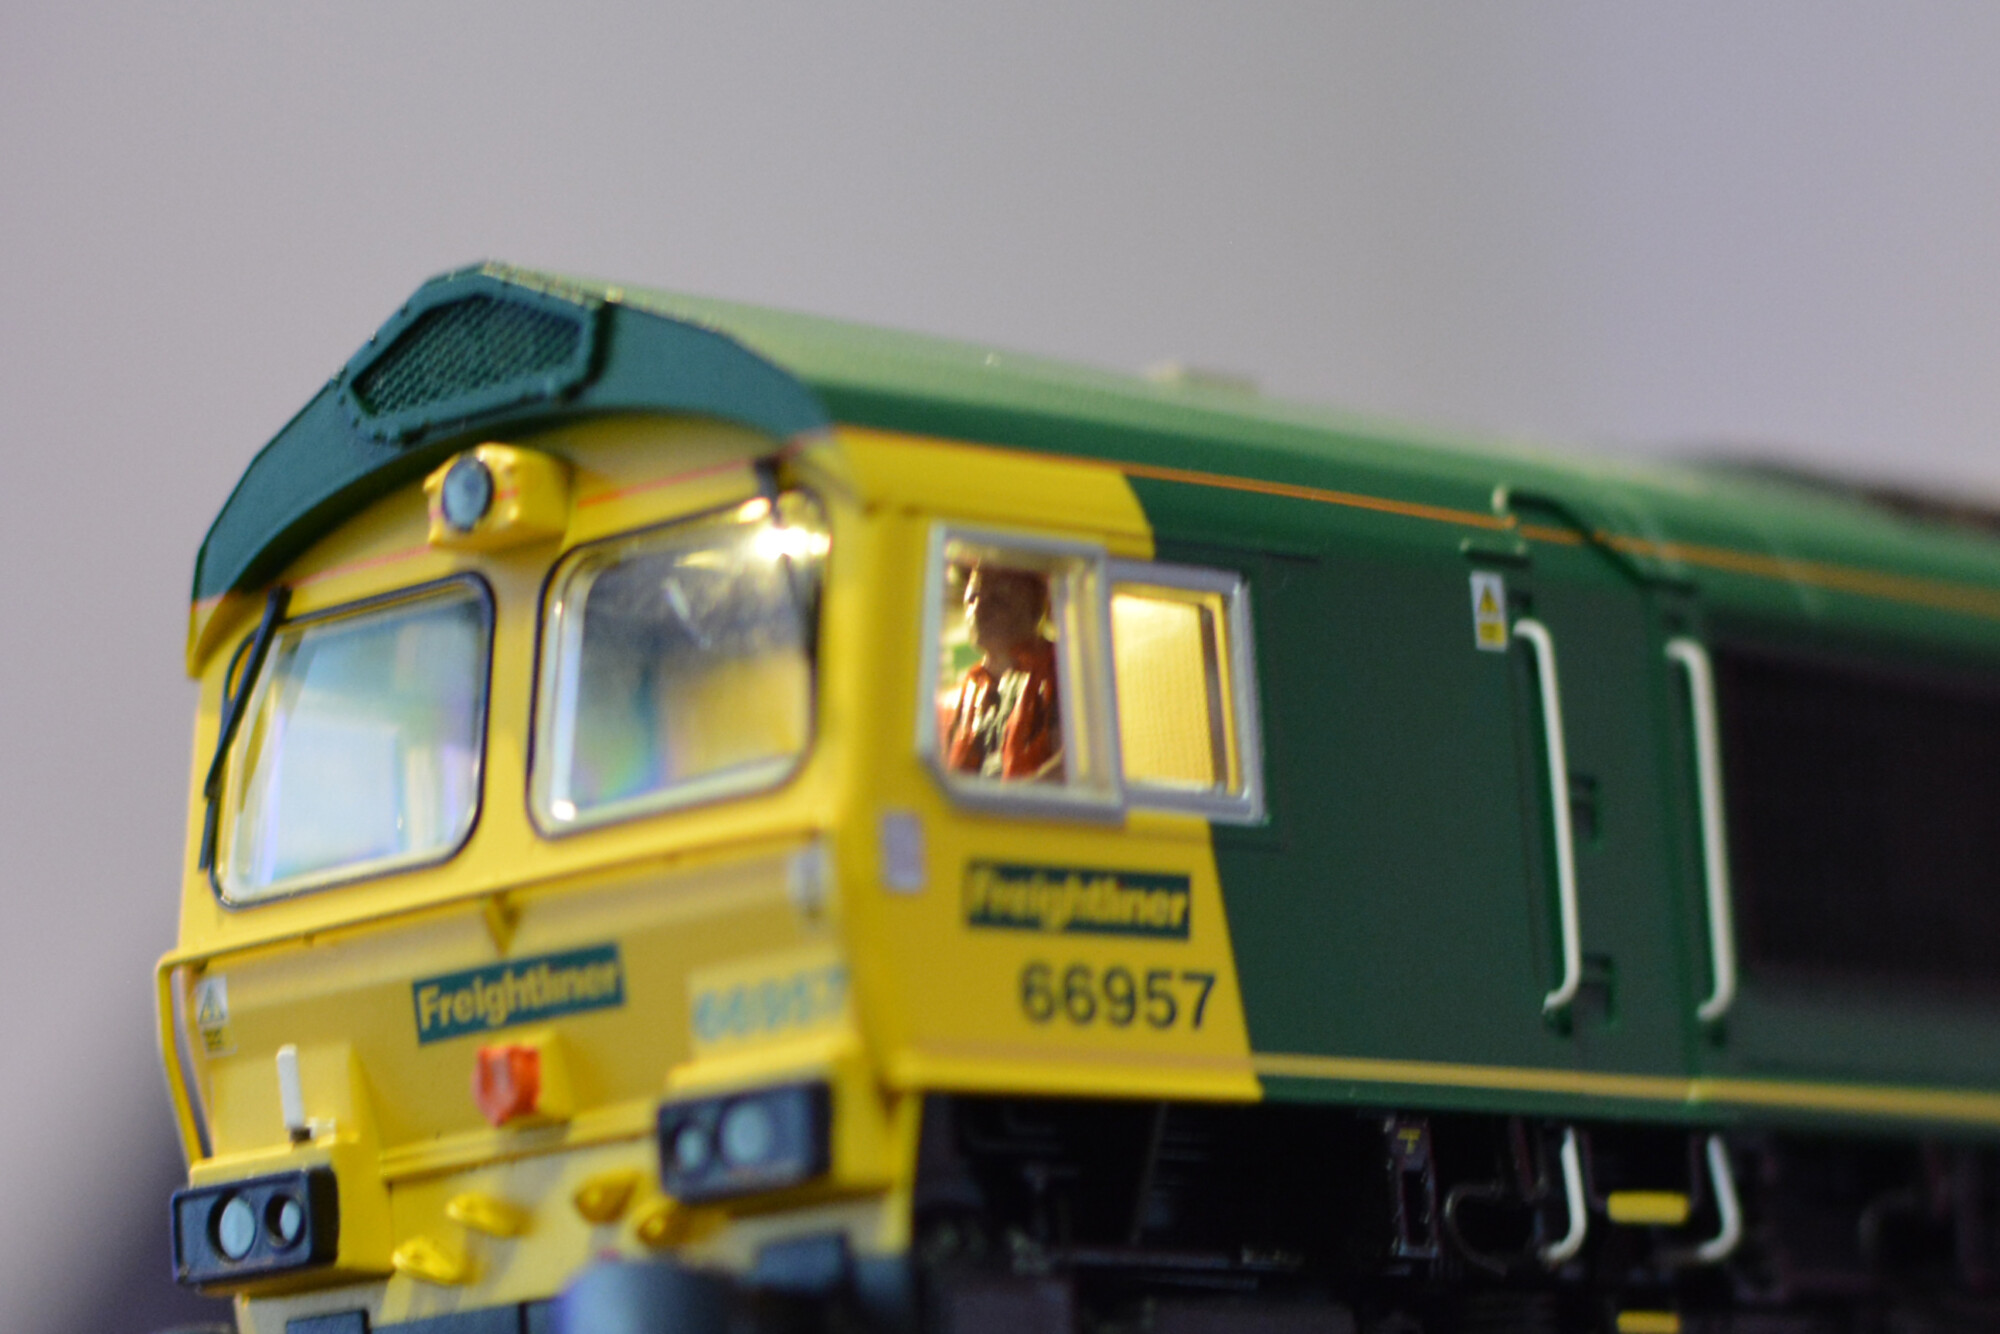
For 66957 I’ve chosen to give both drivers the same Freightliner-ish green shirt, underneath a classic orange hi-vis vest. Black trousers complete the look. The drivers of 66789 are a bit different, with one having a shirt and tie, and the other a blue shirt and a hi-vis vest. The latter is also in a “relaxed” pose, with one leg resting on the driver’s console. I thought this was a nice touch and not something you see on many models.
In terms of the actual painting, I started with the lowest layers of clothing first (the trousers), and then worked “upwards” from there. Next was the shirt, then the hi-vis vest or tie (depending on the figure), before finally the skin tone, hair, and two tiny black dots for eyes. The eyes aren’t very visible in the photos, but they do help give the face a bit of depth and are well worth doing in my opinion. The support base (the grey slab in the photos) was very useful for holding the figures whilst I painted them, so I kept this attached for as long as possible (basically until I needed to paint the undersides of the arms).
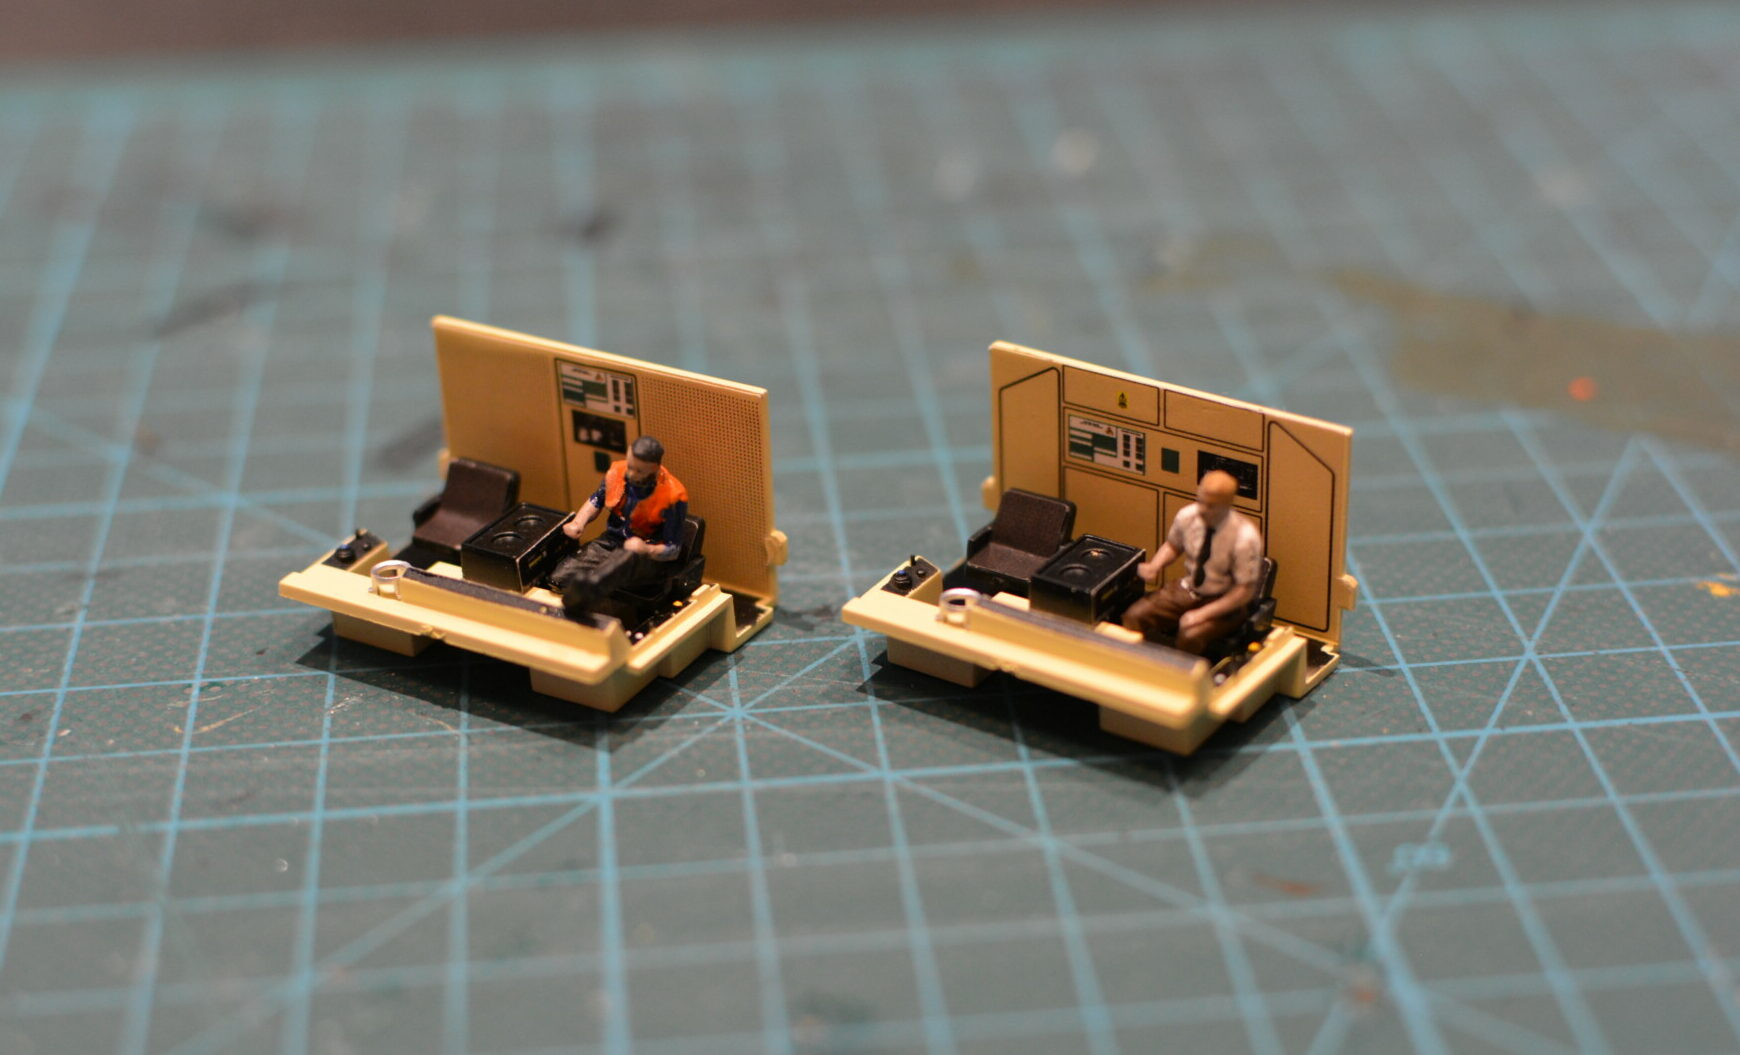
The figures look good when installed in the cabs. I particularly like the way the drivers’ right hand lies right were the throttle and brake controls are in a class 66 (on the side of the centre console, with the levers facing the driver’s leg).

Final thoughts
I think these figures are pretty decent – they’re very detailed and fit a class 66 very nicely. One downside I have noticed is that none of the drivers have anything below knee height – presumably this is to allow them to be fitted in models where the floor is higher than it would be in real life. This is a shame, because in the Hattons model, the floor in the cab is at the correct height (relative to the seat at least!), so the legs would have fitted nicely. I’d like to see the lower legs included on these figures, as this would look better in the models that have space, whilst still giving the option of cutting off the lower leg if need be.